Figure 47 wall bracket fastened to backboard – Nortel Networks 1000M User Manual
Page 115
Wall mounting in a vertical position
115
for cables and card access. Refer to
installing the chassis on a wall in a vertical position" (page 114)
.
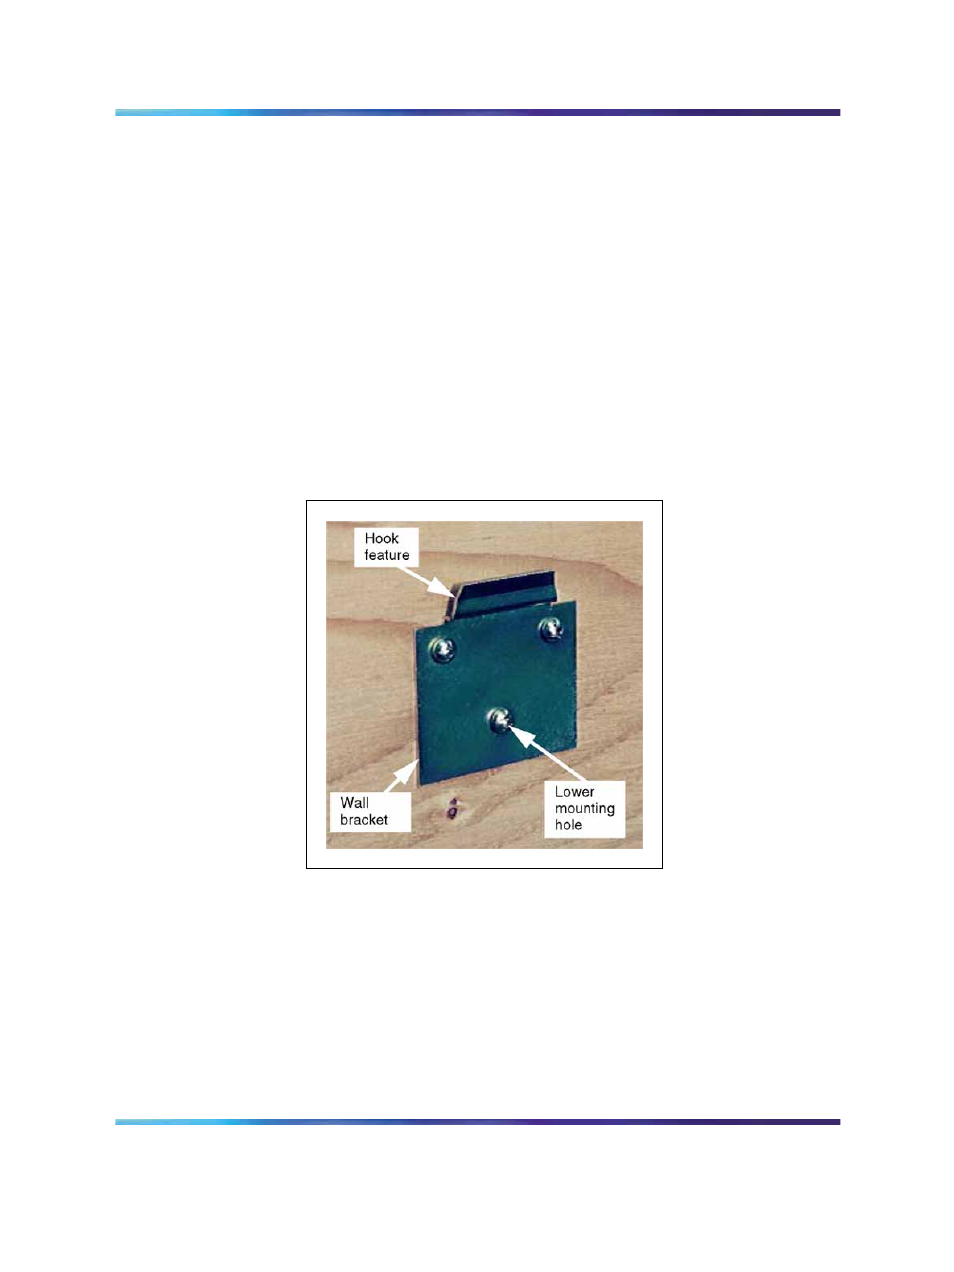
2
Draw a horizontal line on the plywood backboard.
This line indicates the vertical position of the lower hole of the wall
bracket.
Place the wall bracket against the plywood backboard. Place
the lower mounting hole over the intersection of the vertical
and horizontal lines. Fasten the wall bracket securely to the
plywood backboard with three #12 wood screws provided (or other
appropriate fasteners). See
Figure 47 "Wall bracket fastened to
Note: Make sure that the hook feature on the wall bracket points
toward the top of the backboard.
Figure 47
Wall bracket fastened to backboard
3
Fasten the chassis bracket to the back of the chassis using the four
#8-32 machine screws supplied with the bracket kit. See
"Chassis bracket installed on the back of the chassis" (page 116)
,
which shows the chassis lying on its side.
Note: Make sure that the slot feature on the chassis bracket is at
the top of the chassis. Also, the two tabs on the chassis bracket
must extend past the bottom of the chassis.
Nortel Communication Server 1000
Communication Server 1000M and Meridian 1 Small System Installation and Commissioning
NN43011-310
01.04
Standard
Release 5.0
13 May 2008
Copyright © 2008, Nortel Networks
.