Grass Valley Maestro Master Control Installation v.2.4.0 User Manual
Page 337
MAESTRO — Installation and Service Manual
337
Channel Branding Hard Drives Installation
Installing the 2.4.0 Version of the Software on to the Deployment PC
Follow the steps and caveats listed in Software Installation
.
Deploying the Application’s TAR Files to the Frame Processor
The new application TAR files must be deployed to the Maestro Frame Pro-
cessors using the
Update and Apply
button in the Maestro Deployment Center
application. This deployment will send the new version, which supports 48
bit LBA, to the Frame Processors.
Follow these steps to deploy the application’s TAR files to the Frame pro-
cessor:
1.
Start the Maestro Deployment Control Center application if it is not
already started.
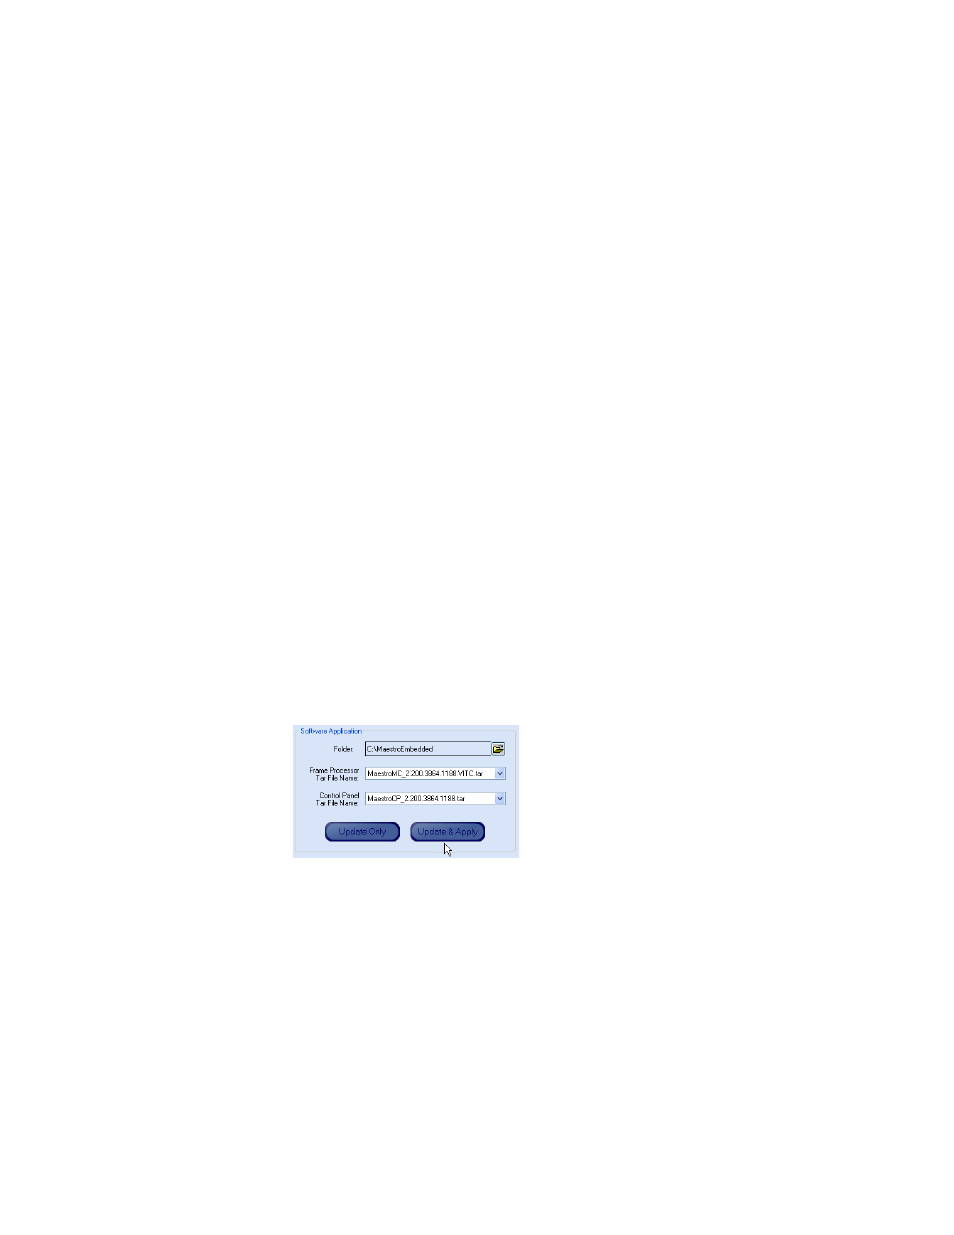
2.
Verify that the Folder field has the correct path to the Maestro
configuration directory. (The default location is:
C:\MaestroEmbedded)
3.
Select the new TAR file from the Frame Processor Tar File Name drop-
down list.
•
Select the MaestroMC_2.20.xxxx.yyy.LTC.tar if you are using
Linear Time Code.
•
Select the MaestroMC_2.20.xxxx.yyy.VITC.tar if you are using Ver-
tical Interval Time Code.
4.
Select the new TAR file from the Control Panel Tar File Name drop-
down list.
Figure 235. The Software Application Section - Click Update & Apply
5.
Click the
Update & Apply
). The update process will
then begin.
The TAR files that support the 48 bit LBA have been sent to the Frame Pro-
cessors. The hard disk must now be formatted.
- Concerto Routing Matrix v.1.7.6.1 Concerto Routing Matrix v.1.8.1 Concerto Routing Matrix v.1.7.5 Kayenne Installation v.4.0 Kayenne Installation v.3.0 Kayenne K-Frame Installation v.6.0 Kayenne K-Frame Installation v.7.0 Kayenne K-Frame Installation v.8.0 Karrera K-Frame S-Series Installation v.8.0 Karrera Video Production Center Installation v.6.0 Karrera Video Production Center Installation v.7.0 Karrera Video Production Center Installation v.4.1 Karrera Video Production Center Installation v.4.0 7600REF v5.0 7600REF v3.0.0.8 7600REF v5.0 Installation 7600REF v3.0.0.8 Installation 7620PX-5 Installation 2012 7620PX Installation 2012 KayenneKayenne v.2.0 v.2.0 Maestro Master Control Installation v.2.3.0 Maestro Master Control Installation v.2.0.0 Maestro Master Control v.2.3.0 7620PX 2012 7620PX-5 2012 7620PX 2008 MVMC 3G VMCR 3G 8900F GeckoFlex Frames Concerto Compact Routing System GPIO-4848 Jupiter Maestro Master Control v.2.2.0 Maestro Master Control v.2.0.0 Maestro Master Control v.2.4.0 Maestro Master Control Installation v.2.2.0 Maestro Master Control Installation v.1.5.1 Maestro Master Control Installation v.1.7