Grass Valley Maestro Master Control Installation v.2.4.0 User Manual
Page 282
282
MAESTRO Installation and Service Manual
Section 7 — Prelude Control System Interface
buttons at the top of the application (
) when it is installed with
Prelude.
Figure 169. The Prelude Button on the Button Row
These instructions assume that the NetConfig and Prelude software have
been installed and are started.
Follow these steps to configure and update the Prelude matrices:
1.
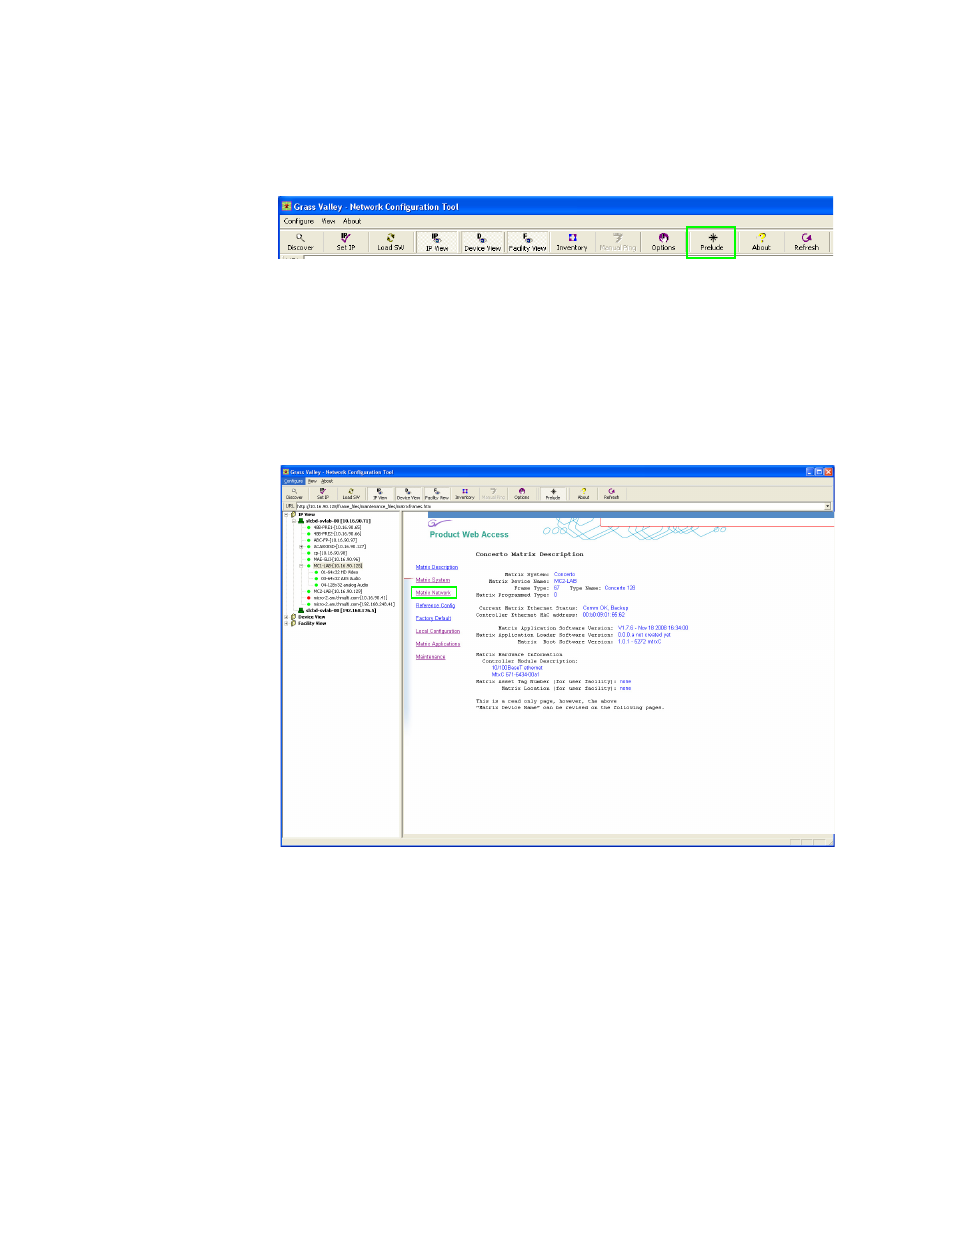
Select the first Prelude matrix in the IP View folder of the NetConfig
application. The Concerto Matrix Description page will then appear.
Figure 170. Concerto Matrix Description
2.
Click the Matrix Network hyperlink on the left side of the page
(
). The Concerto Matrix Network Configuration page will
). The settings you will need to
change are under the Current Settings heading.
- Concerto Routing Matrix v.1.7.6.1 Concerto Routing Matrix v.1.8.1 Concerto Routing Matrix v.1.7.5 Kayenne Installation v.4.0 Kayenne Installation v.3.0 Kayenne K-Frame Installation v.6.0 Kayenne K-Frame Installation v.7.0 Kayenne K-Frame Installation v.8.0 Karrera K-Frame S-Series Installation v.8.0 Karrera Video Production Center Installation v.6.0 Karrera Video Production Center Installation v.7.0 Karrera Video Production Center Installation v.4.1 Karrera Video Production Center Installation v.4.0 7600REF v5.0 7600REF v3.0.0.8 7600REF v5.0 Installation 7600REF v3.0.0.8 Installation 7620PX-5 Installation 2012 7620PX Installation 2012 KayenneKayenne v.2.0 v.2.0 Maestro Master Control Installation v.2.3.0 Maestro Master Control Installation v.2.0.0 Maestro Master Control v.2.3.0 7620PX 2012 7620PX-5 2012 7620PX 2008 MVMC 3G VMCR 3G 8900F GeckoFlex Frames Concerto Compact Routing System GPIO-4848 Jupiter Maestro Master Control v.2.2.0 Maestro Master Control v.2.0.0 Maestro Master Control v.2.4.0 Maestro Master Control Installation v.2.2.0 Maestro Master Control Installation v.1.5.1 Maestro Master Control Installation v.1.7