Manually installing maestro – Grass Valley Maestro Master Control Installation v.2.4.0 User Manual
Page 309
MAESTRO — Installation and Service Manual
309
Software Upgrade Procedure
Manually Installing Maestro
If the installation does not start automatically, the process can be started
manually:
1.
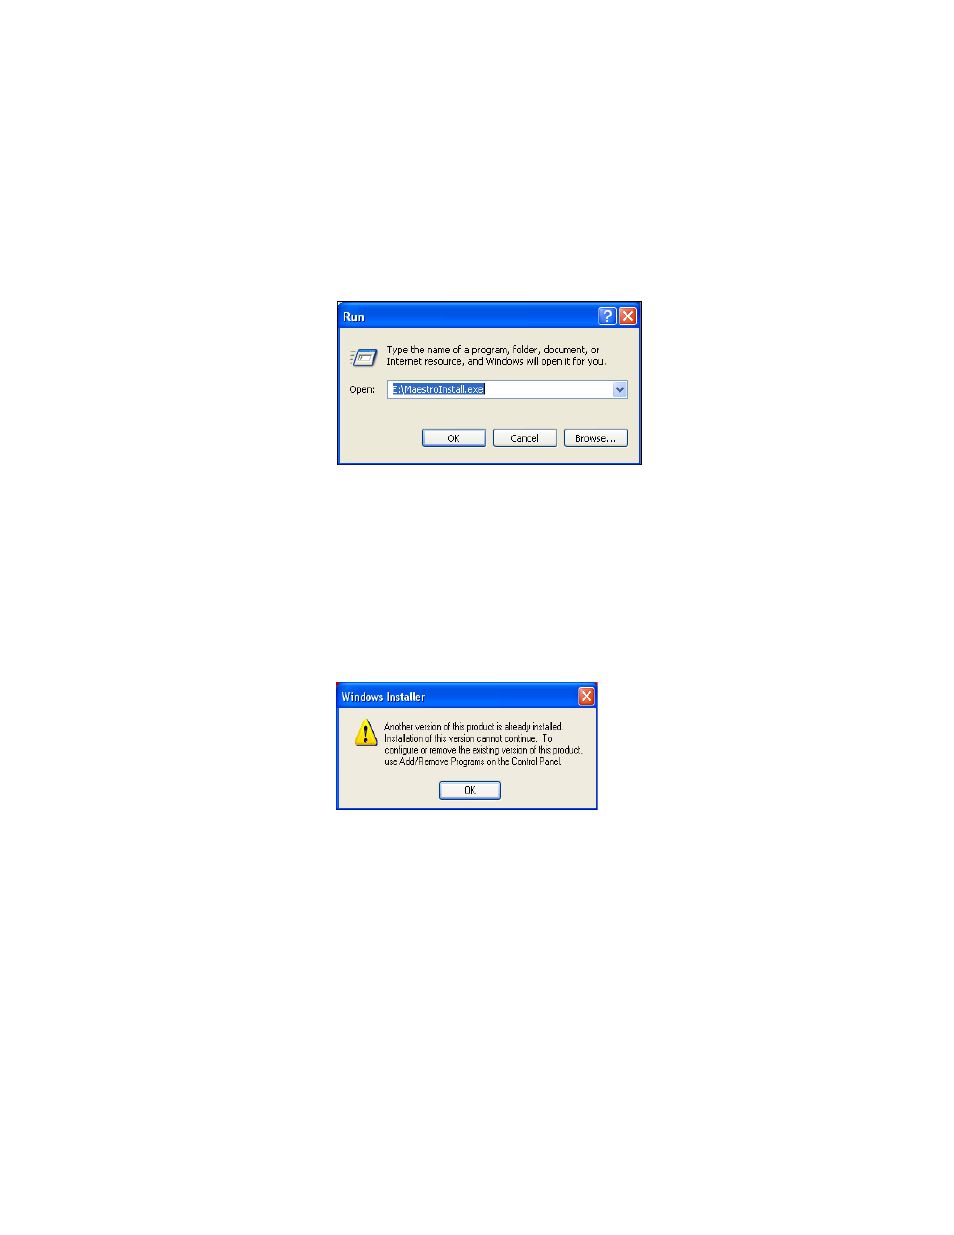
Select the Run command from the Start menu (Start> Run).
A window similar to that shown in
should appear.
Figure 205. Run Dialog Box
2.
Enter “E:\MaestroInstall.exe” where E: is the CD Drive.
Note
If you enter E:\setup.exe (where “E” is the name of the PC’s CD ROM) in the
Run dialog box (instead of ‘MaestroInstall.exe”) the dialog in
appear. Click the OK button. The prior Maestro software version must then be
manually removed using the Add/Remove Programs in the Windows Control
Panel.
Figure 206. Setup.exe Add/Remove Programs Prompt
3.
Click the
OK
button. The installation as described in the Installing the
Maestro Software Package section will then begin.
- Concerto Routing Matrix v.1.7.6.1 Concerto Routing Matrix v.1.8.1 Concerto Routing Matrix v.1.7.5 Kayenne Installation v.4.0 Kayenne Installation v.3.0 Kayenne K-Frame Installation v.6.0 Kayenne K-Frame Installation v.7.0 Kayenne K-Frame Installation v.8.0 Karrera K-Frame S-Series Installation v.8.0 Karrera Video Production Center Installation v.6.0 Karrera Video Production Center Installation v.7.0 Karrera Video Production Center Installation v.4.1 Karrera Video Production Center Installation v.4.0 7600REF v5.0 7600REF v3.0.0.8 7600REF v5.0 Installation 7600REF v3.0.0.8 Installation 7620PX-5 Installation 2012 7620PX Installation 2012 KayenneKayenne v.2.0 v.2.0 Maestro Master Control Installation v.2.3.0 Maestro Master Control Installation v.2.0.0 Maestro Master Control v.2.3.0 7620PX 2012 7620PX-5 2012 7620PX 2008 MVMC 3G VMCR 3G 8900F GeckoFlex Frames Concerto Compact Routing System GPIO-4848 Jupiter Maestro Master Control v.2.2.0 Maestro Master Control v.2.0.0 Maestro Master Control v.2.4.0 Maestro Master Control Installation v.2.2.0 Maestro Master Control Installation v.1.5.1 Maestro Master Control Installation v.1.7