Tified, Figure 225 – Grass Valley Maestro Master Control Installation v.2.4.0 User Manual
Page 328

328
MAESTRO — Installation and Service Manual
Section 9 — Channel Branding Hardware Installation
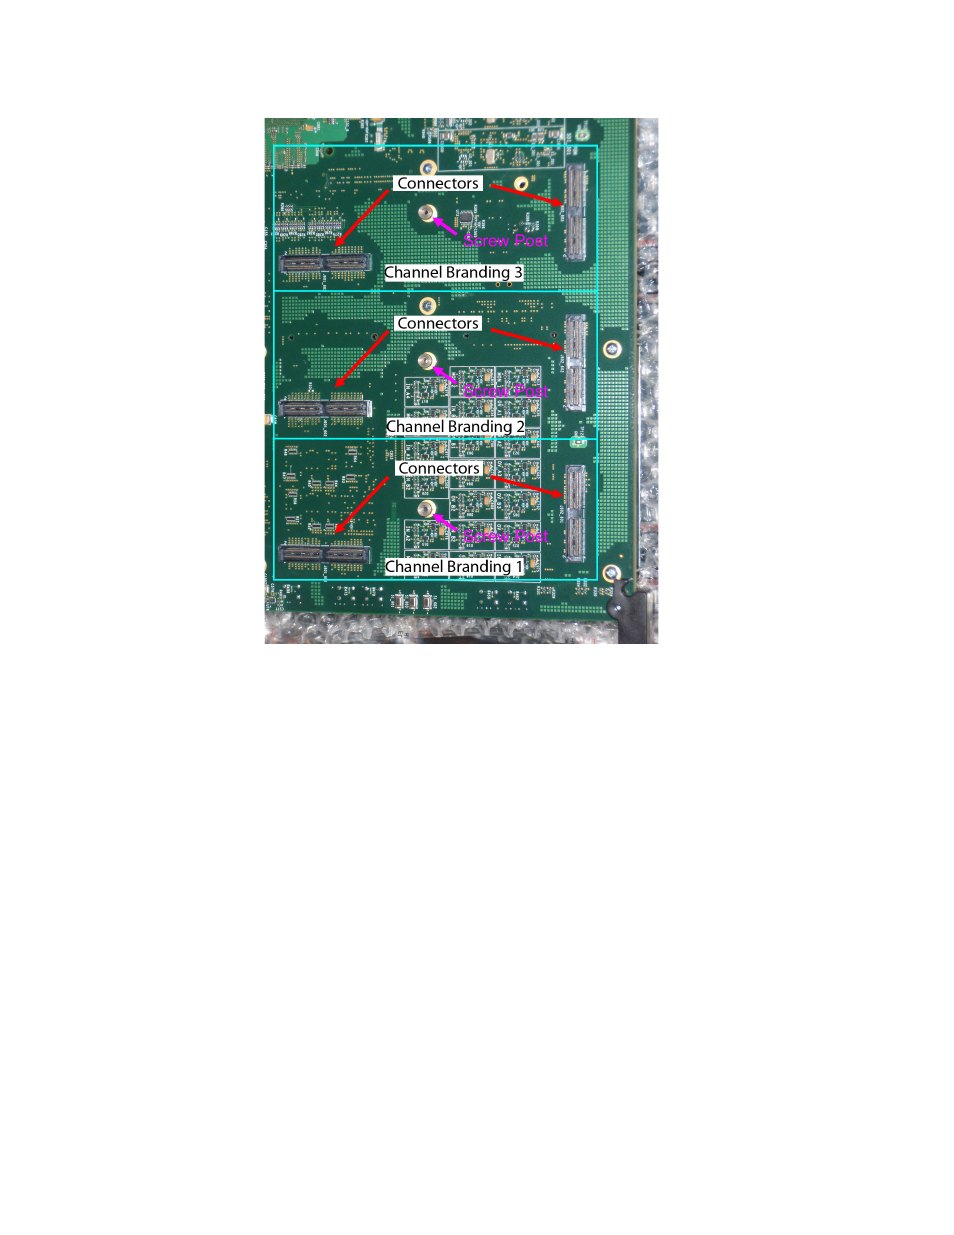
Figure 225. Channel Branding Mounting Location
With the board turned so the back side is facing up and the extractors and
compact flash slot at the bottom edge (see
), the Channel
Branding mounting locations are in the bottom right corner of the board.
Note
The Enhanced Channel Branding solution, which includes support for still
images, audio, CG text, text crawls, animation sequences and motion video,
is shipped with the required three Channel Branding boards. The previous
release of the basic solution, which only supported still images and audio
files, only required one Channel Branding board mounted in position number
one (1). See
.
Follow these steps to install the Channel Branding mezzanine board on the
Maestro frame processor board:
1.
Align the connectors with the hole on the Channel Branding board with
the connectors and screw post on the Maestro processor board and then
press down firmly to interlock the connectors.
2.
Fasten the Channel Branding board in place on the Maestro Processor
board using the included mounting screw.
- Concerto Routing Matrix v.1.7.6.1 Concerto Routing Matrix v.1.8.1 Concerto Routing Matrix v.1.7.5 Kayenne Installation v.4.0 Kayenne Installation v.3.0 Kayenne K-Frame Installation v.6.0 Kayenne K-Frame Installation v.7.0 Kayenne K-Frame Installation v.8.0 Karrera K-Frame S-Series Installation v.8.0 Karrera Video Production Center Installation v.6.0 Karrera Video Production Center Installation v.7.0 Karrera Video Production Center Installation v.4.1 Karrera Video Production Center Installation v.4.0 7600REF v5.0 7600REF v3.0.0.8 7600REF v5.0 Installation 7600REF v3.0.0.8 Installation 7620PX-5 Installation 2012 7620PX Installation 2012 KayenneKayenne v.2.0 v.2.0 Maestro Master Control Installation v.2.3.0 Maestro Master Control Installation v.2.0.0 Maestro Master Control v.2.3.0 7620PX 2012 7620PX-5 2012 7620PX 2008 MVMC 3G VMCR 3G 8900F GeckoFlex Frames Concerto Compact Routing System GPIO-4848 Jupiter Maestro Master Control v.2.2.0 Maestro Master Control v.2.0.0 Maestro Master Control v.2.4.0 Maestro Master Control Installation v.2.2.0 Maestro Master Control Installation v.1.5.1 Maestro Master Control Installation v.1.7
