Figure 228, Shows – Grass Valley Maestro Master Control Installation v.2.4.0 User Manual
Page 331
MAESTRO — Installation and Service Manual
331
Channel Branding Hard Drives Installation
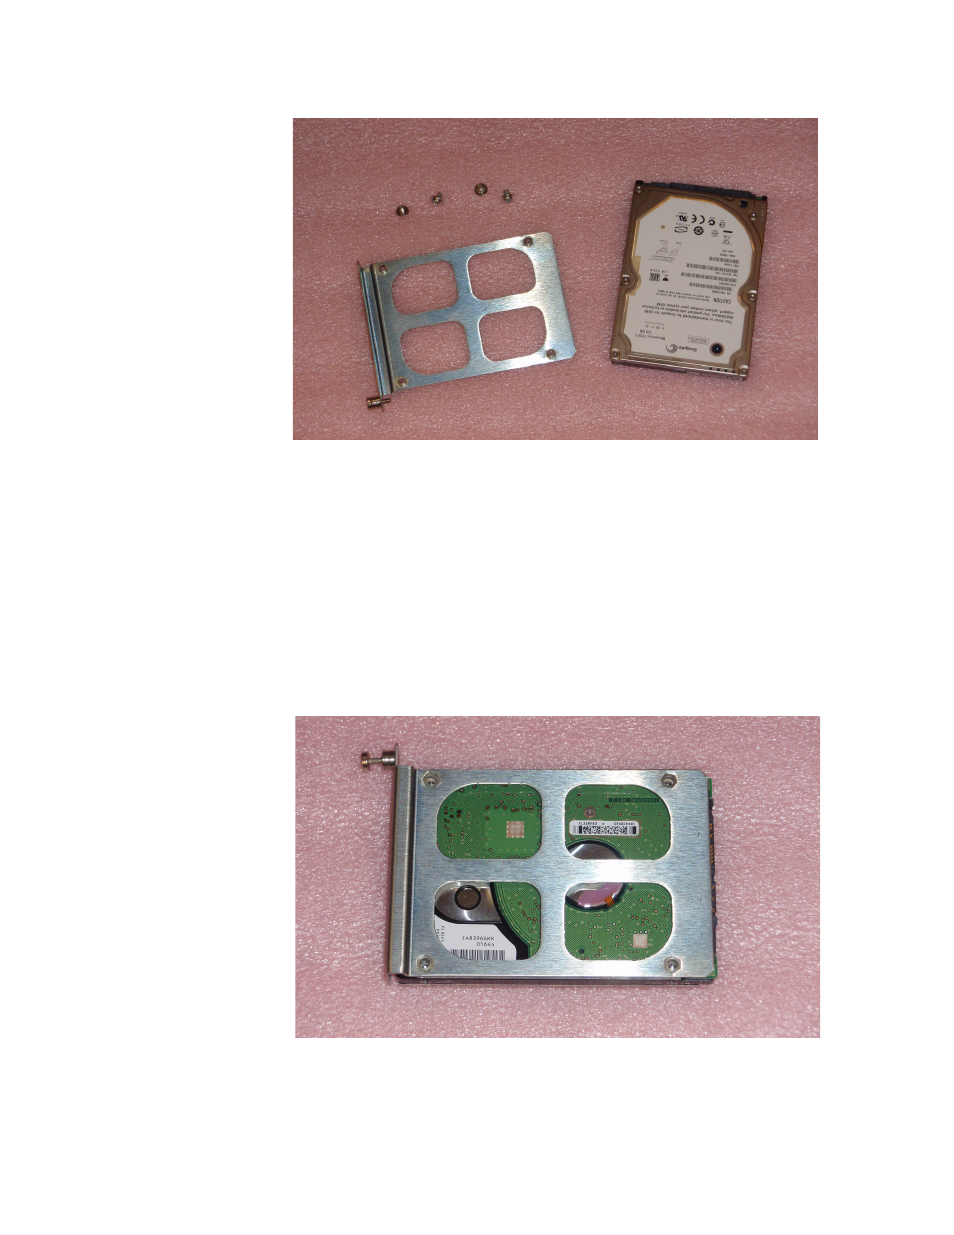
Figure 228. Channel Branding Disk Drive Mounting Hardware
Follow these steps to install a Channel Branding disk drive:
Note
Steps 1-3 are necessary only if replacing the drive supplied by Grass Valley
with a different drive. In this case, the mounting sled must be removed from
the old drive and mounted on the new drive.
1.
Position the hard drive with the circuit board side facing up.
2.
Position the drive sled on the drive so that the four holes in the sled are
aligned with the holes in the drive. See
.
Figure 229. Drive Sled Aligned on Disk Drive
This manual is related to the following products:
- Concerto Routing Matrix v.1.7.6.1 Concerto Routing Matrix v.1.8.1 Concerto Routing Matrix v.1.7.5 Kayenne Installation v.4.0 Kayenne Installation v.3.0 Kayenne K-Frame Installation v.6.0 Kayenne K-Frame Installation v.7.0 Kayenne K-Frame Installation v.8.0 Karrera K-Frame S-Series Installation v.8.0 Karrera Video Production Center Installation v.6.0 Karrera Video Production Center Installation v.7.0 Karrera Video Production Center Installation v.4.1 Karrera Video Production Center Installation v.4.0 7600REF v5.0 7600REF v3.0.0.8 7600REF v5.0 Installation 7600REF v3.0.0.8 Installation 7620PX-5 Installation 2012 7620PX Installation 2012 KayenneKayenne v.2.0 v.2.0 Maestro Master Control Installation v.2.3.0 Maestro Master Control Installation v.2.0.0 Maestro Master Control v.2.3.0 7620PX 2012 7620PX-5 2012 7620PX 2008 MVMC 3G VMCR 3G 8900F GeckoFlex Frames Concerto Compact Routing System GPIO-4848 Jupiter Maestro Master Control v.2.2.0 Maestro Master Control v.2.0.0 Maestro Master Control v.2.4.0 Maestro Master Control Installation v.2.2.0 Maestro Master Control Installation v.1.5.1 Maestro Master Control Installation v.1.7