Adobe Dreamweaver CC 2015 User Manual
Page 296

289
Page content and assets
Last updated 6/3/2015
1
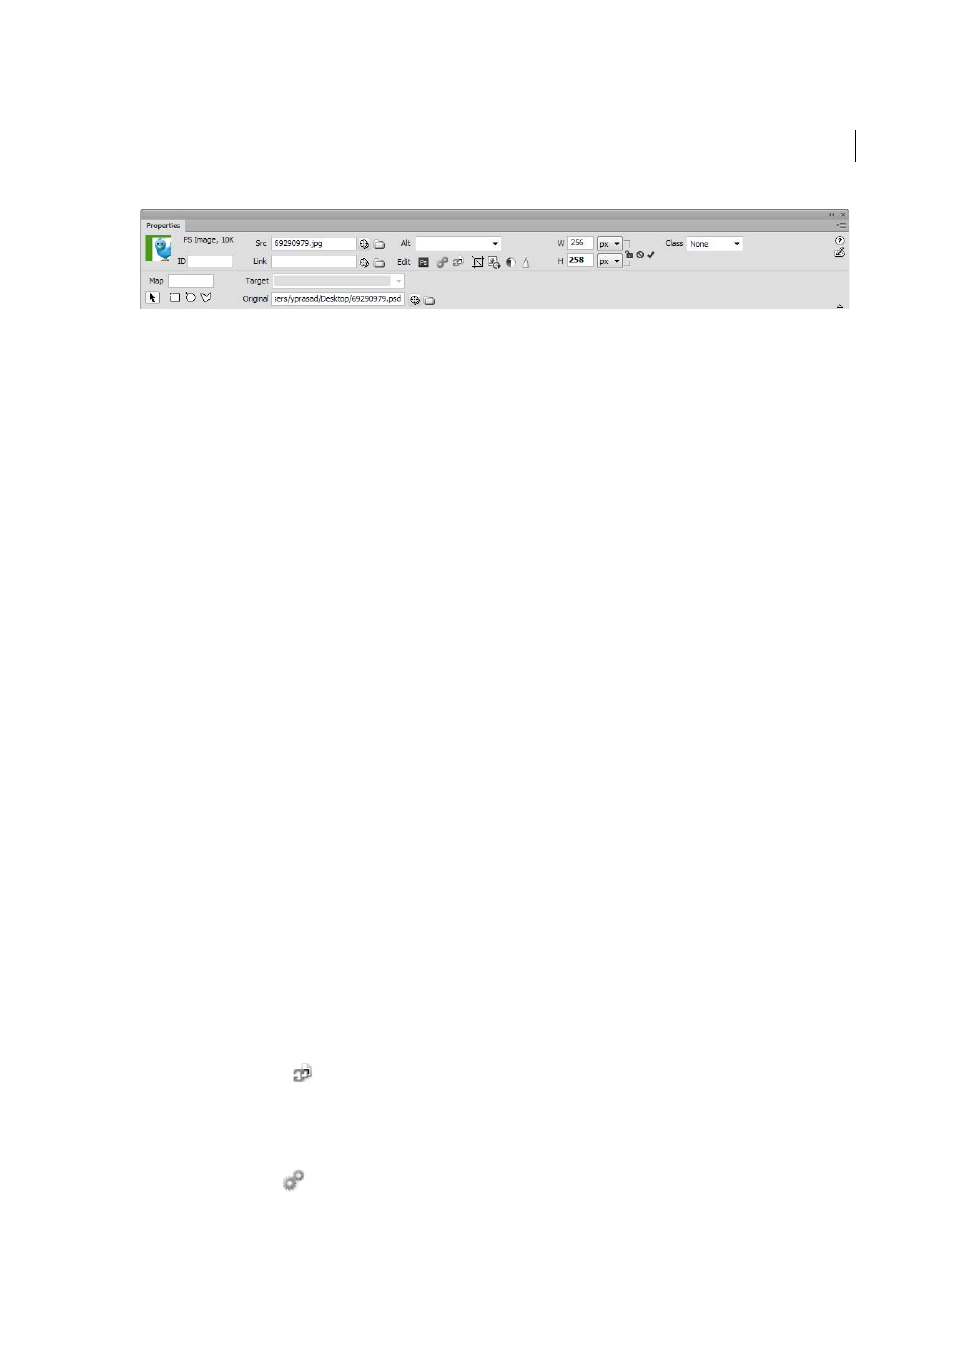
Click the image and select Window > Properties to view the Property inspector for a selected image.
2
In the text box below the thumbnail image, enter a name so you can refer to the image when using a Dreamweaver
behavior (such as Swap Image) or when using a scripting language such as JavaScript or VBScript.
3
Set any of the image options.
W and H
The width and height of the image, in pixels. Dreamweaver automatically updates these text boxes with the
image’s original dimensions when you insert an image in a page.
If you set W and H values that do not correspond to the actual width and height of the image, the image may not
display properly in a browser. (To restore the original values, click the W and H text box labels, or the Reset image
size button that appears to the right of the W and H text boxes in entering a new value.)
Note: You can change these values to scale the display size of this image instance, but this does not reduce download
time, because the browser downloads all image data before scaling the image. To reduce download time and to ensure
that all instances of an image appear at the same size, use an image-editing application to scale images.
Src
Specifies the source file for the image. Click the folder icon to browse to the source file, or type the path.
Link
Specifies a hyperlink for the image. Drag the Point-To-File icon to a file in the Files panel, click the folder icon
to browse to a document on your site, or manually type the URL.
Alt
Specifies alternative text that appears in place of the image for text-only browsers or for browsers that have been
set to download images manually. For visually impaired users who use speech synthesizers with text-only browsers,
the text is spoken out loud. In some browsers, this text also appears when the pointer is over the image.
Map Name and Hotspot tools
Allow you to label and create a client-side image map.
Target
Specifies the frame or window in which the linked page should load. (This option is not available when the
image isn’t linked to another file.) The names of all the frames in the current frameset appear in the Target list. You
can also choose from the following reserved target names:
• _blank loads the linked file into a new, unnamed browser window.
• _parent loads the linked file into the parent frameset or window of the frame that contains the link. If the frame
containing the link is not nested, the linked file loads into the full browser window.
• _self loads the linked file into the same frame or window as the link. This target is the default, so you usually don’t
need to specify it.
• _top loads the linked file into the full browser window, thereby removing all frames.
Edit
Starts the image editor you specified in External Editors preferences and opens the selected image.
Update from original
When the web image (that is, the image on the Dreamweaver page) is out of sync with the
original Photoshop file, Dreamweaver detects that the original file has been updated, and displays one of the Smart
Object icon’s arrows in red. When you select the web image in Design view and click the Update from Original
button in the Property inspector, the image updates automatically, reflecting any changes that you made to the
original Photoshop file.
Edit image settings
Opens the Image Optimization dialog box and lets you optimize the image.
