Measure 3d objects – Adobe Acrobat 8 3D User Manual
Page 415

408
ADOBE ACROBAT 3D VERSION 8
User Guide
To understand how each axis divides the 3D model, select an axis and then drag the Offset slider back and forth and
observe the changes in the embedded 3D model.
Flip
Reverses the cross section. For example, if the top half of the model is cut off in the cross section, clicking Flip
displays the top half and cuts off the bottom half.
Tilt sliders
Determine the angles between the cutting plane and the axes. Drag the sliders left or right, or change the
percentages.
Save Section View
Adds the current cross-sectional view to the lists in the 3D toolbar and Model Tree, where you
can select it to return the model to this view. The saved view is given a default name, SectionView[n].
Measure 3D objects
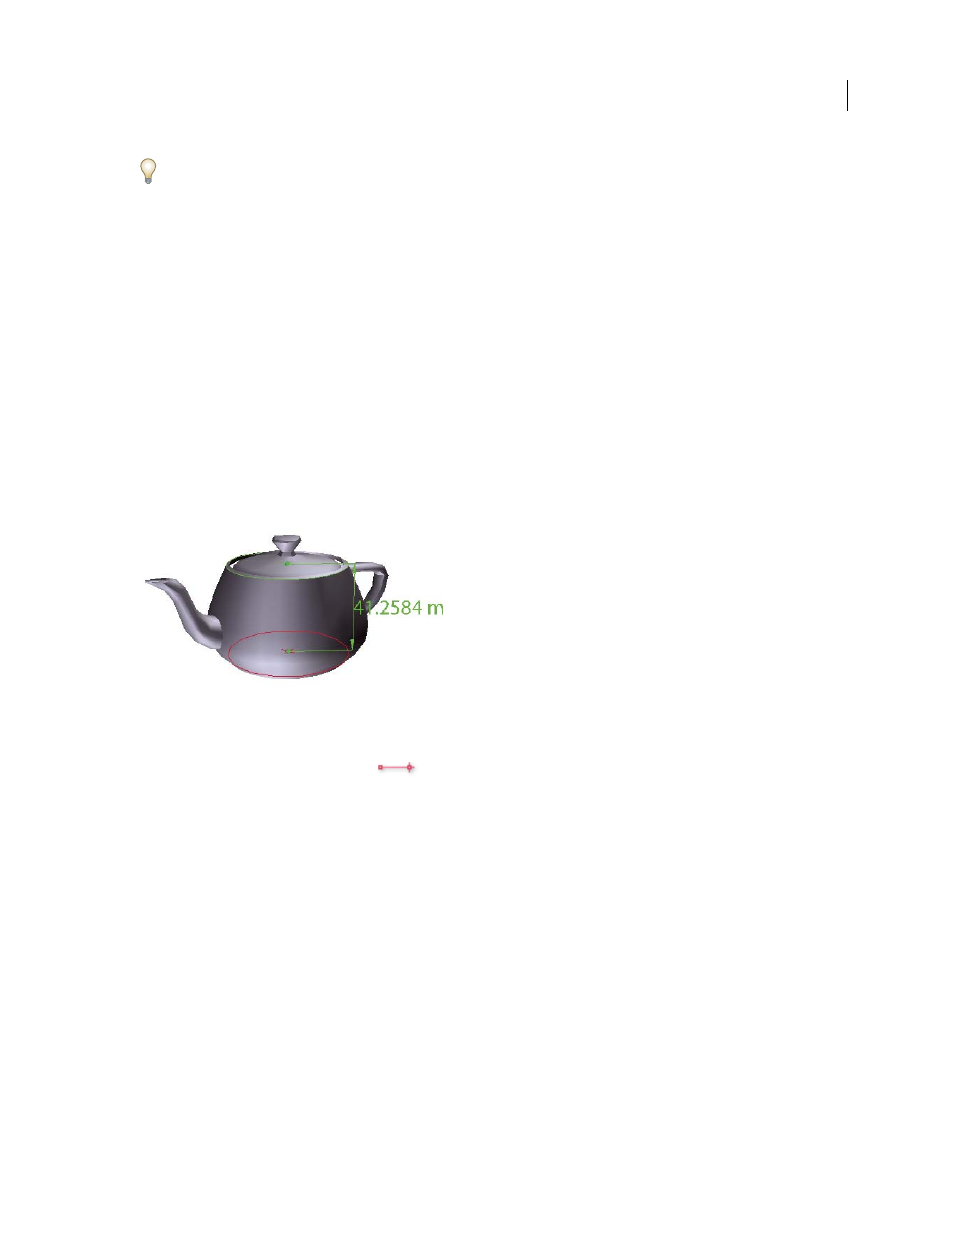
Use the 3D Measurement Tool to measure 3D models. You can create measurements between combinations of points
or edges of the 3D model. As you move the pointer over the 3D model, specific points and edges are highlighted. The
3D Measurement Tool supports four types of measurements: perpendicular distance between two straight edges,
linear distance between two points, the radius of circular edges, and the angle between two edges (or three points).
You can also display comments while taking measurements. However, these comments (also called measurement
markups) are not preserved after the document is closed.
3D measurement display
1
Click a 3D model in a PDF to enable it.
2
Click the 3D Measurement Tool icon
on the 3D toolbar. (If the 3D toolbar view is set for consolidated
tools, the 3D Measurement tool is available on the pop-up menu under the Rotate, Spin, Pan, Zoom, or Walk tool.)
3
Select the options you want in the Snap Enables, Measurement Types, and Units And Markup Settings areas of the
3D Measurement Tool palette.
4
Under Units And Markup Settings, change the options, as needed. Leave the 3D Measurement Tool palette open.
5
Measure the 3D model:
•
To measure the distance between two positions on the 3D model, click to set a start point and move the pointer
to another location or an edge.
•
To measure the circumference of a round shape, move the pointer to the edge of the shape so that a circle appears,
and click once.
•
To create and set the position of an annotation on the measurement, select Measurement Markup in the 3D
Measurement Tool palette and then type a markup message in Annotation. Measure the 3D model as described
above, but click to set the end point for the measurement and then click a third time to set the location of the
measurement and annotation text.
•
To discontinue a measurement, right-click/Control-click and choose Cancel Measurement.
