Apple Aperture 3.5 User Manual
Page 486
Chapter 13
Customize the Aperture workspace
486
2
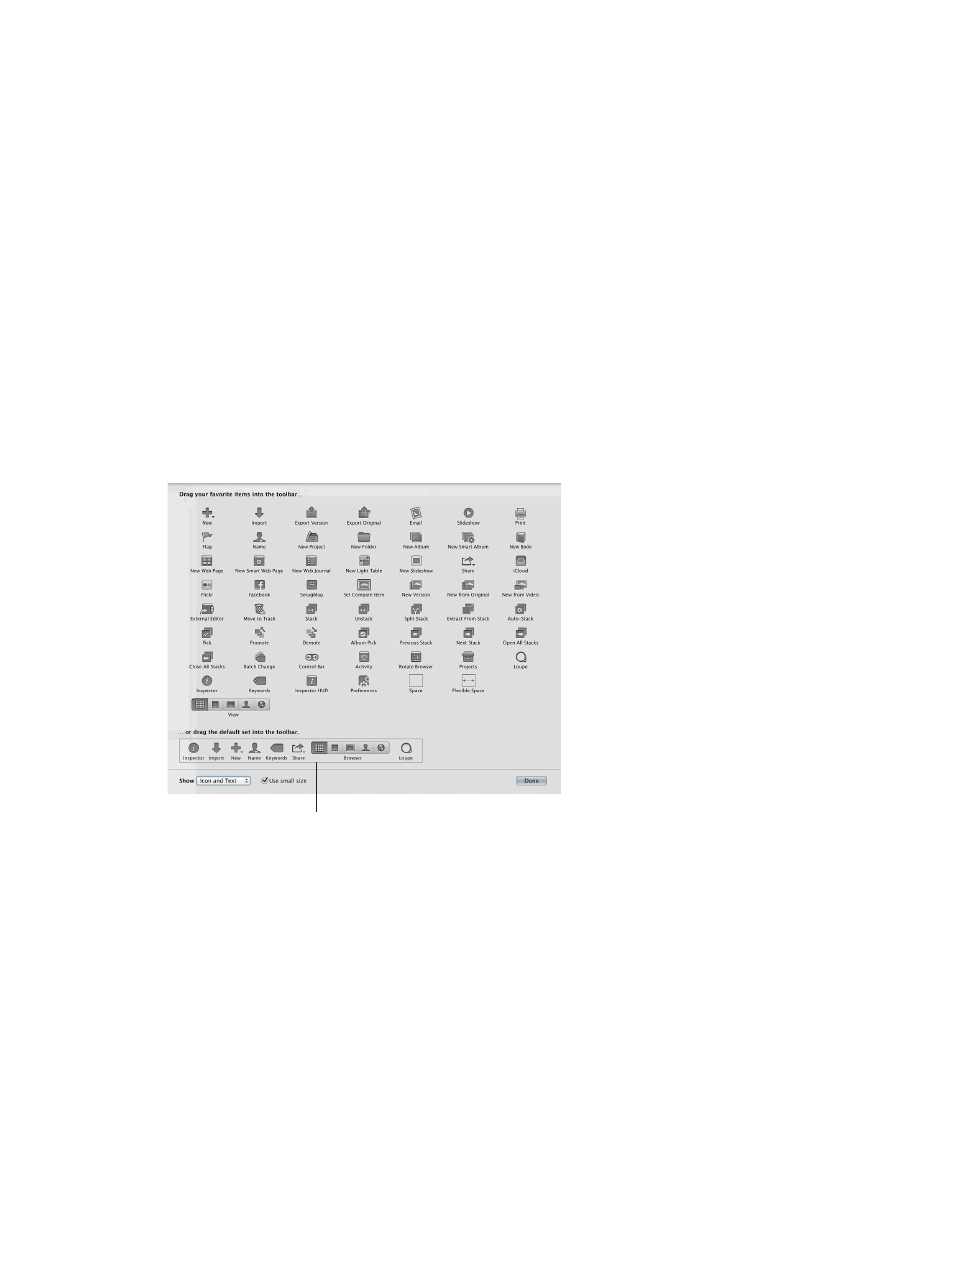
Configure the toolbar by doing any of the following:
•
To add items to the toolbar: Drag their icons from the dialog to the location where you want
them to appear in the toolbar.
•
To remove items from the toolbar: Drag items out of the toolbar, or Control-click the item you
want to remove and choose Remove Item from the shortcut menu.
•
To change the order of the items in the toolbar: Drag each item to its new position.
•
To control whether each item’s icon and text appear in the toolbar: Choose Text Only, Icon Only, or
Icon & Text from the Show pop-up menu in the lower-left corner of the dialog, or Control-click
the toolbar and choose Text Only, Icon Only, or Icon & Text from the shortcut menu.
•
To use small icons in the toolbar: Select the “Use small size” checkbox.
3
When you finish configuring the toolbar, click Done.
Reset the toolbar to its default state
1
Do one of the following:
•
Choose View > Customize Toolbar.
•
Control-click the toolbar, then choose Customize Toolbar from the shortcut menu.
A dialog appears, showing icons for toolbar buttons and controls.
Default toolbar items are
shown in the bottom section.
2
Drag the default toolbar up from the bottom of the dialog into the toolbar area.
3
Click Done.
67% resize factor