Reduce digital noise – Apple Aperture 3.5 User Manual
Page 265
Chapter 7
Make image adjustments
265
Reduce digital noise
You use the Noise Reduction adjustment controls when you need to reduce digital noise in an
image. Digital noise is often caused by shooting at high ISO settings in low-light conditions.
When you reduce noise in an image, you often have to sharpen the image to prevent blurry
edges or loss of detail. For more information, see
on page 311.
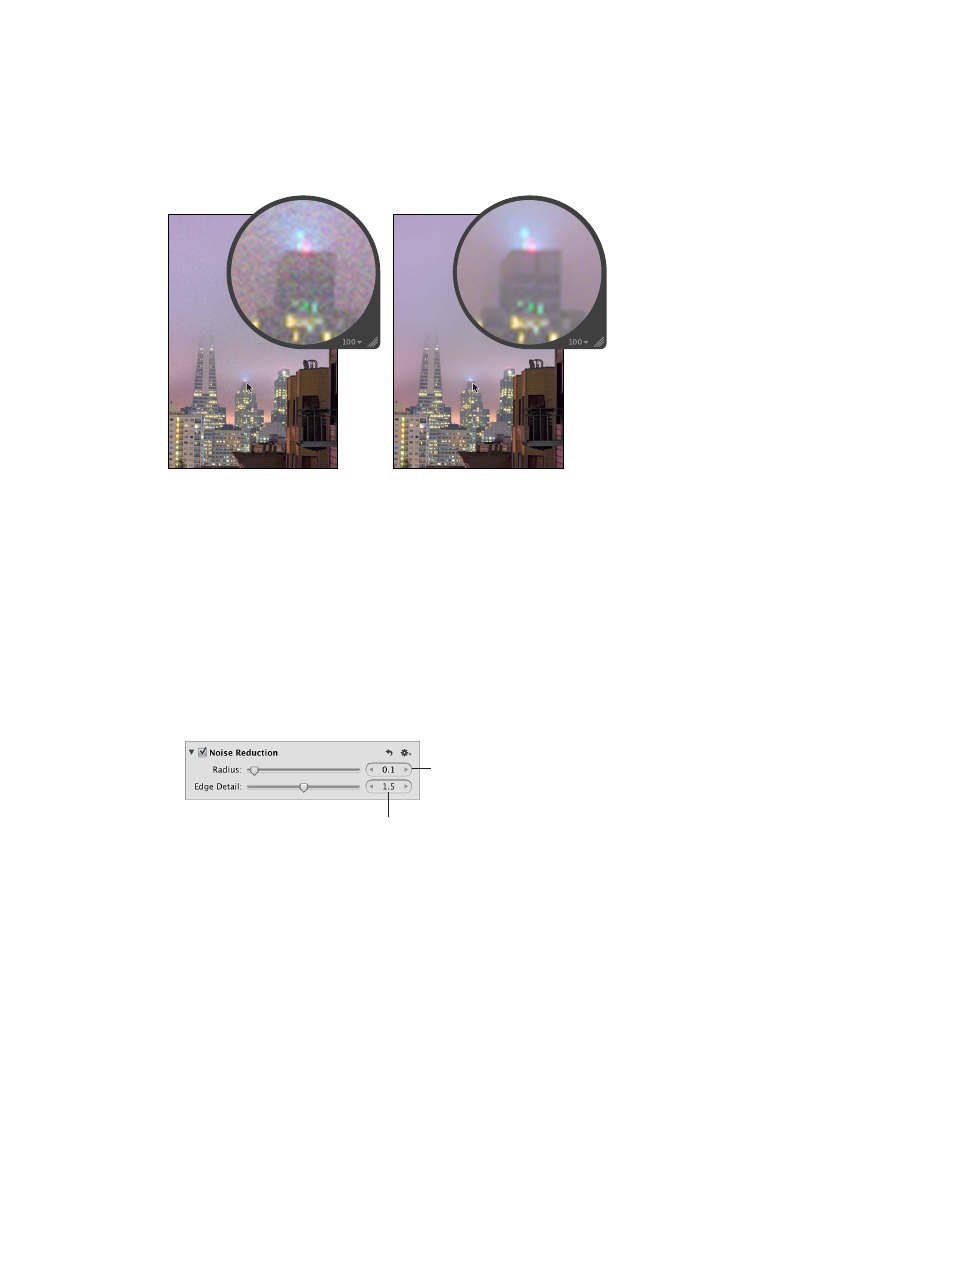
Before Noise Reduction adjustment
After Noise Reduction adjustment
Note: For RAW images, you can also use the De-noise option in combination with the Edges
adjustment in the Raw Fine Tuning adjustment block to reduce noise. For more information, see
RAW Fine Tuning controls overview
on page 334.
Reduce digital noise in an image
1
Select a photo.
2
If the Noise Reduction controls aren’t shown in the Adjustments inspector or the Adjustments
pane of the Inspector HUD, choose Noise Reduction from the Add Adjustment pop-up menu (or
press Control-N), and specify the following settings:
•
To reduce digital noise in the image: Use the Radius parameter controls.
Use the Radius slider and
value slider to decrease the
digital noise in the photo.
Use the Edge Detail slider
and value slider to maintain
details in areas of contrast.
A value of 0.0 applies no digital noise adjustment to the image. A value greater than 0.0
reduces digital noise in the image.
•
To maintain edge detail in areas of high contrast in the image: Use the Edge Detail
parameter controls.
As you change the parameter value, the image is updated to display the amount of edge
detail sharpening applied to it.
You can also brush the Noise Reduction adjustment on specific areas of an image. For more
information, see
on page 228.
67% resize factor