Brush the saturation adjustment on an image – Apple Aperture 3.5 User Manual
Page 322
Chapter 7
Make image adjustments
322
Brush the Saturation adjustment on an image
You use the Saturation Quick Brush adjustment to modify the saturation of the colors in a
specific area of an image.
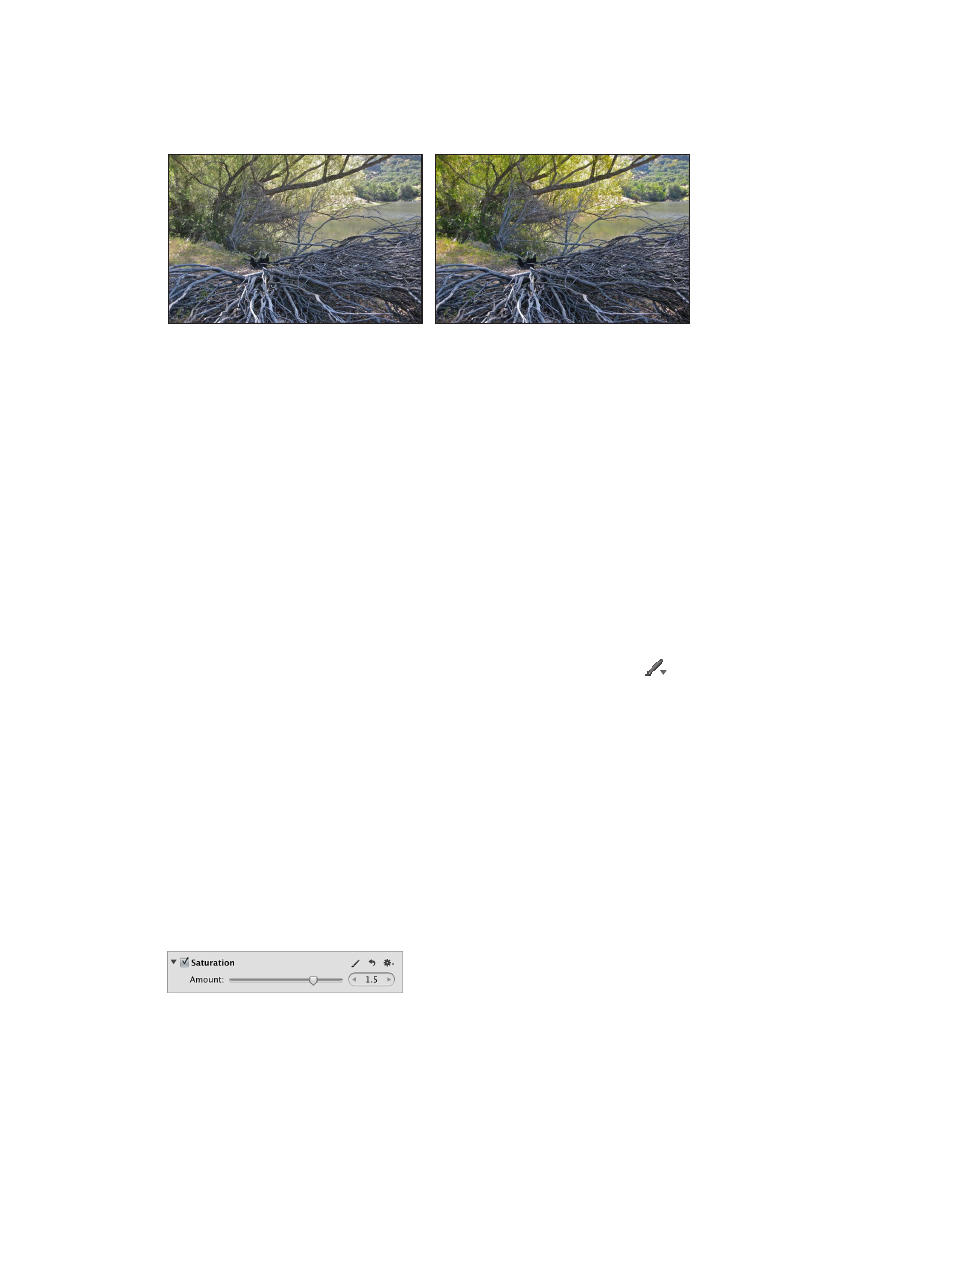
Before Saturation adjustment
After Saturation adjustment
(added saturation to the green trees
in the background)
Note: You can also apply a Saturation adjustment by brushing the Enhance adjustment on an
image. However, brushing the Enhance adjustment on an image applies the Contrast, Definition,
Saturation, Vibrancy, and Tint parameter settings. You use the Quick Brush equivalents when you
need to apply each of these adjustments in different ways to different parts of the photo. For
more information about the Enhance adjustment, see
Adjust contrast, clarity, and saturation
on
page 273.
Selectively adjust saturation in an image
1
Select a photo.
2
Do one of the following:
•
In the Adjustments inspector or the Adjustments pane of the Inspector HUD, choose Quick
Brushes > Saturation from the Add Adjustment pop-up menu.
•
In the tool strip, choose Saturation from the Quick Brush pop-up menu
.
The Saturation Brush HUD appears, and the Saturation adjustment controls appear in the
Adjustments inspector and the Adjustments pane of the Inspector HUD, if both are shown.
3
Specify the brush stroke settings using the controls in the Saturation Brush HUD.
For more information, see
on page 232.
4
Brush the adjustment on the area of the image where you want to change the saturation.
Modify the Saturation adjustment after it has been applied to an image
1
Select a photo with the Saturation adjustment applied to it.
2
In the Saturation area of the Adjustments inspector or the Adjustments pane of the Inspector
HUD, use the Amount parameter controls to modify the strength of the adjustment.
67% resize factor