Ways to perform adjustments, Apply standard adjustments, 225 ways to perform adjustments 225 – Apple Aperture 3.5 User Manual
Page 225: Apply standard, Adjustments
Chapter 7
Make image adjustments
225
Ways to perform adjustments
Apply standard adjustments
To modify the appearance of the entire image, you apply a standard adjustment and adjust
its settings.
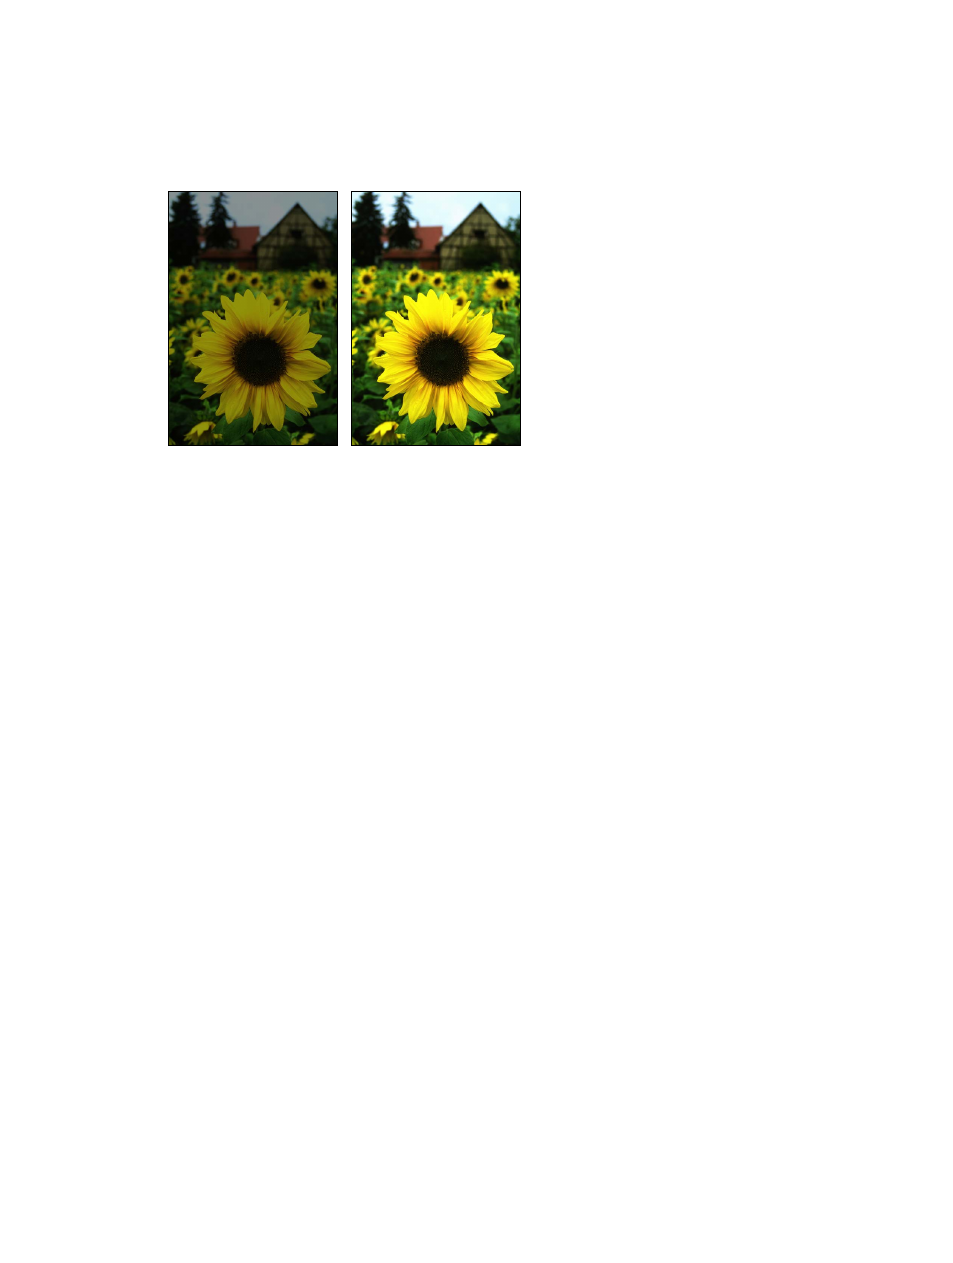
Before Exposure adjustment
After Exposure adjustment
Some images can be difficult to perfect. Images shot in mixed-lighting and low-light conditions
often require the same adjustment applied multiple times in small increments to achieve the
appearance you’re looking for. For example, an image shot in low-light conditions may require
multiple incremental Noise Reduction adjustments so that the image isn’t muddied by a single
strong Noise Reduction adjustment. In Aperture, adjustments are applied from top to bottom
as they appear in the Adjustments inspector. In the example above, you can add the Noise
Reduction controls with a slight Radius adjustment coupled with a slight Edge Detail adjustment,
and then add the same Noise Reduction controls to the Adjustments inspector again, with the
same incremental settings.
You can also apply an adjustment or a group of adjustments to a range of images by first
applying the adjustments to one image and then lifting the adjustments from the first image
and stamping them on the other images.
Apply a standard adjustment
1
Select a photo.
2
Do one of the following:
•
To open the Adjustments inspector: Click the Inspector button in the toolbar, and click the
Adjustments tab.
•
To open the Adjustments pane of the Inspector HUD: Choose Window > Show Inspector HUD
(or press H), and click the Adjustments button.
67% resize factor