Magnify photos using the loupe – Apple Aperture 3.5 User Manual
Page 182
Chapter 5
View and compare photos
182
Magnify photos using the Loupe
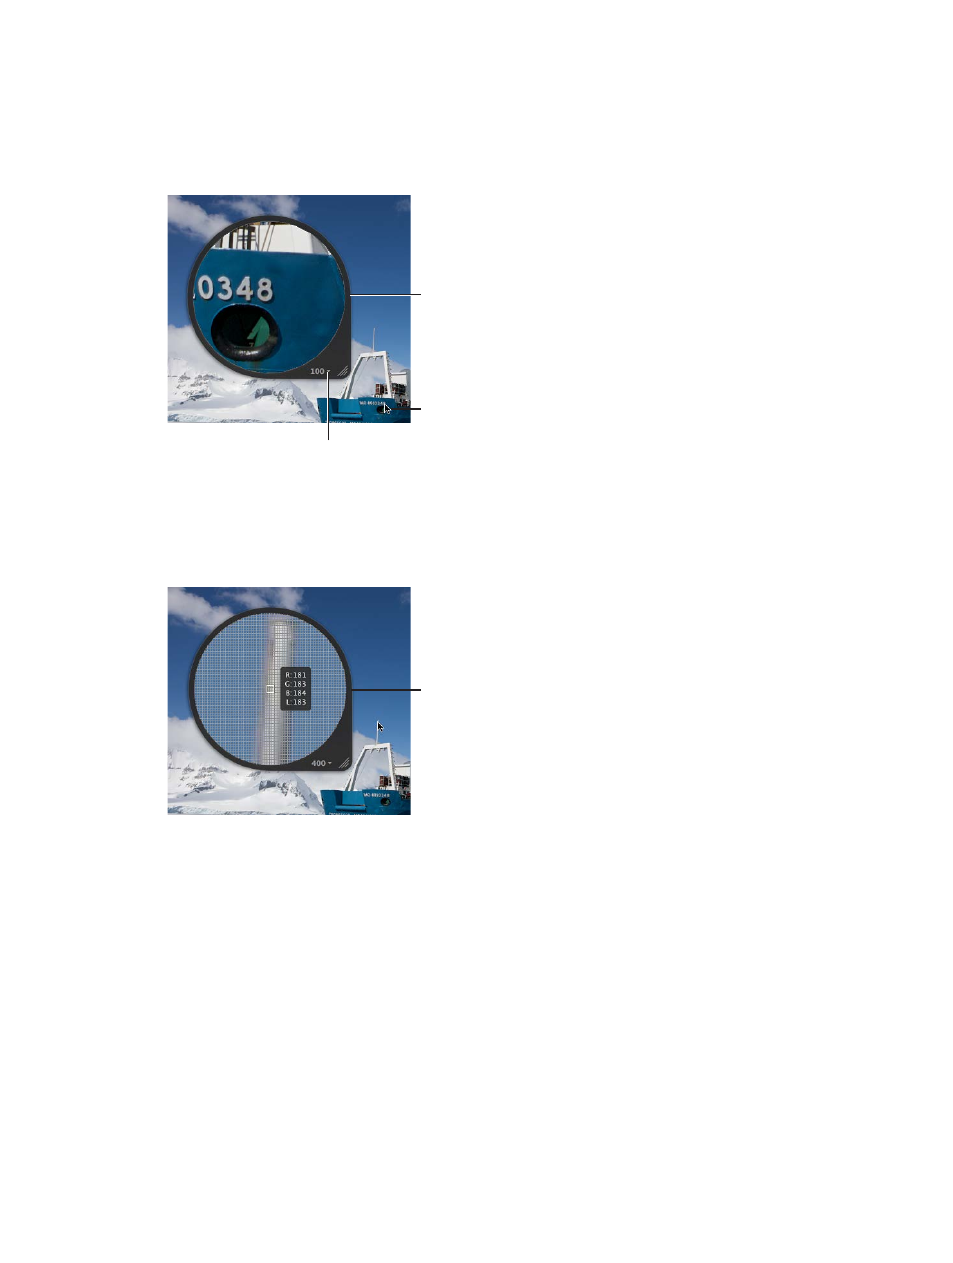
You can magnify a portion of a photo by placing the Centered Loupe over it. You can also leave
the Loupe stationary and set it to magnify the portion of the photo at the position of the pointer.
Using the pointer to magnify the photo is useful when you don’t want the Loupe to cover part of
the photo.
Pointer position
Loupe pop-up menu
The Loupe shows
a magnified view
of the portion of the
photo at the position
of the pointer.
You can change the size of the Loupe and increase or decrease its magnification level. You can
also have the Loupe display a photo as a grid that shows the actual pixel composition of the
photo, allowing you to see the individual pixel values at high magnification (400 percent or
higher). You can also set the Loupe to display readings of the color values of a photo, showing
the RGB (%), RGB (8-bit), Lab, CMYK, HSB, or HSL values chosen for the Color meter.
Loupe set to display
a pixel grid and
color values
Show or hide the Loupe
m
To show the Loupe: Choose View > Show Loupe, or press the Grave Accent key (`).
m
To hide the Loupe: Choose View > Hide Loupe, or press the Grave Accent key (`).
You can also show or hide the Loupe by clicking the Loupe button in the toolbar.
Move the Loupe
Do one of the following:
m
Drag the Loupe’s handle.
m
Drag within the Loupe.
A circle appears that targets the area to be magnified.
m
Hold down the Grave Accent key (`) while clicking a specific place in a photo.
The Loupe moves to the part of the photo you clicked.
67% resize factor