Batch change metadata, 212 batch change metadata – Apple Aperture 3.5 User Manual
Page 212
Chapter 6
Work with metadata
212
Import a metadata preset
1
In the Info inspector or the Info pane of the Inspector HUD, choose Manage Presets from the
Metadata Action pop-up menu
.
2
In the Metadata dialog, choose Import from the Action pop-up menu
in the bottom-left
corner of the dialog.
3
In the dialog that appears, select the metadata preset file that you want to import, then
click Import.
The metadata preset is imported into Aperture and placed at the bottom of the Preset Name
column in the Metadata dialog.
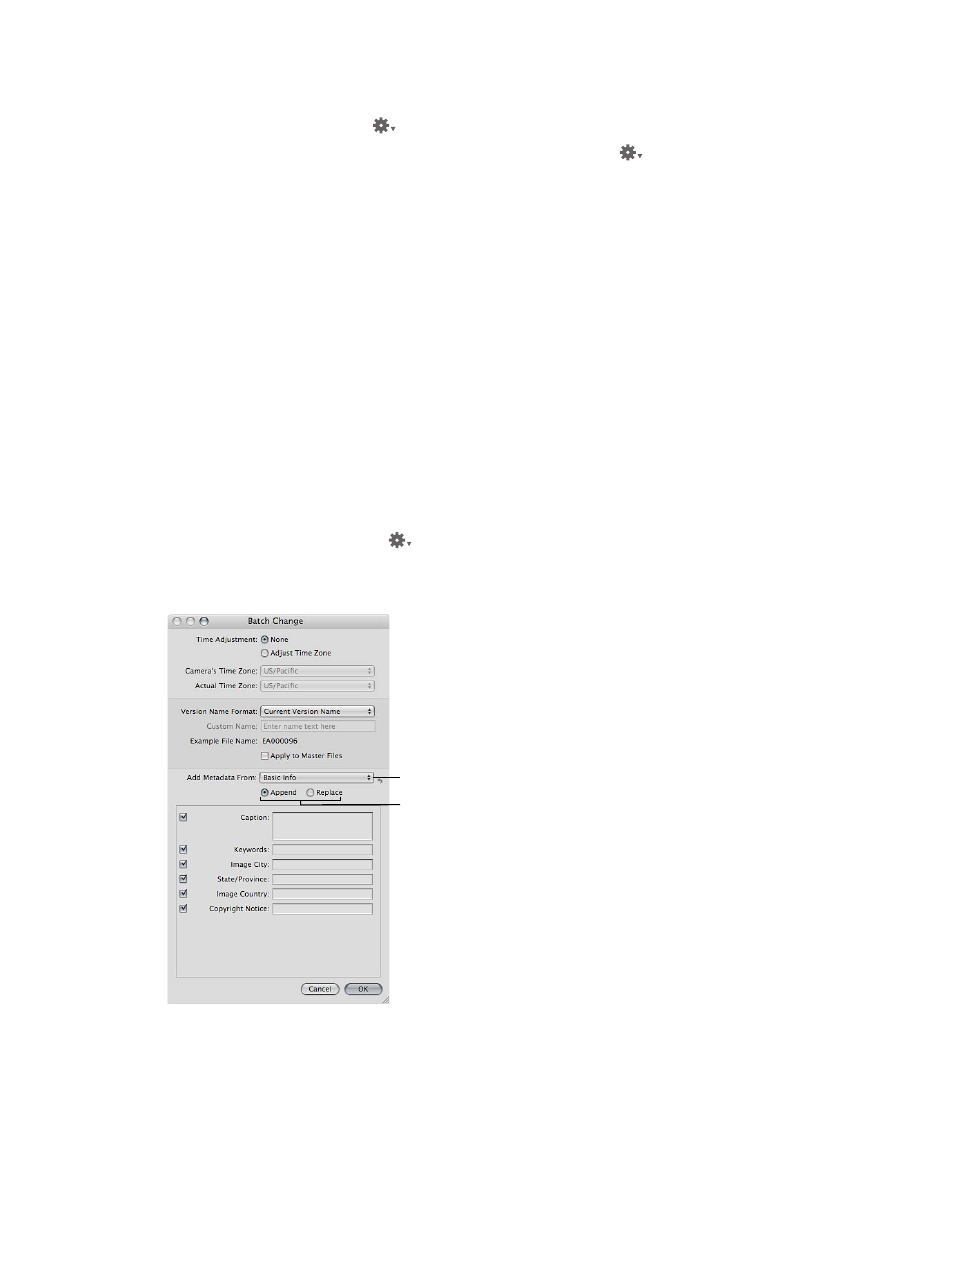
Batch change metadata
You can select a group of photos and make metadata changes to all the photos at once. For
example, if you need to add the same set of keywords to a selection of photos, or change
the version name format, you can select the photos and use the Batch Change dialog to
change them.
Change the metadata associated with a selection of photos
1
Do one of the following:
•
Choose Metadata > Batch Change (or press Shift-Command-B).
•
In the Info inspector or the Info pane of the Inspector HUD, choose Batch Change from the
Metadata Action pop-up menu
.
2
In the Batch Change dialog, choose the metadata preset you want from the Add Metadata From
pop-up menu.
Choose the metadata
preset you want from
this pop-up menu.
Click Append or Replace.
3
Click Append to add the preset’s metadata to the photos, maintaining any currently associated
metadata, or click Replace to add the preset’s metadata to the photos and remove any other
associated metadata.
4
Enter any additional metadata you want applied in the metadata fields.
5
Specify any other metadata options you want to change, then click OK.
67% resize factor