Apple Aperture 3.5 User Manual
Page 252
Chapter 7
Make image adjustments
252
4
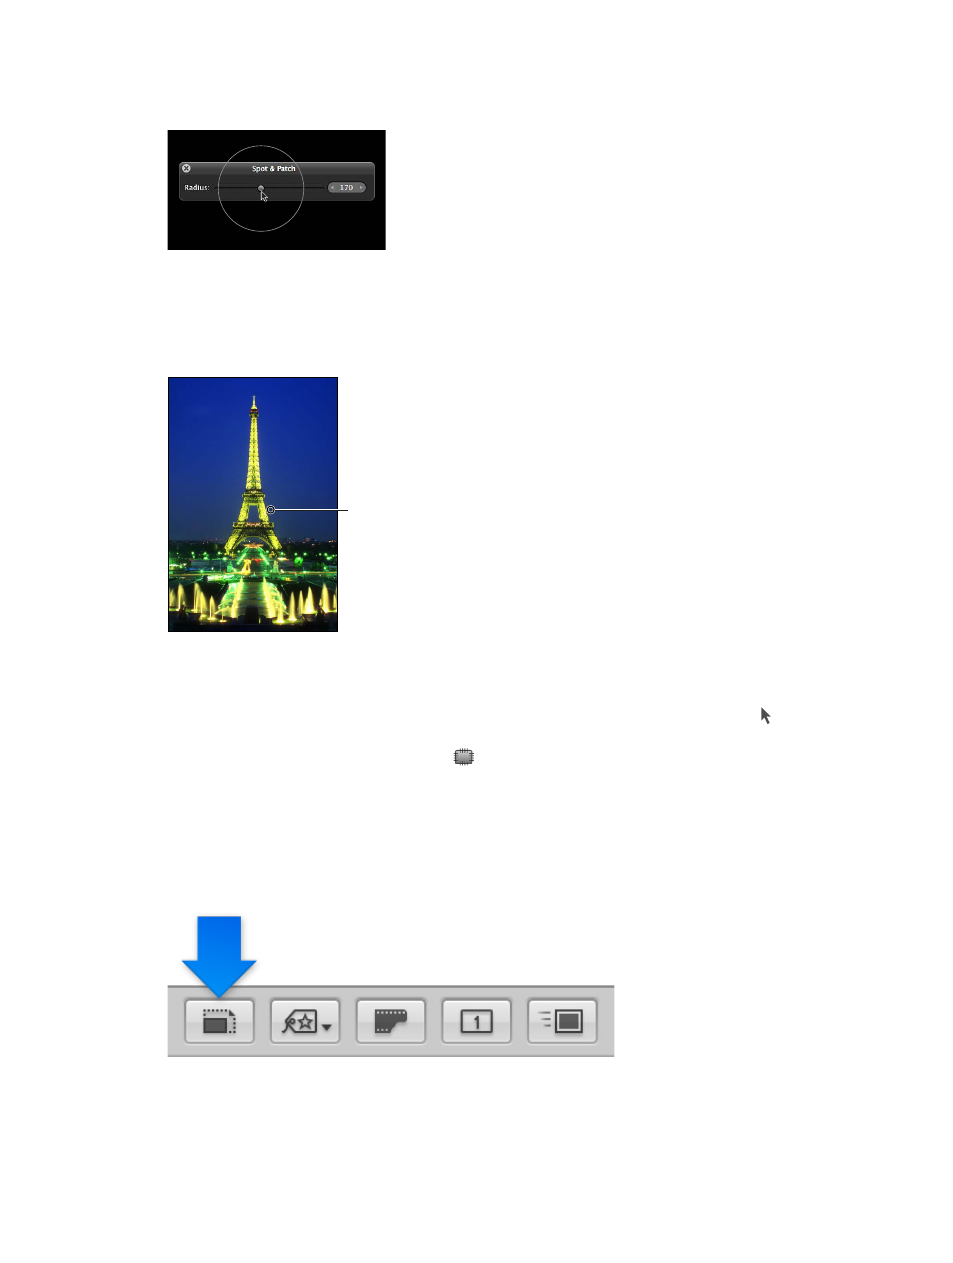
Change the size of the Spot & Patch target using the Radius parameter control in the Spot &
Patch HUD, or use the scroll gesture.
It’s best to adjust the size of the target overlay so that it fits the area around the blemish as
tightly as possible. A tight fit minimizes visual aberrations.
5
Click the blemish area to place the Spot & Patch target overlay on it.
The yellow Spot & Patch target overlay is placed over the blemish, and the blemish disappears.
Click a blemish to place
a Spot & Patch target
overlay on it.
Note: You can always adjust the size of the target overlay and other parameters.
6
Repeat step 5 until all of the blemishes in your image are removed.
To view the corrected image with Spot & Patch overlays turned off, select the Selection tool in
the toolstrip or the full-screen view toolbar (or press A). To turn the Spot & Patch target overlays
on again, click the Spot & Patch Tool button
in the Spot & Patch area of the Adjustments
inspector or the Adjustments pane of the Inspector HUD.
Patch a blemish in an image
1
Select a photo.
2
To display the photo at full size, click the Zoom Viewer button in the tool strip or the full-screen
view toolbar (or press Z).
Setting the photo to appear at full size (100 percent) prevents image scaling from
obscuring details.
67% resize factor