Apple Aperture 3.5 User Manual
Page 314
Chapter 7
Make image adjustments
314
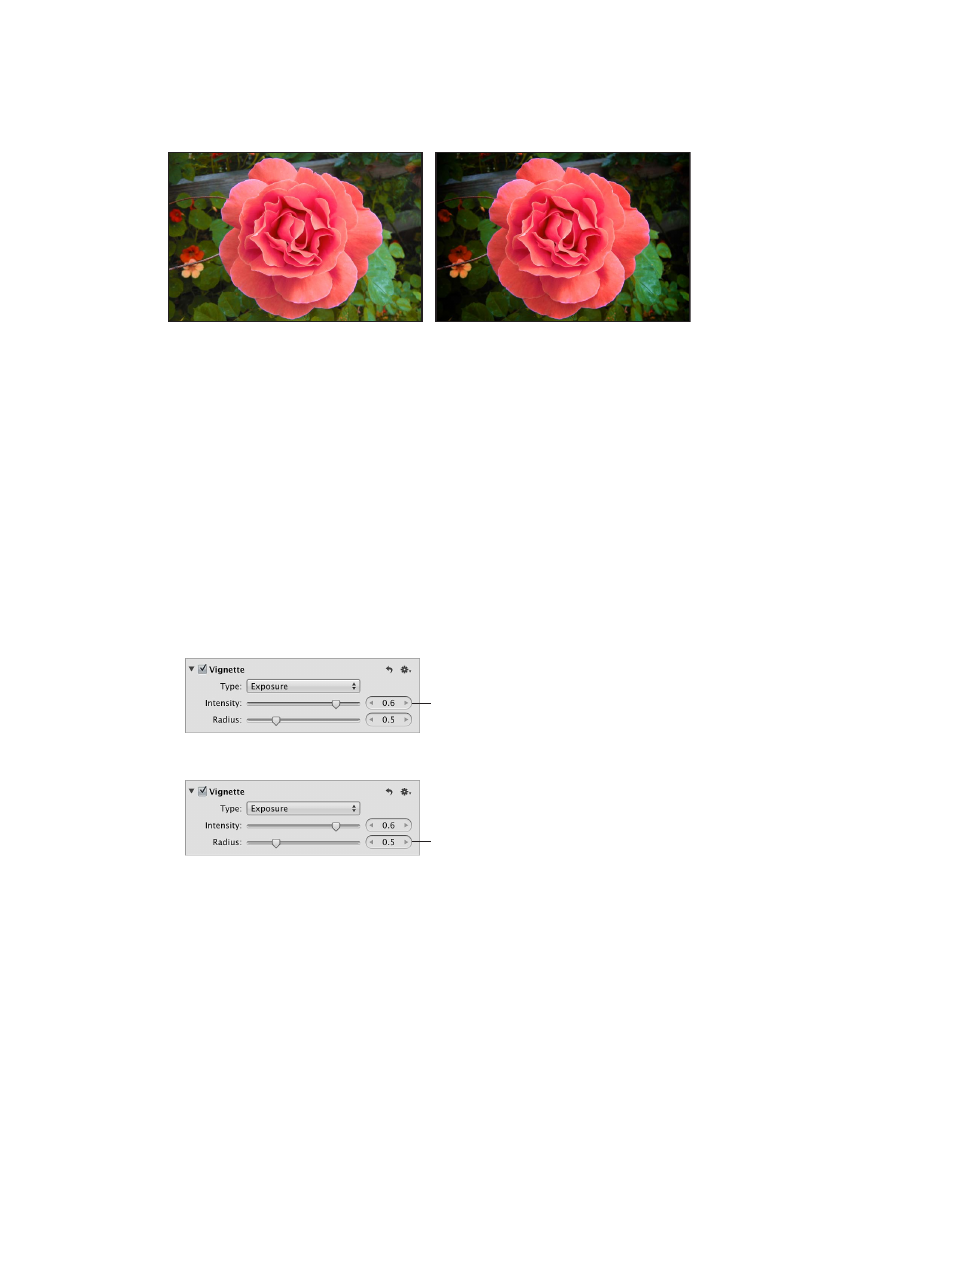
The Gamma vignette is designed for artistic effect and applies a gamma adjustment to the
affected pixels within the vignette. Because the Gamma vignette intensifies colors in the affected
pixels, it creates a more pronounced vignette effect than the Exposure vignette.
Before Gamma Vignette adjustment
After Gamma Vignette adjustment
Note: You can add a vignette to any image cropped in Aperture. The adjustment is applied after
the image is cropped.
Apply an Exposure vignette or a Gamma vignette to an image
1
Select a photo.
2
If the Vignette controls aren’t shown in the Adjustments inspector or the Adjustments pane of
the Inspector HUD, choose Vignette from the Add Adjustment pop-up menu (or press Control-V).
3
Do one of the following:
•
To apply an Exposure vignette: Choose Exposure from the Type pop-up menu.
•
To apply a Gamma vignette: Choose Gamma from the Type pop-up menu.
4
Specify the following settings:
•
To adjust the amount of vignette to apply to the image: Use the Intensity parameter controls.
Use the Intensity slider and
value slider to adjust the
amount of brightness removed
from the edges of the photo.
•
To adjust the size of the vignette, in pixels: Use the Radius parameter controls.
Use the Radius slider and
value slider to adjust the size
of the area over which the
Vignette adjustment is applied.
After you apply a vignette to an image, you can change the vignette type and maintain the
Intensity and Radius parameter values you set using the previous vignette. To change the
vignette, choose the other vignette type from the Type pop-up menu.
You can also brush the Exposure and Gamma Vignette adjustments on specific areas of an
image. For more information, see
on page 228.
For information about removing a vignette that was applied to an image when it was shot, see
on page 264.
67% resize factor