Apple Aperture 3.5 User Manual
Page 221
Chapter 7
Make image adjustments
221
For more information, see
Perform adjustments in full-screen view
on page 238.
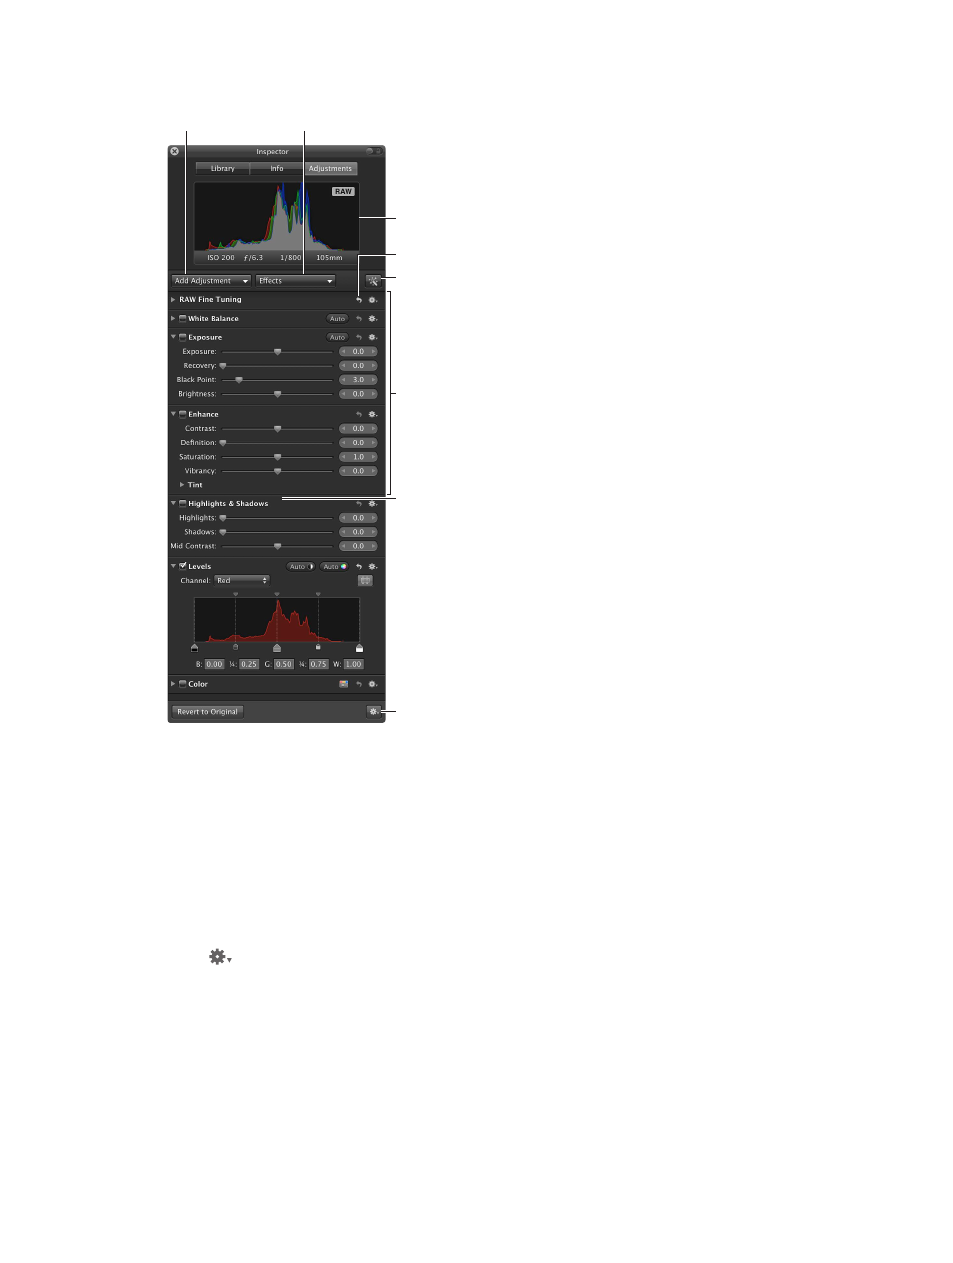
Histogram
Double-click
the top of an
adjustment to
show and hide
the adjustment’s
controls.
Reset button
Add Adjustment
pop-up menu
Effects
pop-up menu
Adjustments
Auto Enhance
button
Adjustment Action
pop-up menu
Note: The adjustment controls in the Adjustments inspector and the Adjustments pane of the
Inspector HUD are dimmed when an audio clip or a video clip is selected.
Choose a histogram view
When you show the Adjustments inspector or the Adjustments pane of the Inspector HUD, a
histogram of the selected image’s luminance or color channels appears. The histogram displays a
graph of the brightness values in the image, from the blackest point to the whitest point. You can
adjust the histogram to show luminance; red, green, and blue (RGB) channels displayed together;
or separate red, green, and blue channels.
m
Choose a view option from the Histogram Options section of the Adjustment Action pop-up
menu
.
Note: The histogram updates in real time for images displayed in the Viewer and in full-screen
view, but is slightly delayed in the Book Layout Editor, the Webpage Editor, and the Light Table.
For information about how to interpret a histogram, see
on page 344.
67% resize factor