Apple Aperture 3.5 User Manual
Page 31
Chapter 2
Import photos
31
2
Do one of the following:
•
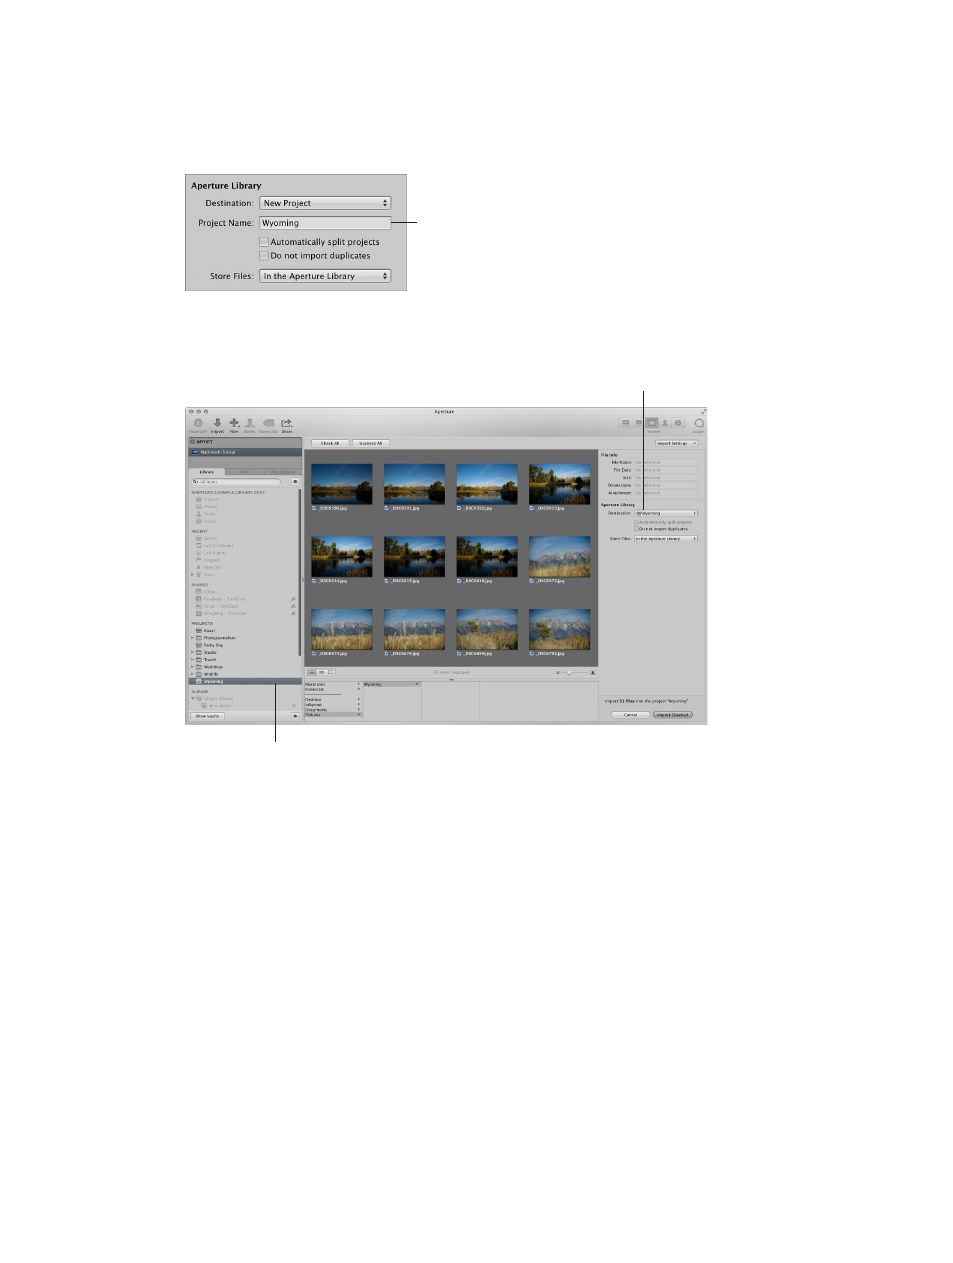
If you want to import the photos into a new, empty project: Choose New Project from the
Destination pop-up menu to create a new project, and enter a name for the project in the
Project Name field.
Project Name field
•
If you want to import the photos into an existing project: Select the project in the
Library inspector.
The project selected in
the Library inspector
appears here.
Selected project in
the Library inspector
The selected project appears in the Destination pop-up menu.
3
Choose a location to store the original image files by doing one of the following:
•
To store imported originals in the Aperture library: Choose “In the Aperture Library” from the
Store Files pop-up menu.
•
To store imported originals as referenced images in the Pictures folder on your hard disk: Choose
Pictures from the Store Files pop-up menu, then choose whether you want the image files
moved or copied to the Pictures folder by clicking the “Move files” or “Copy files” button.
•
To store imported originals as referenced images in a location other than the Pictures folder:
Choose “Choose” from the Store Files pop-up menu and select a folder. In the dialog that
appears, choose a location to store the imported originals, then click Open. Choose Project
Name from the Subfolders pop-up menu to specify that the files be stored in a folder with the
same name as the project. Choose whether you want the image files moved or copied to the
new location by clicking the “Move files” or “Copy files” button.
4
To add controls for additional import settings, choose an option from the Import Settings
pop-up menu.
For more information about Import Settings, see
on page 36.
67% resize factor