Yx z – HEIDENHAIN TNC 407 (280 580) User Manual User Manual
Page 81

TNC 425/TNC 415 B/TNC 407
4-22
4
Programming
1
1
2
3
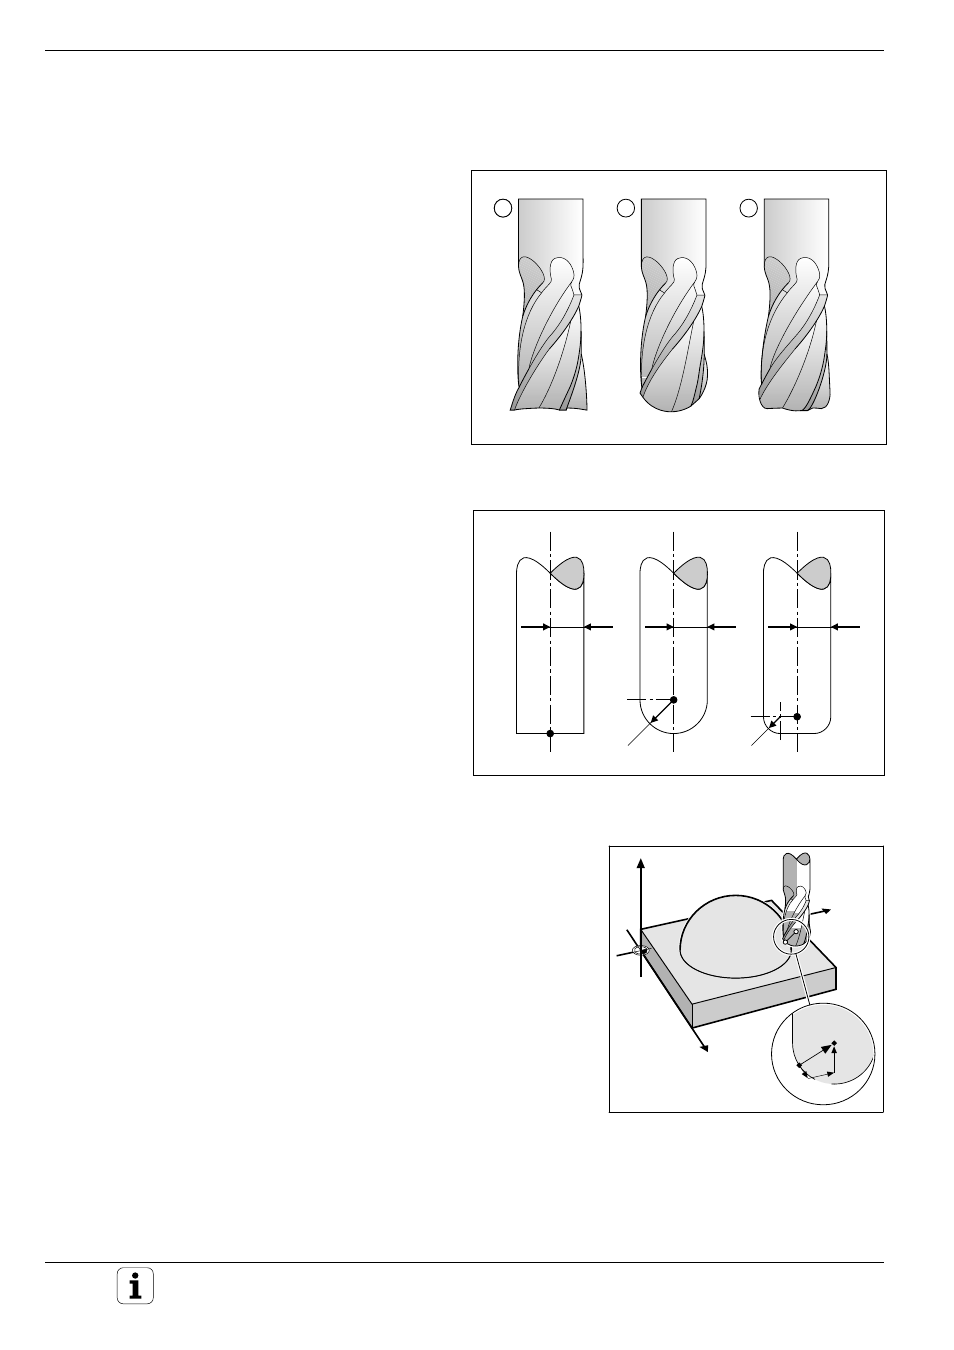
Fig. 4.17:
Surface-normal vectors and tool
position during 3D compensation
R
P
T
R2
R
P
T
R
P
T
R2
Y
X
Z
PT
P
NX
NZ
NY
4.5 Three-Dimensional Tool Compensation (Not on TNC 407)
This TNC feature uses straight-line blocks that
include tool radius compensation in terms of
surface-normal vectors (see below) that have been
calculated by a CAD system.
The TNC calculates a three-dimensional (3D) tool
compensation so that tools can be used that have
slightly different dimensions than the one originally
used.
3D compensation can be performed for the tool
shapes illustrated in Fig. 4.16
Defining tool shapes for 3D compensation
Two types of radii, R and R2, can be entered in the
tool table:
• TOOL RADIUS – R
Distance from the tool axis to the tool circumfer-
ence (tool "thickness").
• TOOL RADIUS 2 – R2
Dimension for the curvature of the tool point:
distance from the center of a circle derived from
the arc of curvature to the curve itself.
The second radius value (R2) determines the shape
of the tool:
• End mill
R2 = 0
• Toroid cutter
0 < R2 < R
• Spherical cutter
R2 = R
Surface-normal vectors NX, NY, NZ
For 3D compensation the TNC uses three additional words in the NC block
(NX, NY and NZ): one for each compensated axis in the Cartesian coordi-
nate system.
The CAD system calculates NX, NY and NZ, which are transferred to the
TNC together with the contouring commands.
NX, NY and NZ are the "components" of the directional data for 3D com-
pensation. Such directional data is called a "vector."
Fig. 4.15:
Tool shapes for 3D compensation: end mill (1),
spherical cutter (2), toroid cutter (3)
Fig. 4.16:
Tool datum P, tool radii R and R2 on end mills, spherical and
toroid cutters
