Tch probe 17.0 contour lines, Yx z – HEIDENHAIN TNC 407 (280 580) User Manual User Manual
Page 298

9-31
TNC 425/TNC 415 B/TNC 407
9
3D Touch Probe Systems
Digitizing with a Measuring Touch Probe
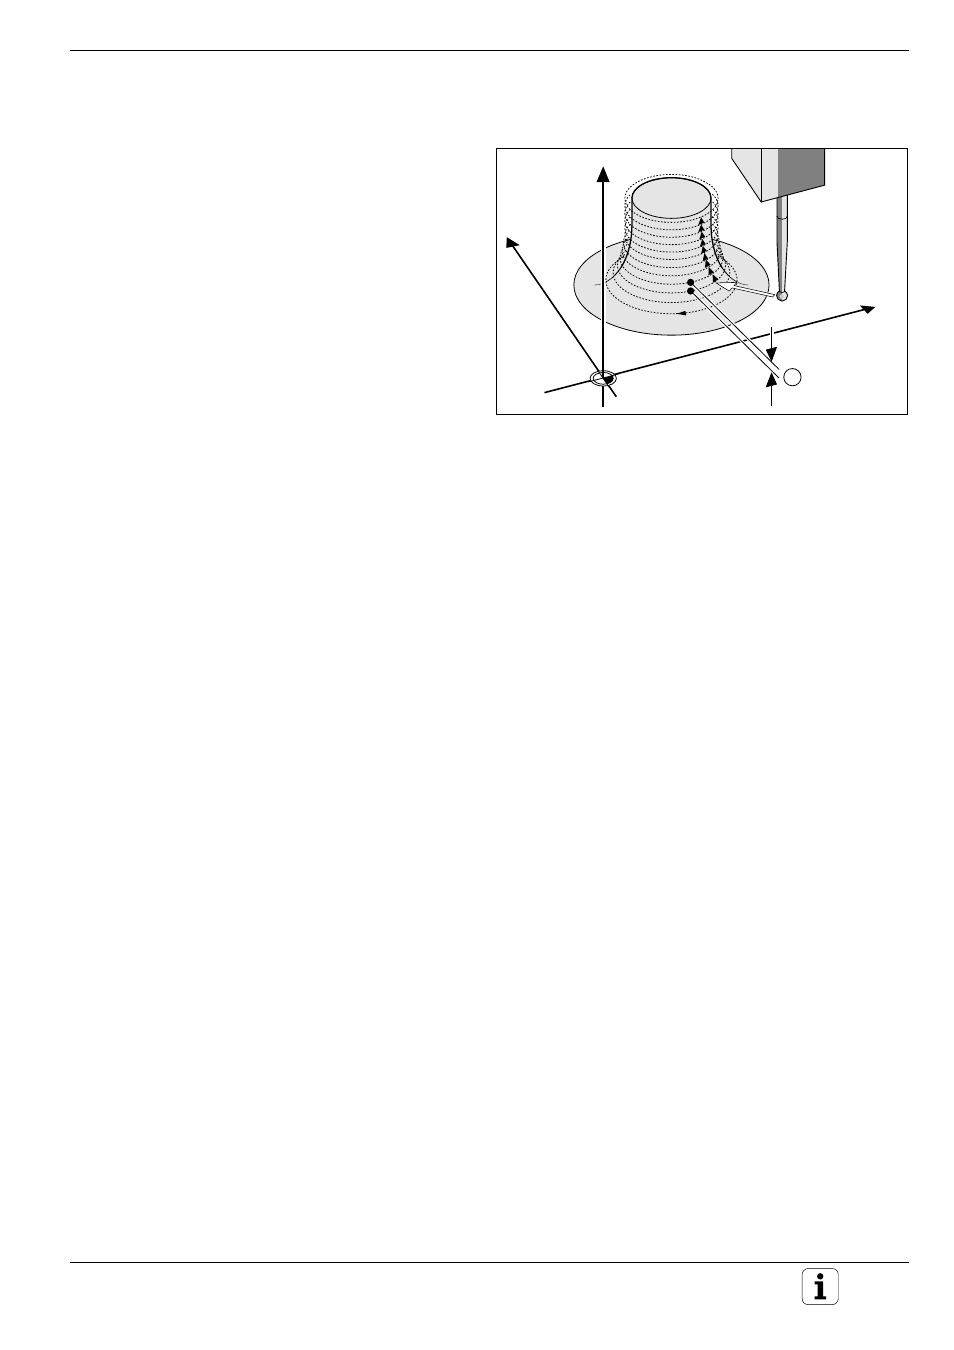
Fig. 9.23
Digitizing a 3D contour with the CONTOUR LINES cycle
Y
X
Z
1
Contour line digitizing with cycle 17 CONTOUR LINES
The CONTOUR LINES cycle scans a 3D contour by
circling around the model in a series of upwardly
successive levels. This cycle is particularly useful
for digitizing steep contours, such as the gating of
injection molding dies, or for digitizing a single
contour line, such as the contour of a cam disk.
The touch probe starts scanning in the direction
that you entered as STARTING PROBE AXIS AND
DIRECTION at a constant level. When the touch
probe has orbited the form and has returned to the
first probe point, it then moves in the positive or
negative direction of the probe axis by the LINE
SPACING. The process repeats itself for the rest of
the range.
Once the entire range is scanned, the touch probe
returns to the CLEARANCE HEIGHT and the
programmed starting position.
Limits of the scanning range
• In the touch probe axis:
The defined RANGE must be lower that the highest point of the 3D
model by at least the radius of the probe tip.
• In the plane perpendicular to the touch probe:
The defined RANGE must be larger than the 3D model by at least the
radius of the probe tip.
Starting position
• Z coordinate of the MIN point from cycle 5 RANGE or cycle 15 RANGE
(TABLE), if the LINE SPACING is entered as a positive value, or Z
coordinate of the MAX POINT if the LINE SPACING was entered as a
negative value.
• Define X and Y coordinates in the CONTOUR LINES cycle
• Automatically approach the starting point:
first in Z to the CLEARANCE HEIGHT, then in X and Y
Contour approach
The touch probe moves toward the surface in the programmed direction.
When it makes contact, the TNC stores position coordinates.
