Yx z – HEIDENHAIN TNC 407 (280 580) User Manual User Manual
Page 289

TNC 425/TNC 415 B/TNC 407
9-22
9
3D Touch Probes
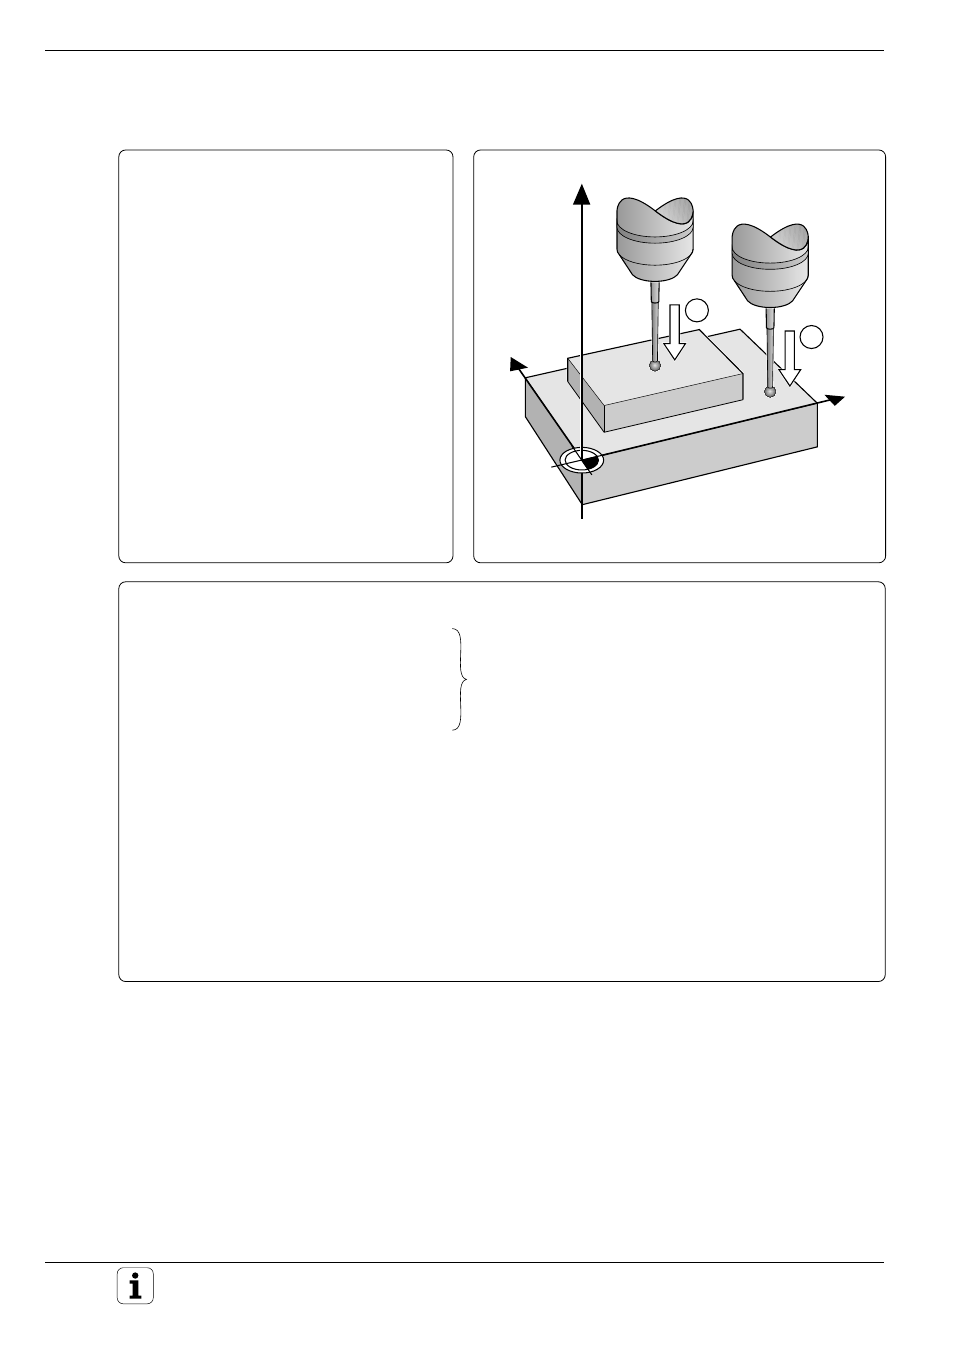
Example: Measuring the height of an island on a workpiece
Coordinates for pre-positioning the 3D touch
probe
Touch point 1:
X = + 20 mm (Q11)
Y =
50 mm (Q12)
Z =
10 mm (Q13)
Touch point 2:
X = + 50 mm (Q21)
Y =
10 mm (Q22)
Z =
0 mm (Q23)
Part program:
0
BEGIN PGM ISLAND MM
1
FN0: Q11 = + 20
2
FN0: Q12 = + 50
3
FN0: Q13 = + 10
4
FN0: Q21 = + 50
5
FN0: Q22 = + 10
6
FN0: Q23 = + 0
7
TOOL CALL 0 Z
8
L Z+100 R0 FMAX M6 ....................................... Insert the touch probe
9
TCH PROBE 0.0 REF. PLANE Q10 Z–
10
TCH PROBE 0.1 X+Q11 Y+Q12 Z+Q13 ............. The Z coordinate probed in the negative direction is stored in
Q10 (1st point)
11
L X+Q21 Y+Q22 ................................................. Auxiliary point for second pre-positioning
12
TCH PROBE 0.0 REF. PLANE Q20 Z–
13
TCH PROBE 0.1 X+Q21 Y+Q22 Z+Q23 ............. The Z coordinate probed in the negative direction is stored in
Q20 (2nd point)
14
FN2: Q1 = Q20–Q10 .......................................... Measure the height of the island and assign to Q1
15
STOP .................................................................. Q1 can be checked after the program run has been stopped
16
L Z+100 R0 FMAX M2
17
END PGM ISLAND MM ..................................... Retract the tool and end the program
Y
X
Z
1
2
Measuring the Workpiece with a 3D Touch Probe
Begin the program; Assign the coordinates for pre-
positioning the touch probe
