The parts of an hmi tag alarm summary, Inserting headings – Rockwell Automation FactoryTalk View Site Edition Users Guide User Manual
Page 246
F
ACTORY
T
ALK
V
IEW
S
ITE
E
DITION
U
SER
’
S
G
UIDE
11–34
• •
•
•
•
The parts of an HMI tag alarm summary
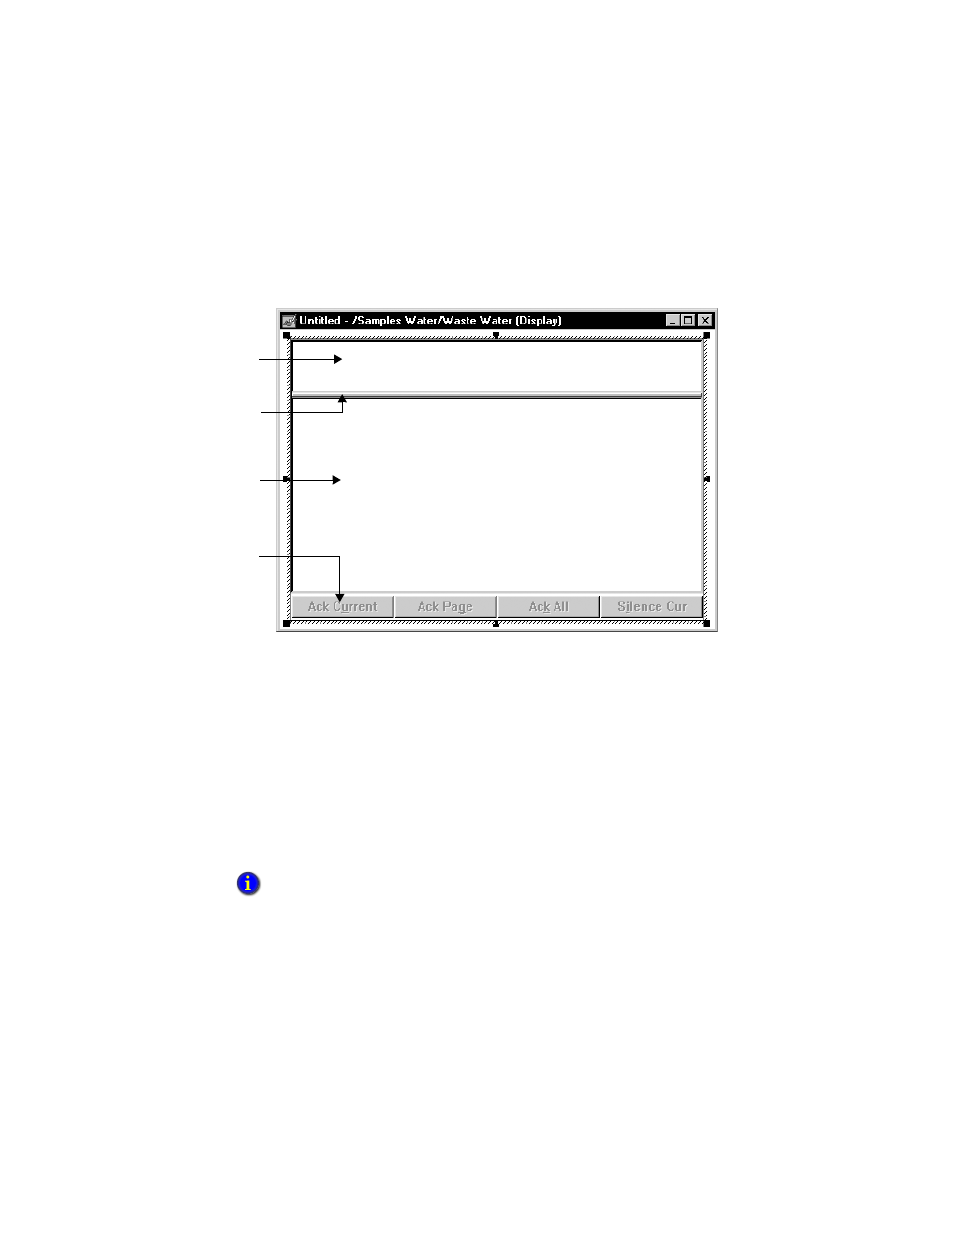
A new HMI tag alarm summary object in a graphic display looks like this:
When setting up an alarm summary, you determine how many columns the table will
have, how wide the columns will be, and what information the columns will contain.
You can also specify the HMI tags and areas (in a network distributed application) that
will provide information to the alarm summary.
Inserting headings
Use headings from the Insert menu (shown in the next illustration) to define what
information is shown in the HMI tag alarm summary at run time.
To add a heading, click an item on the menu, and then click on the header area in the alarm
summary. You can add any number of headings, and place them in any order.
Insert the Operator Name heading to include an operator’s name. When a tag goes into alarm,
the Operator Name column will show the name of the Windows system account. When a user
acknowledges an alarm, the column will show the name of that user.
Use commands on
the Insert menu to
insert headings in
the header area.
Use the mouse to
move the split bar
up and down.
Alarm information is
shown in the alarm
summary’s body at
run time.
Use commands on
the Format menu to
specify the position
of the button bar,
and the buttons it
contains.