Getting started: creating a project – Lenze Engineer v2.21 User Manual
Page 33
Lenze · Engineer · 2.13 EN - 10/2014
33
Getting started: creating a project
Creating a new project
_ _ _ _ _ _ _ _ _ _ _ _ _ _ _ _ _ _ _ _ _ _ _ _ _ _ _ _ _ _ _ _ _ _ _ _ _ _ _ _ _ _ _ _ _ _ _ _ _ _ _ _ _ _ _ _ _ _ _ _ _ _ _ _
2. Select the Select component from catalogue option.
3. Click the Next button.
4. Step 2 - Properties
Enter the corresponding properties of the project (name, order number etc.) in the input
fields.
• Enter desired Properties.
• The Name can be found later in the Project view as the name of the project element.
5. Click the Next button.
6. Step 3 - Memory location
As Project name the previously entered Project designation is suggested. If required,
correct the suggestion accordingly.
• The Project name at the same time is the name for the project directory to be created.
• Specify the storage location for the project directory in the Directory input field.
• If the folder specified is not available, it will be created.
• As an alternative you can select an existing directory in your workplace environment via
the Browse... button.
• The Always save projects here option determines the folder specified to be the standard
storage location for future »Engineer« projects. Activate this option for the central
management of all projects within the same folder.
7. Specify the storage location for the project directory in the Directory input field.
• If the specified directory does not exist, it will be created.
• As an alternative you can select an existing directory in your workplace environment via
the Browse... button.
8. Click the Next button.
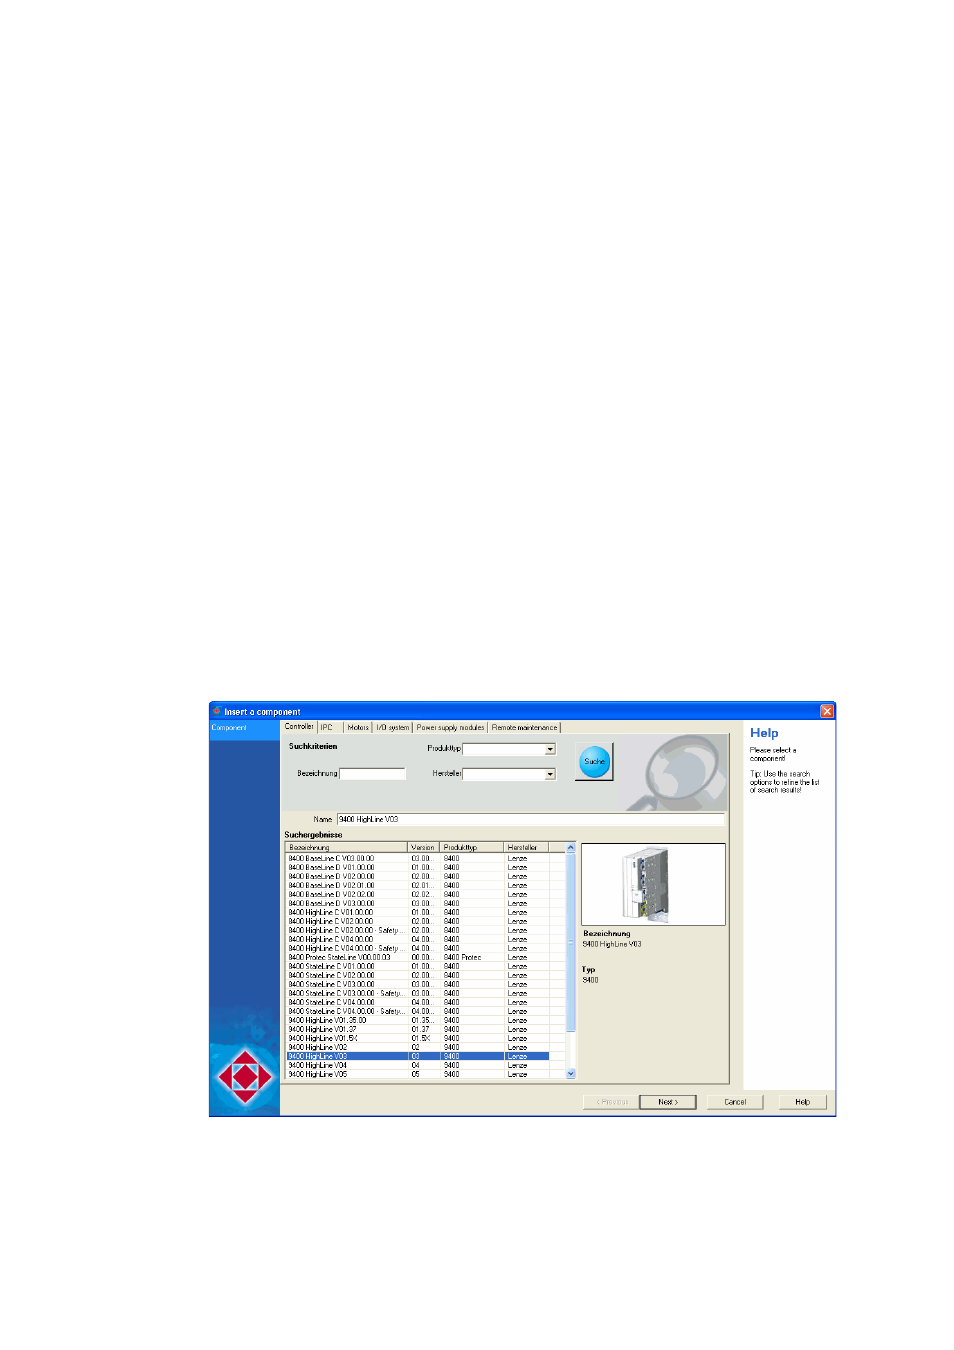
9. Select the required component.
• The search results show the components available.