6 adjusting the representation, Adjusting the representation, Adjusting the representation ( 120) – Lenze Engineer v2.21 User Manual
Page 120: Device functions with active online connection
Device functions with active online connection
Data logger
120
Lenze · Engineer · 2.13 EN - 10/2014
_ _ _ _ _ _ _ _ _ _ _ _ _ _ _ _ _ _ _ _ _ _ _ _ _ _ _ _ _ _ _ _ _ _ _ _ _ _ _ _ _ _ _ _ _ _ _ _ _ _ _ _ _ _ _ _ _ _ _ _ _ _ _ _
7.7.2.6
Adjusting the representation
After recording, the measured values are visualised in the diagram. If required, you can now adjust
the representation using the zoom function or the automatic scaling function.
Tip!
»Engineer« From »Engineer» V2.10
, a scrollbar appears below the time axis as soon as the
diagram does not show the complete measurement anymore.
You can use the scrollbar to move the visible section horizontally. The time-axis inscription
and the position indicator are automatically corrected during scrolling.
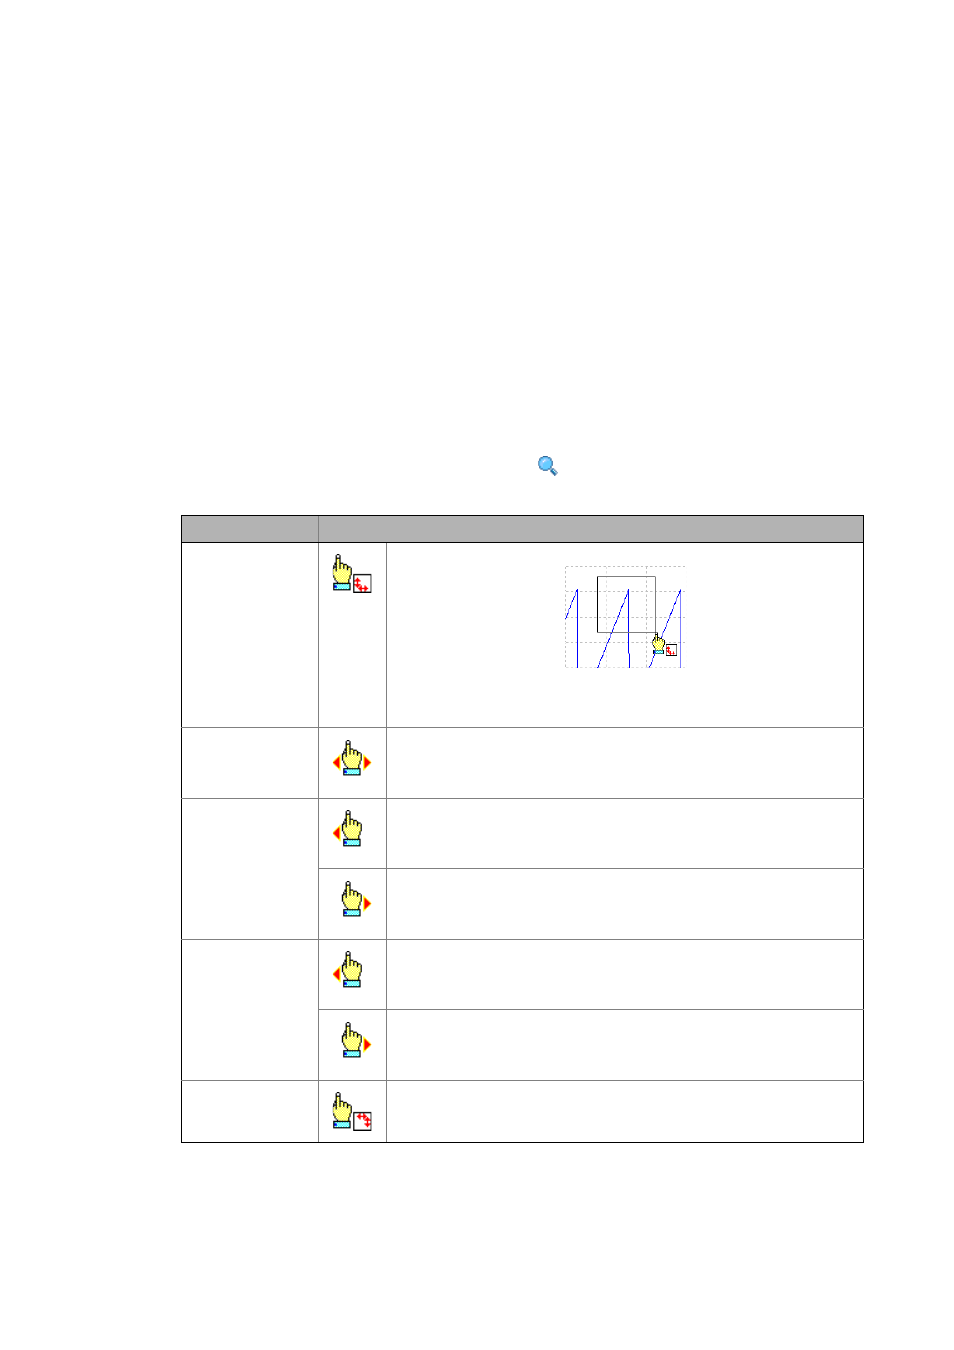
Zoom function
Go to the Data logger toolbar and click the
icon to activate the zoom function.
Zoom function
Procedure
Zoom selection
Hold down the left mouse button and draw the section to be zoomed:
• The selection is shown with a frame.
• When the left mouse button is released, the selection is zoomed in the
diagram.
Horizontal/vertical
shift of selection
Hold down the left and right mouse button and move the mouse pointer on the
horizontal scale to the left or right or on the vertical scale to the top or bottom
to shift the selection accordingly.
• With a three-button mouse, you can use the mouse button in the middle.
Horizontal stretching
Hold down the left mouse button and move the mouse pointer on the horizontal
scale to the left to stretch the shown selection from the right edge.
• Moving the mouse pointer in opposite direction continuously reduces the
stretching.
Hold down the right mouse button and move the mouse pointer on the
horizontal scale to the right to stretch the shown selection from the left edge.
• Moving the mouse pointer in opposite direction continuously reduces the
stretching.
Vertical stretching
Hold down the left mouse button and move the mouse pointer on the vertical
scale to the bottom to stretch the shown selection from the top.
• Moving the mouse pointer in opposite direction continuously reduces the
stretching.
Hold down the right mouse button and move the mouse pointer on the vertical
scale to the top to stretch the shown selection from the bottom.
• Moving the mouse pointer in opposite direction continuously reduces the
stretching.
Return to original
representation
Click the right mouse button in the diagram to return step by step to the original
representation.