Viewing port groups, Figure 321 – Brocade Network Advisor IP User Manual v12.3.0 User Manual
Page 887
Brocade Network Advisor IP User Manual
835
53-1003153-01
Port groups
22
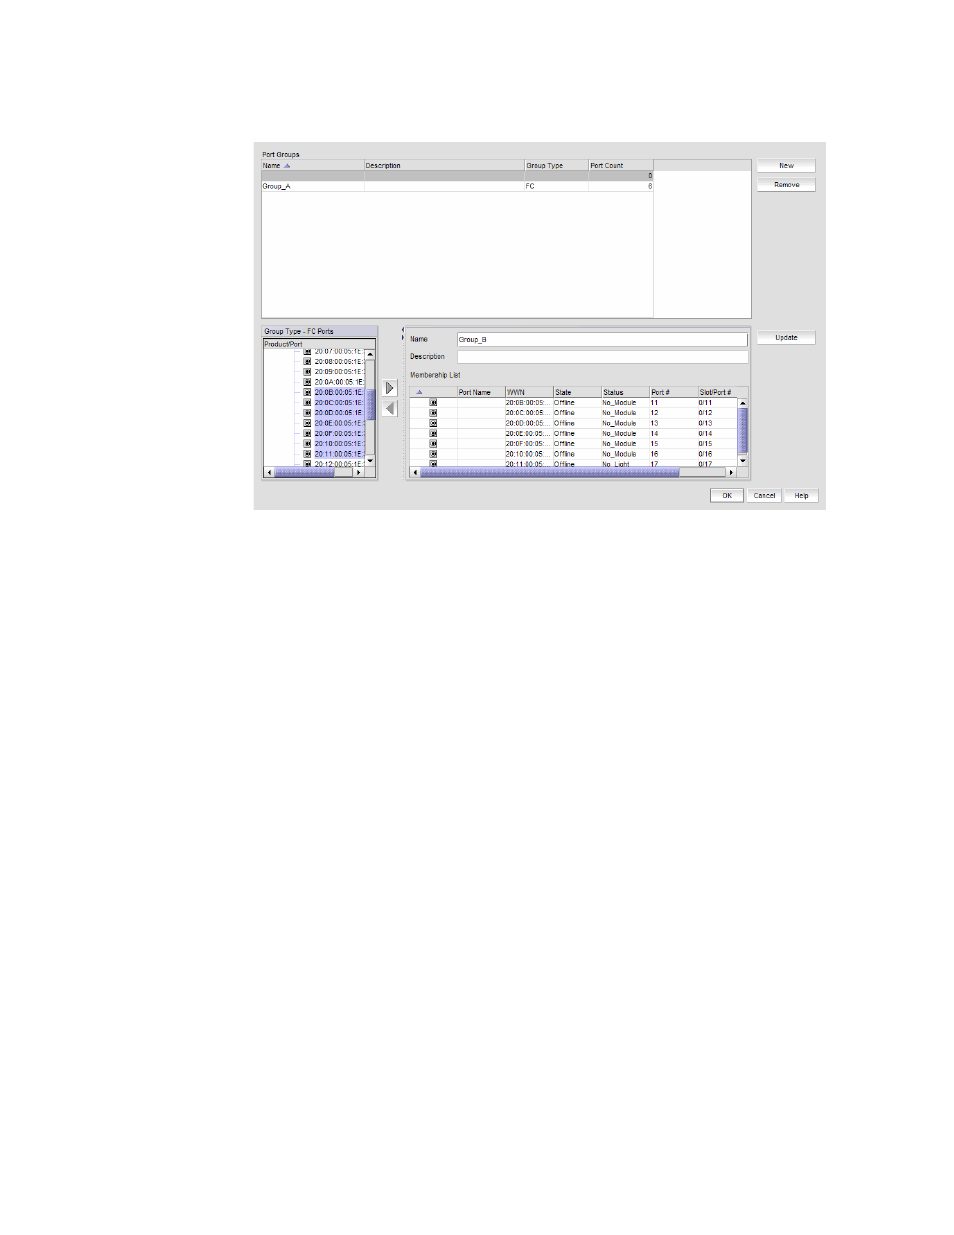
FIGURE 321
Port Groups dialog box
2. Click New.
3. Enter a name for the port group in the Name field.
4. Enter a description for the port group in the Description field.
5. Select one or more ports to add to the group in the Group Type - FC Ports list.
A port group must have at least one port in the Membership List. All ports must be from
switches in the same fabric.
6. Click the right arrow button.
The selected ports display in the Membership List.
7. Click Update.
The new port group displays in the Port Groups list.
8. Click OK to close the Port Groups dialog box.
Viewing port groups
To view port groups, complete the following steps.
1. Select Configure > Port Groups.
The Port Groups dialog box displays only port groups defined by you.
If a fabric becomes un-monitored, any port groups associated with that fabric do not display in
the Port Groups list. Once the fabric becomes monitored again, the associated port groups
display in the Port Groups list.
If a fabric is removed from discovery, any port groups associated with that fabric are removed
permanently from the Port Groups dialog box.