Brocade Network Advisor IP User Manual v12.3.0 User Manual
Page 1352
1300
Brocade Network Advisor IP User Manual
53-1003153-01
Event action definitions
38
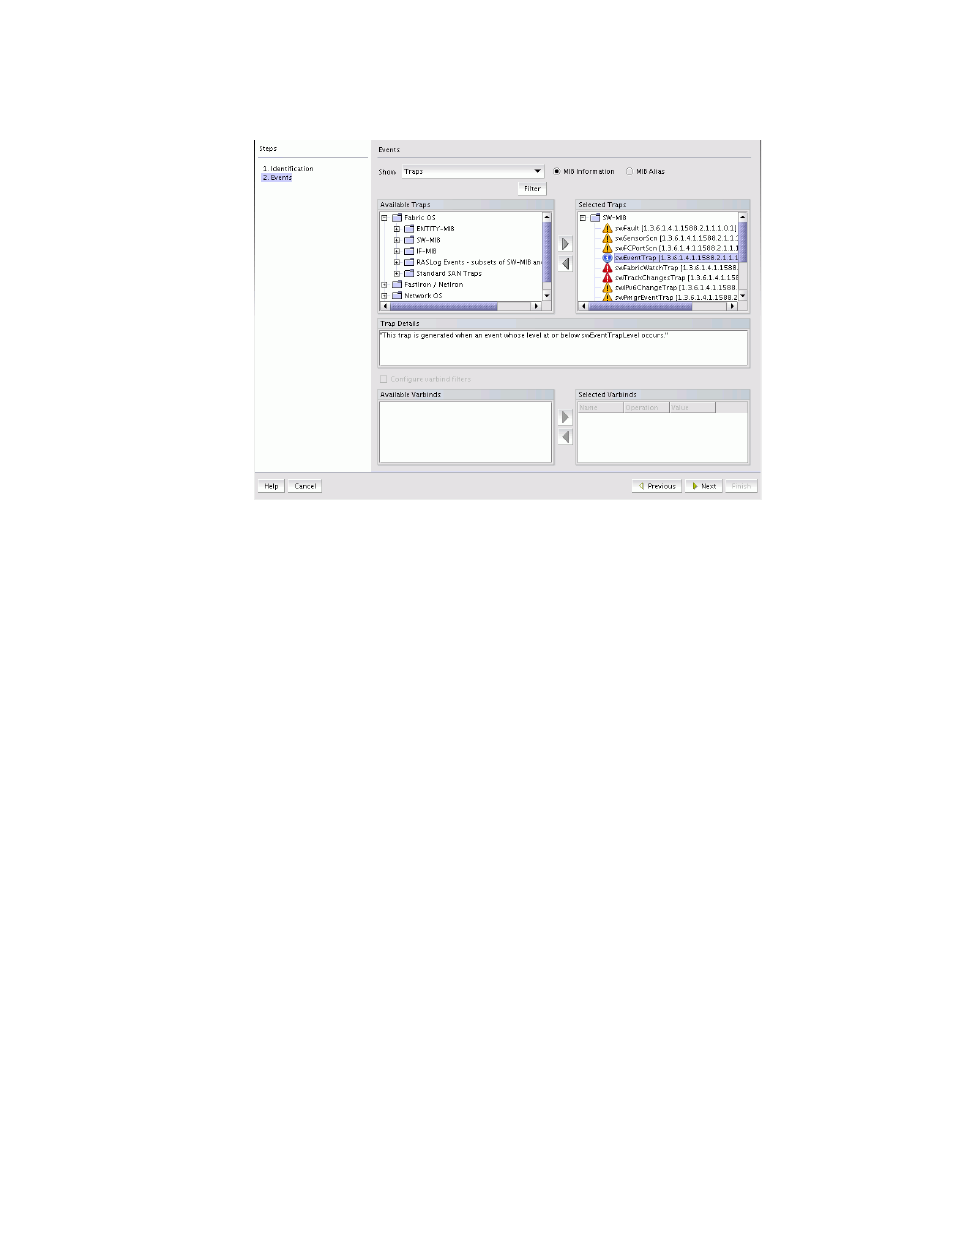
FIGURE 550
Add Event Action dialog box - Events pane
4. Select one of the following event types from the Show list:
•
Traps (default)
•
Application Events
•
Pseudo Events
•
Custom Events
•
Snort® Message
Depending on what the event type you select, a box listing the available events or pseudo
events displays.
5. By default, the traps are grouped under the , Network OS, FastIron/ NetIron, and Wireless root
nodes and listed in the Available Traps list, under the folders for the MIB to which they belong.
You can limit the list by doing any of the following:
•
Select one of the following options:
-
MIB Information, if you want the default SNMP name for the traps to be displayed.
-
MIB Alias, if you want the aliases for the traps to be displayed.
•
Use the Trap Filter tool to limit the trap list to the trap severities you want. To use this tool,
click the Filter button to display the Trap Filters dialog box.
6. After limiting the list of available traps, expand the MIB folder to which the trap you want
belongs under the Available Traps list and select that trap. Click the right arrow button to move
it to the Selected Traps list. You can select a trap in the Selected Traps list and view the trap
details in the Trap Details section.
7. If you selected Application Events in
, select the application events in the left list and use
the arrow button to move them to the right list.
8. If you selected Pseudo Events in
, select one or more of the pseudo events you created
that you want to include in the definition, then click the right arrow button to move it to the
Selected Pseudo Events list.