Configuring a new schedule – Brocade Network Advisor IP User Manual v12.3.0 User Manual
Page 341
Brocade Network Advisor IP User Manual
287
53-1003153-01
Reports
7
4. Activate button — Click to activate a report schedule. For step-by-step instructions, refer to
5. Deactivate button — Click to deactivate a report schedule. For step-by-step instructions, refer to
Configuring a new schedule
You can schedule one or more reports to generate at a specific frequency.
1. Click the Reports icon.
2. Click the Schedules tab.
A list of scheduled reports display.
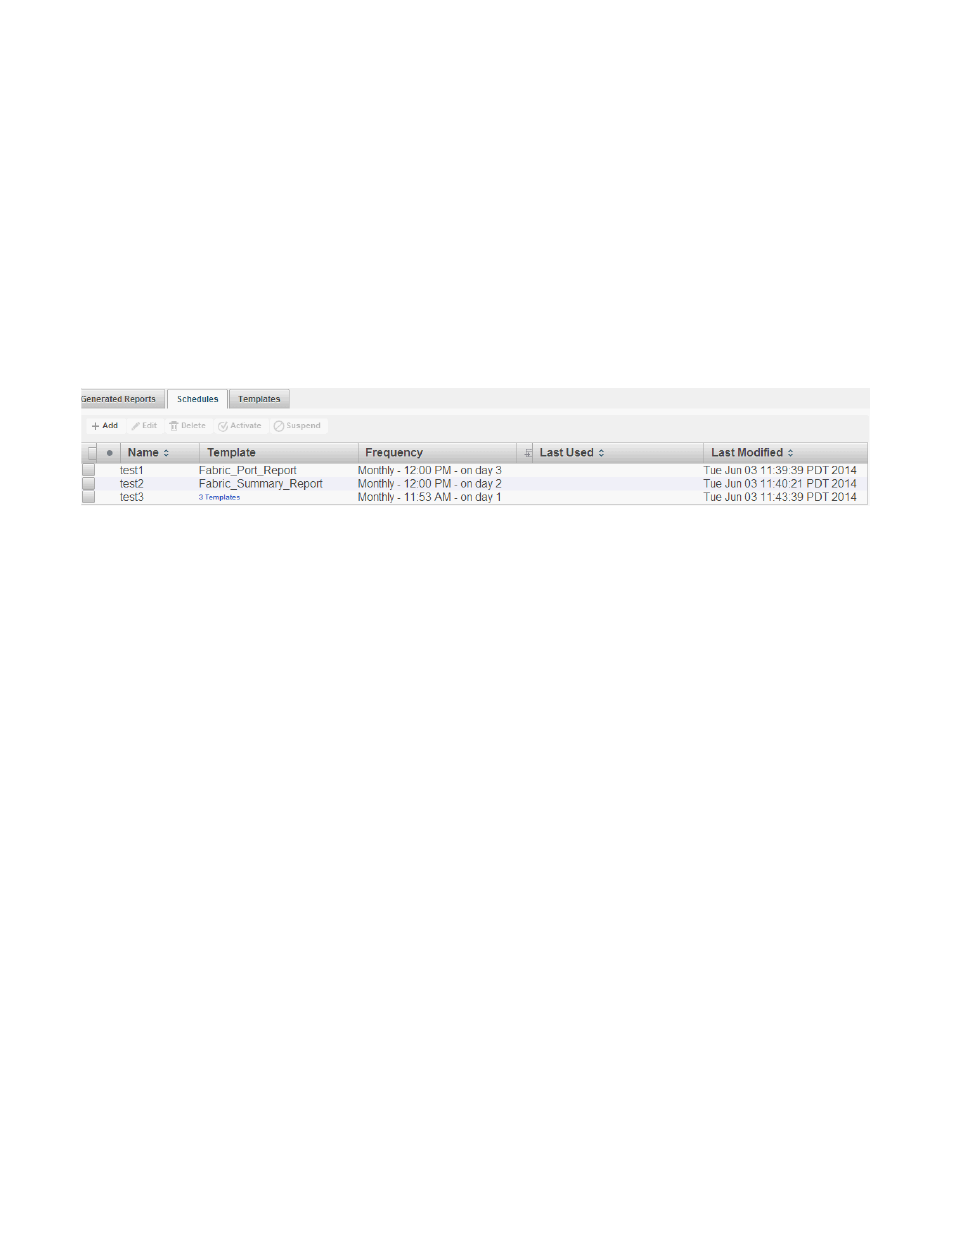
FIGURE 129
Schedules tab
The Schedules tab contains the following information in table format:
•
check box — Click to select a schedule.
•
unnamed column — Displays whether the schedule is activated (no icon) or suspended
(Suspend icon).
•
Name — The name of the schedule.
•
Template — The name of the report template used in the schedule. If you used more than
one template, displays the number of templates as a link. Click to view the templates
included in the schedule.
•
Frequency — The frequency at which the report is run.
•
E-mail icon — Whether the schedule is configured to be e-mailed or not.
•
Directory icon — Whether the schedule is configured to be saved to a directory or not.
•
Last Used — The date and time of the last generation of this schedule. Click to launch the
Last Run Reports for Schedule dialog box (refer to
“Viewing reports from a schedule”
•
Last Modified — The date and time the schedule was last edited.
3. Click Add.
The Add Schedule dialog box displays. If you selected a report in the Reports expand
navigation bar, the report displays already selected in the Selected Templates and Criteria list.