Configuration verification, Subway wlan mesh configuration example, Network requirements – H3C Technologies H3C WX6000 Series Access Controllers User Manual
Page 333: Subway wlan mesh configuration example -24

32-24
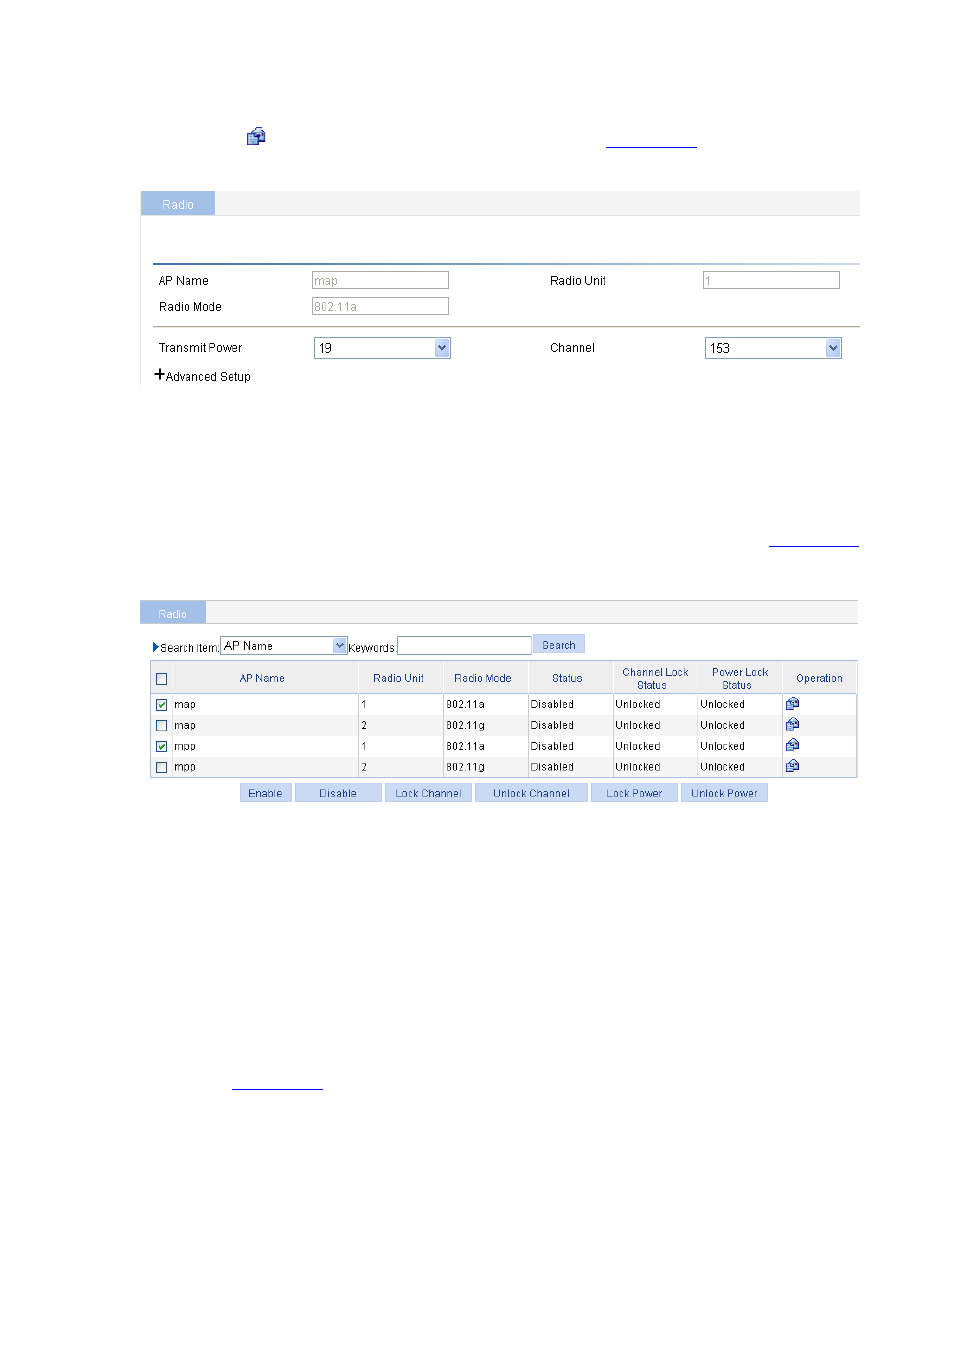
Select Radio > Radio from the navigation tree, select the MAP to be configured in the list, and click the
corresponding
icon to enter the radio setup page, as shown in
.
Figure 32-37 Configure the working channel
Select the channel to be used from the Channel drop-down list. You can follow this step to configure the
working channel for the MPP. Note that the working channel of the radio on the MPP should be the
same as that on the MAP.
# Enable radio
Select Radio > Radio from the navigation tree to enter the radio setup page, as shown in
.
Figure 32-38 Enable radio
Select the radio modes to be enabled for the MAP and MPP, and click Enable.
Configuration verification
The mesh link between the MAP and the MPP has been established, and they can ping each other.
After 802.11g is configured on the MAP, the client and the AC can ping each other, and the client
can access the network through the mesh link.
Subway WLAN Mesh Configuration Example
Network requirements
As shown in
, all rail MPs are connected to an AC.
It is required to configure WLAN mesh so that the train MP will form links with rail MPs during movement,
among them one link is the active link and all others are dormant links.
Subway WLAN mesh configuration is basically the same with normal WLAN mesh configuration. Note
the following when configuring subway WLAN mesh:
1) It is required to create a rail AP mesh policy:
