Specifying trap managers, Figure 261 s – Brocade Communications Systems Brocate Ethernet Access Switch 6910 User Manual
Page 994
944
Brocade 6910 Ethernet Access Switch Configuration Guide
53-1002581-01
Simple Network Management Protocol
42
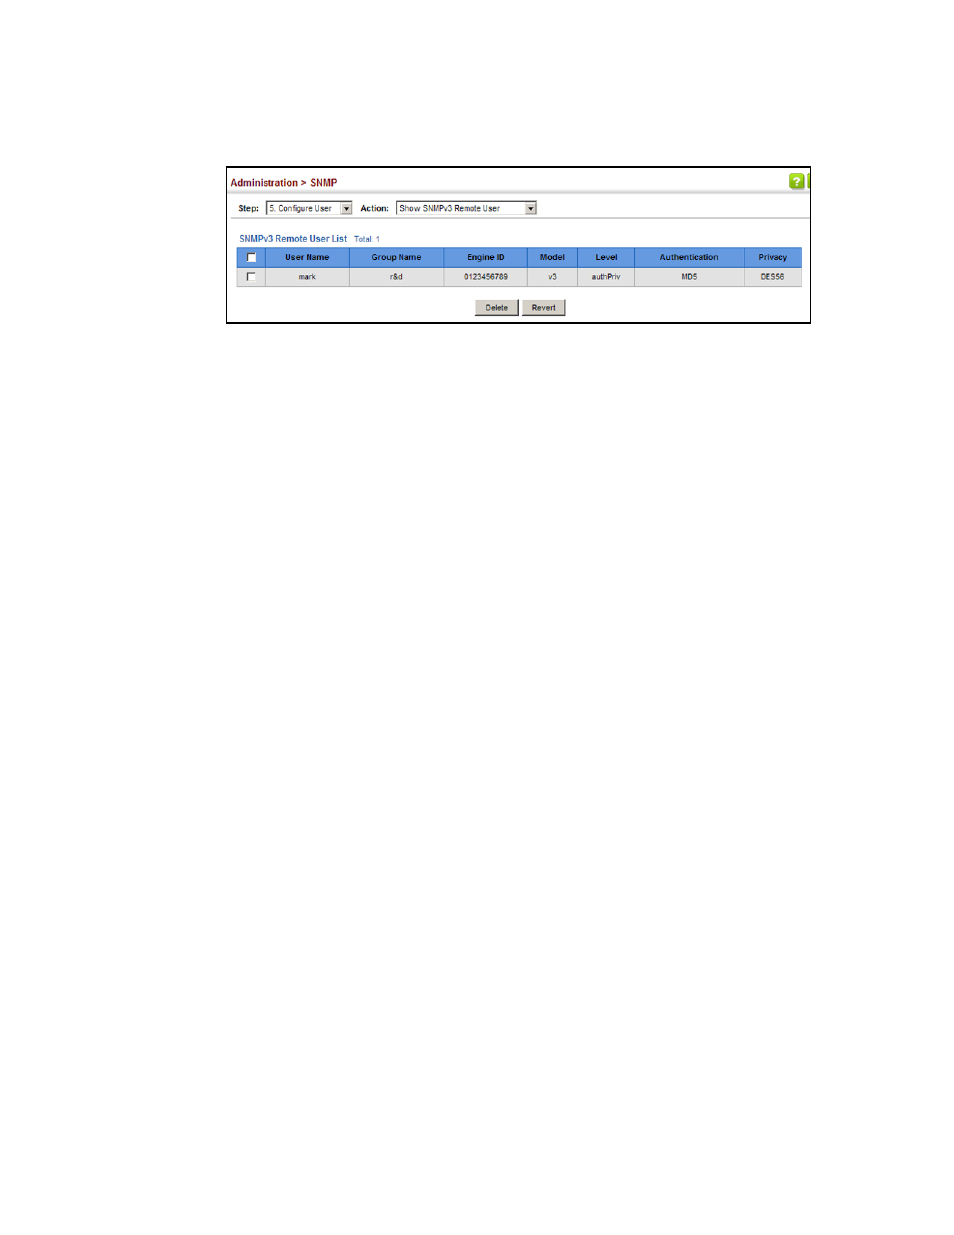
FIGURE 261
Showing Remote SNMPv3 Users
Specifying Trap Managers
Use the Administration > SNMP (Configure Trap) page to specify the host devices to be sent traps
and the types of traps to send. Traps indicating status changes are issued by the switch to the
specified trap managers. You must specify trap managers so that key events are reported by this
switch to your management station (using network management software). You can specify up to
five management stations that will receive authentication failure messages and other trap
messages from the switch.
CLI References
•
•
Command Usage
•
Notifications are issued by the switch as trap messages by default. The recipient of a trap
message does not send a response to the switch. Traps are therefore not as reliable as inform
messages, which include a request for acknowledgement of receipt. Informs can be used to
ensure that critical information is received by the host. However, note that informs consume
more system resources because they must be kept in memory until a response is received.
Informs also add to network traffic. You should consider these effects when deciding whether
to issue notifications as traps or informs.
To send an inform to a SNMPv2c host, complete these steps:
1. Enable the SNMP agent (
2. Create a view with the required notification messages (
3. Configure the group (matching the community string specified on the Configure Trap - Add
page) to include the required notify view (
4. Enable trap informs as described in the following pages.
To send an inform to a SNMPv3 host, complete these steps:
1. Enable the SNMP agent (
2. Create a local SNMPv3 user to use in the message exchange process (
). If the
user specified in the trap configuration page does not exist, an SNMPv3 group will be
automatically created using the name of the specified local user, and default settings for
the read, write, and notify view.
3. Create a view with the required notification messages (
4. Create a group that includes the required notify view (
).