Screen reference, On this form – Interlogix VEREX Director User Manual
Page 80
72
Verex Director V4.9.1 User's Guide
21-0381E v4.9.1
Step 3b: Set Up Event-Triggered
Camera-Views
Doors and sensors on maps can be associated
with a 'camera-view' to trigger a camera when
selected events occur at the device (access
denied, sensor tripped, etc.).
Notes: This feature pertains to individual 'views' (i.e.,
the map and 'camera-views' must be on the same
'View', and the camera images will be visible only when
that 'view' is displayed. Conversely, "Advanced
Camera Settings" (camera-view assignments) on a
specific map will apply to ALL 'views' that contain the
same map, though the camera(s) will be visible only for
'views' that contain the target 'camera-view'.
Panel Firmware: This feature requires panel firmware
version 4.15 or 4.2 (where available) or newer.
Overview of Steps:
Define maps (1a), cameras (1b), and
camera-views (1c).
Define view(s) and arrange the desired
maps, cameras, and/or 'camera-views'
therein (2).
Place items such as doors and sensors
(input points) onto the maps (3a).
Set "Advanced Camera Settings" for each
device that is to trigger a camera (to follow).
Topic Locator:
MyTools Bar: Customize Maps, and (login
with a user name & ID if needed).
In the Tree: Click your site/account button in
the tree, open Control & Status, and Panel
Control & Status (click the "+"), and login with
your user ID and PIN if prompted for this.
Then, select: "Visual Director" (click the "+"),
Customize Maps.
Multi-Account Systems: First select [Account
Folders] in the 'tree', and double-click the desired
account.
Then, right-click the item (door or sensor), and
select
Advanced Camera Settings
from the
pop-up menu.
Now, refer to the details for this screen while
viewing or changing settings as desired.
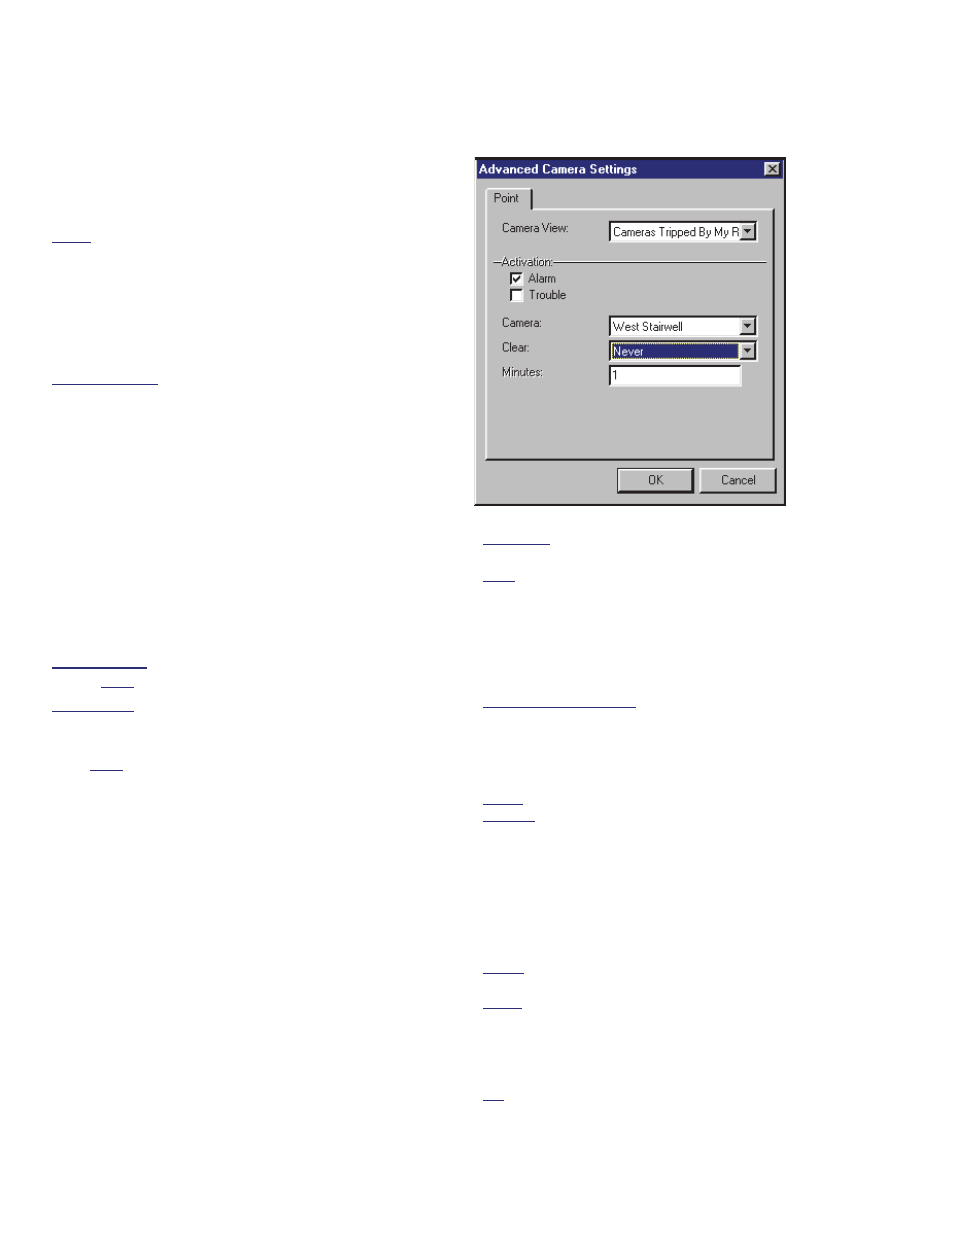
Screen Reference
- Camera View: A previously-defined placeholder
that determines where the camera image will
appear. (Each camera-view shows the last-
triggered camera associated with it.)
Exception: Camera-views close when you select a
different 'view', or move to a different screen/topic.
Note: For a camera-image that cannot be overwritten
by another one, use :
A fixed camera (step 2); A
link to a fixed camera (step 3a), or;
Set up a
'camera-view' that will not be used with any other
cameras (steps 1c & 3b).
On This Form
Door with two Readers: The following sections are
available separately for each reader.
- Activation: Select the states/conditions that you
wish to trigger the camera (e.g., alarm, trouble,
access denied, etc.);
Alarm: Forced entry, door held open too long, etc.
Trouble: Door sensor circuit problems (e.g., cut or
shorted wiring).
- Camera: Select the camera that is to be
displayed when the selected event(s) occur at
the specific door or sensor;
- Clear: Whether or not the camera image is to be
closed/cleared automatically after a certain
period of time;
Never: The camera image will be left in place (until
you select a different view, or select some other task).
Timer: The camera image will remain only for the
number of minutes that you select below (or until you
select a different view, etc.).
- Minutes: With "Clear" set as "Timer", enter the
number of minutes here (1 – 1440).
Tip: 1440 minutes is one day (24 hours).
Visual Director Customize Maps
(right-click an item)
Advanced Camera Settings