Avago Technologies MegaRAID Fast Path Software User Manual
Page 120
Page 120
LSI Corporation Confidential
|
July 2011
MegaRAID SAS Software User Guide
Chapter 4: WebBIOS Configuration Utility
|
CacheCade Configuration
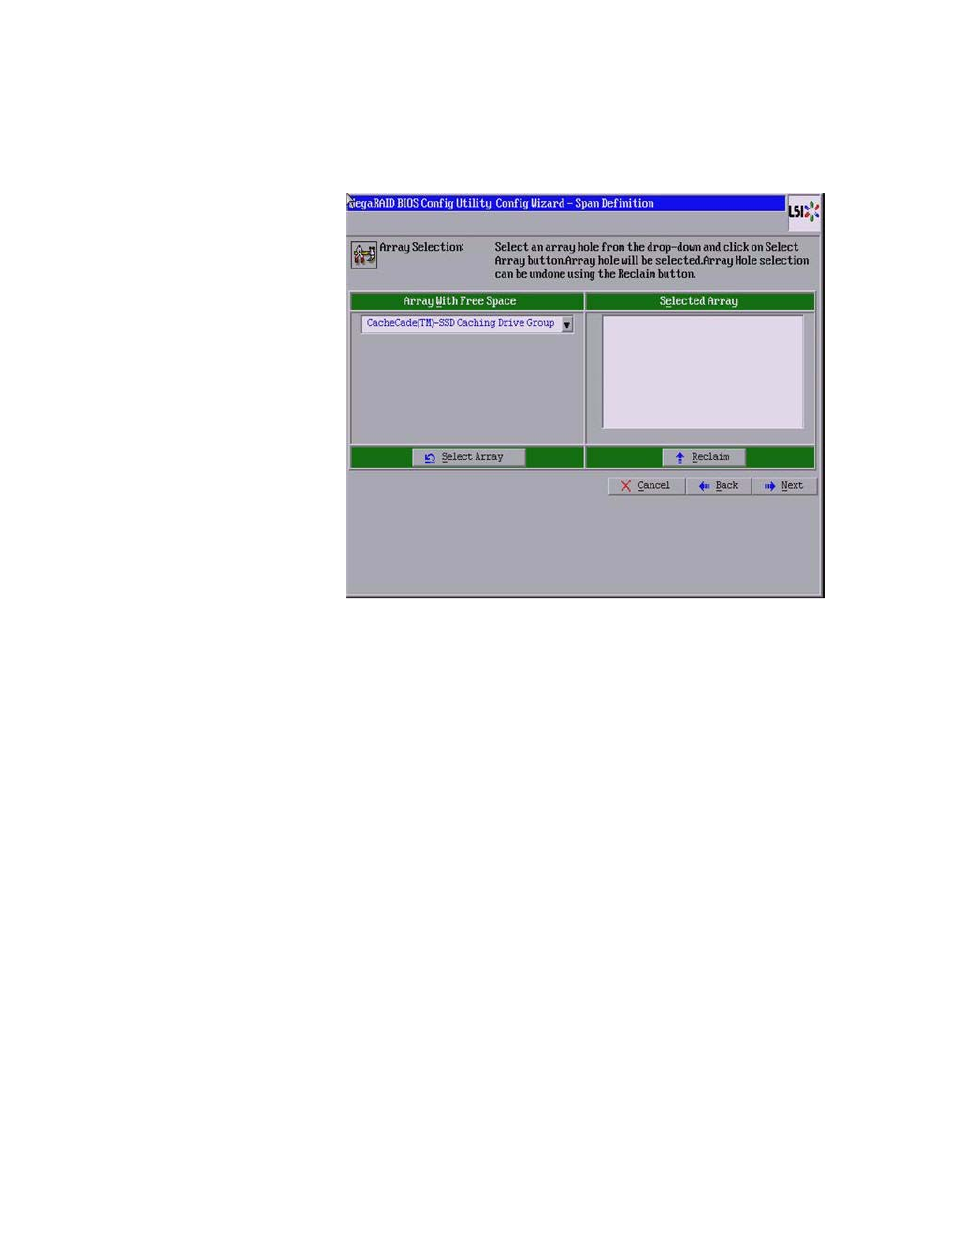
Figure 69:
Span Definition
7. Select an array from Array With Free Space and click Select Array.
8. Click Next.
9. Select a RAID level from the RAID Level drop-down list.
10. Select a write policy from the Write Policy drop-down list.
— Write Back: In Write Back mode, the CacheCade virtual drive is used for both
read as well as write cache. However, if the CacheCade virtual drive becomes
degraded, the CacheCade virtual drive will be used only as read cache. This is
the default write policy.
— Write Through: In Write Through mode, the CacheCade virtual drive is used as
read only cache.
— Always Write Back: In Always Write Back mode, the CacheCade virtual drive is
used for both read and write cache.
11. Click Accept. A confirmation screen appears asking you to confirm your selections.
12. Click Yes to confirm and click Next. The Configuration Preview screen appears.
13. Click Accept. A confirmation screen appears asking if you want to save your
configuration.
14. Click Yes. Your configuration is saved, and you are taken back to the WebBIOS CU
main screen. The new CacheCade drive group appears in the frame under Logical
View.
4.6.2.1
Modifying CacheCade
Pro 2.0 Virtual Drive Properties
You can modify the default write policy of a CacheCade virtual drive. You can also
delete a CacheCade virtual drive.
Perform the following steps to modify the CacheCade virtual drive properties:
- MegaRAID SAS 9240-4i MegaRAID SAS 9240-8i MegaRAID SAS 9260-16i MegaRAID SAS 9260-4i MegaRAID SAS 9260-8i MegaRAID SAS 9261-8i MegaRAID SAS 9280-16i4e MegaRAID SAS 9280-4i4e MegaRAID SAS 9280-8e MegaRAID SafeStore Software MegaRAID SAS 9361-4i MegaRAID SAS 9361-8i MegaRAID SAS 9266-4i MegaRAID SAS 9266-8i MegaRAID SAS 9270-8i MegaRAID SAS 9271-4i MegaRAID SAS 9271-8i MegaRAID SAS 9271-8iCC MegaRAID SAS 9286-8e MegaRAID SAS 9286CV-8e MegaRAID SAS 9286CV-8eCC MegaRAID CacheCade Pro 2.0 Software MegaRAID SAS 9341-4i MegaRAID SAS 9341-8i MegaRAID SAS 9380-8e MegaRAID SAS 9380-4i4e