Adding or modifying port vlans – Brocade Network Advisor SAN User Manual v12.1.0 User Manual
Page 975
Brocade Network Advisor SAN User Manual
927
53-1002948-01
Port VLANs
26
Adding or modifying port VLANs
To create or
modify port VLANs, complete the following steps.
1. On the VLAN Manager dialog box, click the VLAN View or Product View tab to enable the Add
button.
2. Click Add to add port VLANs or click Edit to modify existing port VLANs.
The Ports tab of the Add VLAN dialog box, shown in
Figure 405
, displays.
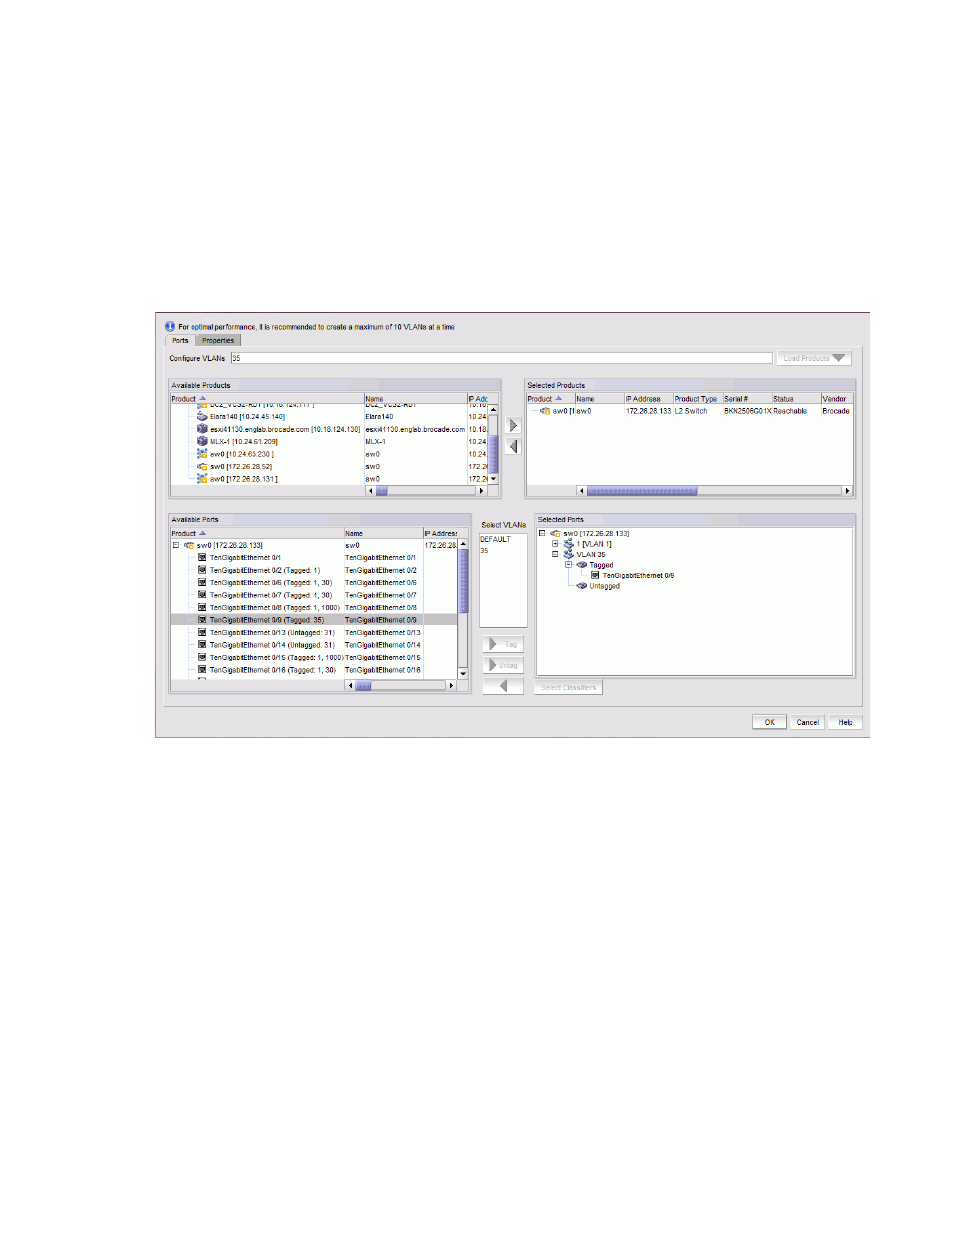
FIGURE 405
Add VLAN dialog box - Ports tab
3. Enter a VLAN ID in the Configure VLAN field.
You can enter more than one ID either by range (for example, 10-20, 30-40) or by separating
individual IDs with a comma (for example, 10, 45, 79, 30). For DCB products, the VLAN ID
range is from 1 through 3583 .
4. Click the Load Products button. Products that already have the entered VLAN IDs configured on
them are automatically moved to the Selected Products list. The Load Products button is
disabled by default.
5. Under the Available Products list, select one or more products to which the VLAN will be
assigned. You can also use the Search tool to find ports.
6. Click the right arrow button to move your selection to the Selected Products list.
7. Expand the folder for a selected product in the Available Ports list to display all the interfaces
or trunk groups on the product that can be added to the VLAN.
The Selected Ports list displays the list of configured VLANs. Initially, these VLANs contain no
ports. If no ports or trunk groups are selected, an empty VLAN is created on the products (DCB
and NOS products).