View files and folders – Adobe Dreamweaver CC 2014 v.13 User Manual
Page 420

Put File(s) Copies the selected files from the local site to the remote site.
Note: The files Dreamweaver copies are the files you select in the active pane of the Files panel. If the Local pane is active, the selected local
files are copied to the remote site or testing server; if the Remote pane is active, Dreamweaver copies the local versions of the selected remote
server files to the remote site.
If you are putting a file that doesn’t already exist on the remote site, and Enable File Check In and Out is enabled, the file is added to the remote
site as “checked out.” Click the Check In Files button if you want to add a file without the checked out status.
Check Out File(s) Transfers a copy of the file from the remote server to your local site (overwriting the existing local copy of the file, if any) and
marks the file as checked out on the server. This option is not available if Enable File Check In and Check Out in the Site Definitions dialog box is
disabled for the current site.
Check In File(s) Transfers a copy of the local file to the remote server and makes the file available for editing by others. The local file becomes
read-only. This option is not available if the Enable File Check In and Check Out option in the Site Definitions dialog box is disabled for the current
site.
Synchronize Synchronizes the files between the local and remote folders.
The Expand/Collapse button Expands or collapses the Files panel to display one or two panes.
View files and folders
You can view files and folders in the Files panel, whether they are associated with a Dreamweaver site or not. When you view sites, files, or
folders in the Files panel, you can change the size of the viewing area, and, for Dreamweaver sites, you can expand or collapse the Files panel.
For Dreamweaver sites, you can also customize the Files panel by changing the view—either your local or remote site—that appears by default in
the collapsed panel. Or, you can switch the content views in the expanded Files panel using the Always Show option.
Open or close the Files panel
Select Window > Files.
Search files in the files panel (Mac OS, Creative Cloud users only)
Use Live Search to locate files based on filename or text present in files. The site selected in the Files panel is used for search. If there is no site
selected in the panel, the search option does not appear. For more information, see
Expand or collapse the Files panel (Dreamweaver sites only)
In the Files panel (Window > Files), click the Expand/Collapse button
in the toolbar.
Note: If you click the Expand/Collapse button to expand the panel while it is docked, the panel maximizes so that you cannot work in the
Document window. To return to the Document window, click the Expand/Collapse button again to collapse the panel. If you click the
Expand/Collapse button to expand the panel while it is not docked, you can still work in the Document window. Before you can dock the panel
again, you must first collapse it.
When the Files panel is collapsed it displays the contents of the local site, the remote site, or the testing server as a list of files. When expanded, it
displays the local site and either the remote site or testing server.
Change the size of the view area in the expanded Files panel
In the Files panel (Window > Files), with the panel expanded, do one of the following:
Drag the bar that separates the two views to increase or decrease the view area of the right or left pane.
Use the scroll bars at the bottom of the Files panel to scroll through the views’ contents.
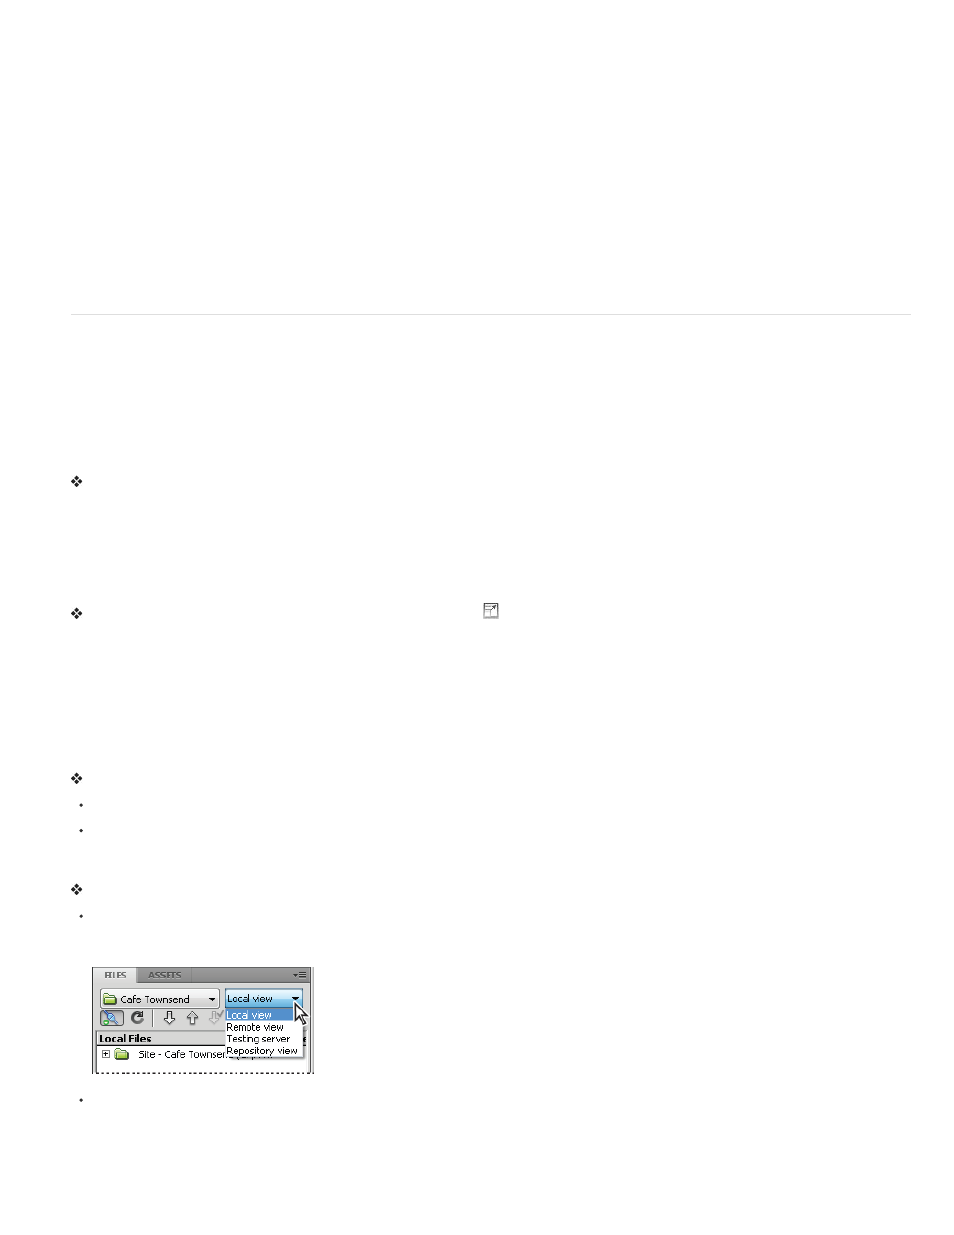
Change the site view in Files panel (Dreamweaver sites only)
Do one of the following:
In the collapsed Files panel (Window > Files), select Local View, Remote View, Testing Server, or Repository View from the Site View
pop-up menu.
Note: Local View appears in the Site View menu by default.
In the expanded Files panel (Window > Files), click the Site Files button (for the remote site), the Testing Server button, or the Repository
Files button.
413
