Yokogawa DAQWORX User Manual
Page 259
8-2
IM WX104-01E
Openng the CX Confgurator by Confgurng a New System
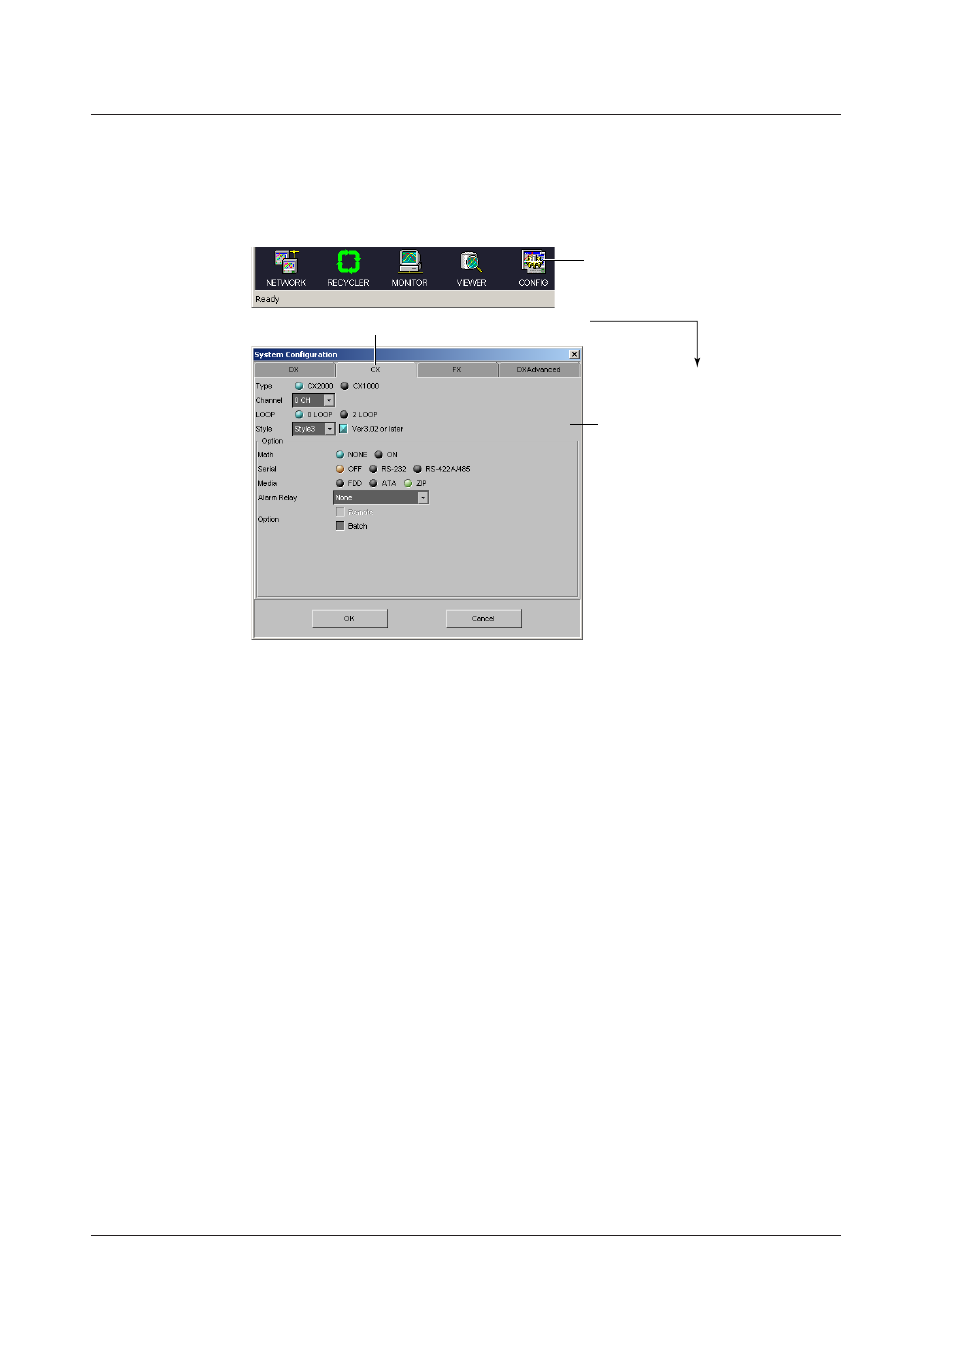
If you wish to create a new setup data file independent from the connected CX, double-
click the [CONFIG] icon on the DAQ desktop or select [New] from the [File] menu on
the CX Configurator to open the [System Configuration] dialog box. Then, configure the
system and open the CX Configurator.
2. The [System Configuration] dialog box
opens.
1. Double-click the CONFIG icon
on the desktop.
3. Click the appropriate items
and click the [OK] button to open
the Configurator screen.
CX tab
You can enter the following settings in this dialog box.
• Type
Select CX2000 or CX1000.
• Channel
Select the number of channels on the CX.
For CX1000, select [0CH] (when the style is set to Style2 or later) or [6CH].
For CX2000, select [0CH] (when the style is set to Style2 or later), [10CH], or [20CH].
• LOOP
Select the number of loops on the CX.
CX1000: [0LOOP] or [2LOOP]
CX2000: [0LOOP], [2LOOP], [4LOOP], or [6LOOP]
• Style
Select the CX style number. Depending on the style number, a version (example:
Version 3.02 or later) check box appears to the right.
• Math Func.
Enable/Disable the math function.
• Serial
Select the serial communications mode: [OFF], [RS-232], or [RS-422/485].
• Media
Select the external storage media: [FDD], [ATA], or [ZIP].
• Alarm Relay
Select the type of alarm relay: [NONE], [4p+With Fail/Mem. End], [6p], or [External
Loop] (only when the number of loops is 0 on the CX2000). The selectable items vary
depending on the Type, Channel, and LOOP settings.
If the number of loops is set to [2LOOP] on the CX1000, the alarm relay is fixed to
[NONE].
8.1 Startng the Hardware Confgurator (Openng the Hardware Confgurator Wndow)