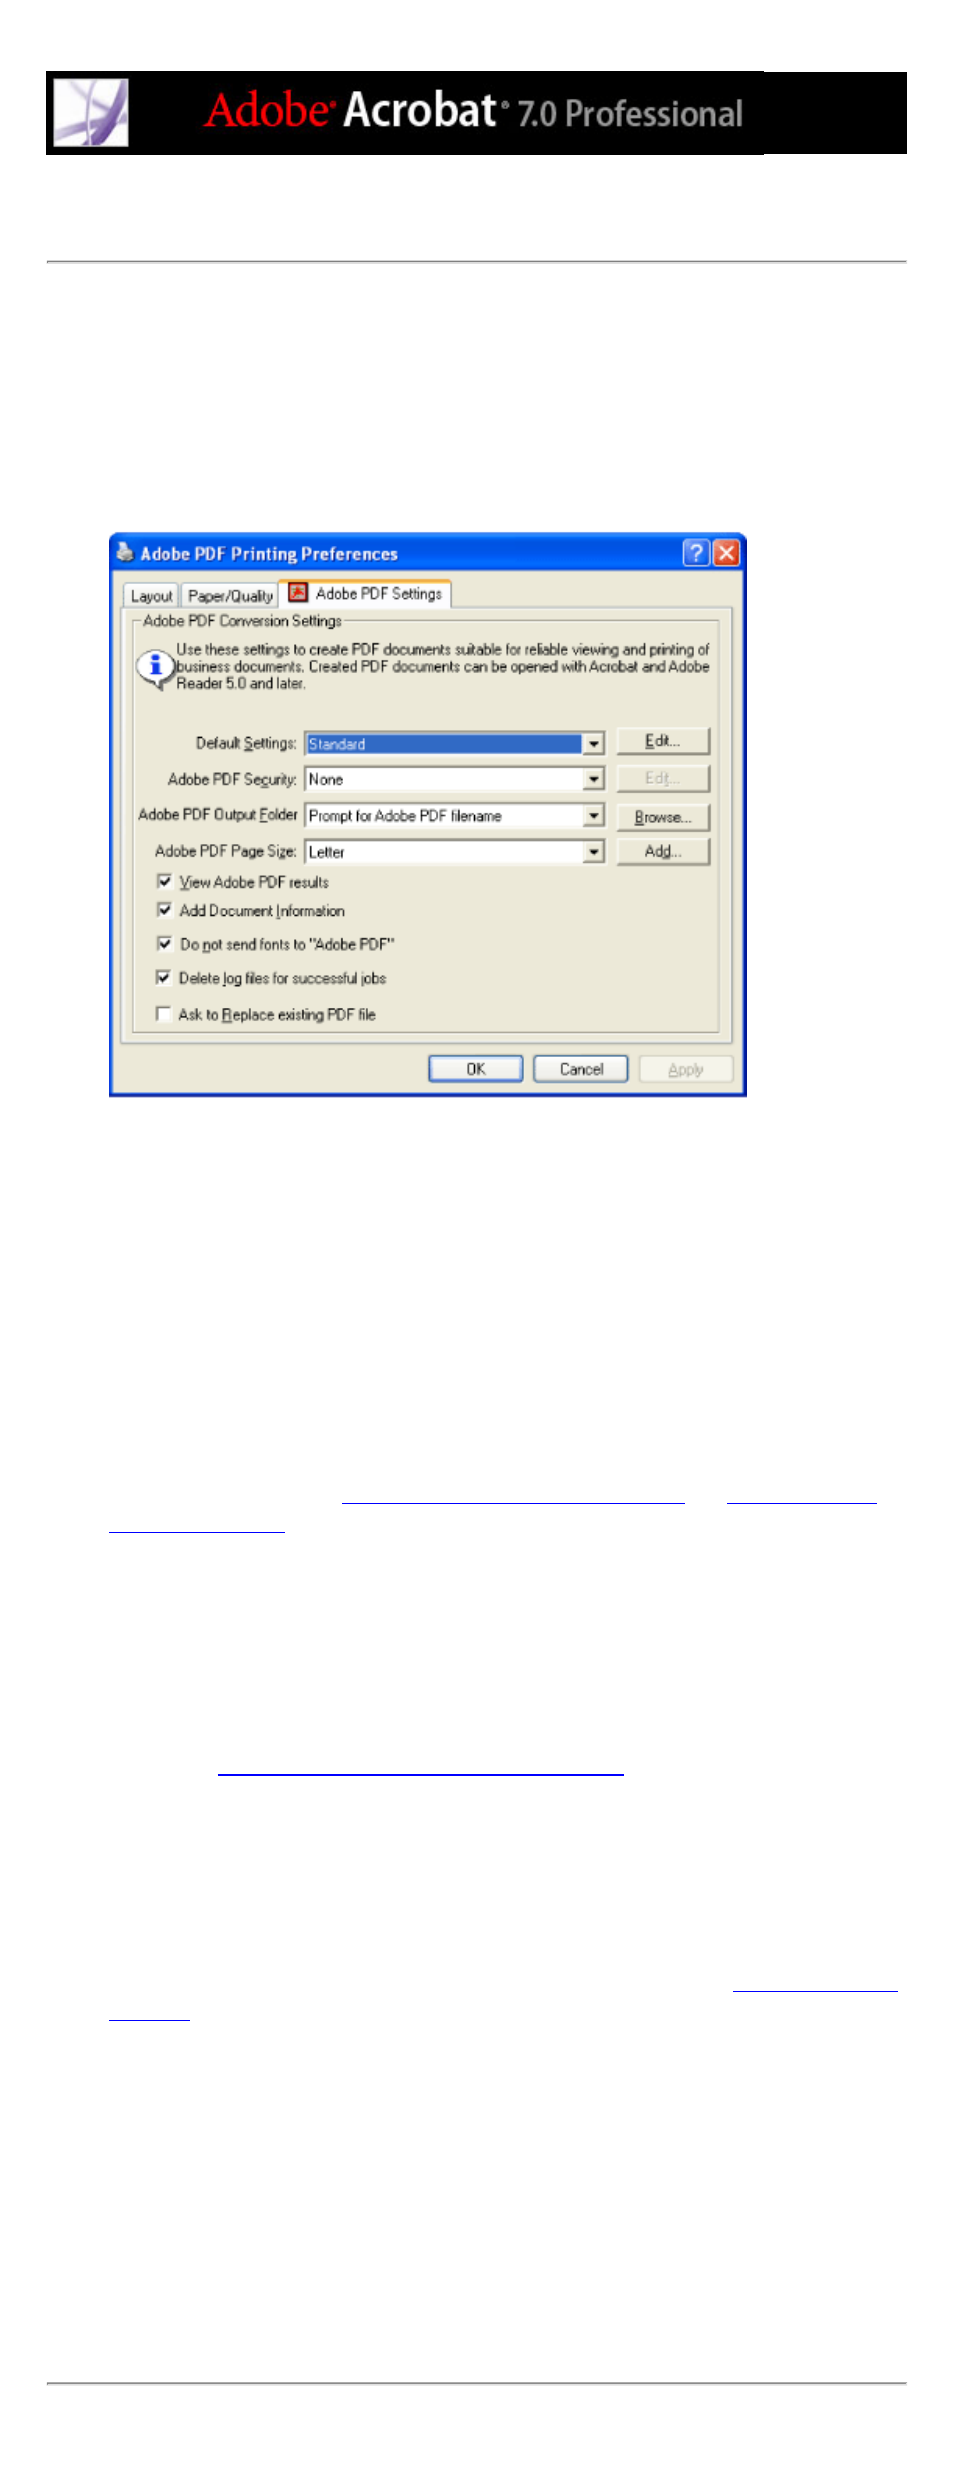
Setting adobe pdf printing preferences (windows), Printing preferences, Adobe pdf settings. see adobe pdf options – Adobe Acrobat 7 Professional User Manual
Page 106: Preferences, adobe pdf printer

Setting Adobe PDF printing preferences (Windows)
Printing preferences apply to all applications that use the Adobe PDF printer, unless you
change the settings in an authoring application by using the Page Setup, Document Setup,
or Print menus.
Note: The dialog box for setting printing preferences is named either Adobe PDF Printing
Preferences, Adobe PDF Printing Defaults, or Adobe PDF Document Properties,
depending on how you access it.
Setting preferences for the Adobe PDF printer
To set Adobe PDF printing preferences:
1. Do one of the following to open the dialog box:
●
Open the Printers or Printer And Faxes window from the Start menu. Right-click the
Adobe PDF printer, and choose Printing Preferences.
●
In an authoring application such as Adobe InDesign, choose File > Print. Select Adobe
PDF as the printer, and click the Properties (or Preferences) button. (In some applications,
you may need to click Setup in the Print dialog box to access the list of printers, and then
click Properties or Preferences to customize the Adobe PDF settings.)
2. In the Adobe PDF Settings tab, specify conversion settings. You can select a predefined
set of options from the Default Settings menu or click Edit to view or change the settings
in the Adobe PDF Settings dialog box. These options match the Distiller default settings.
For more information, see
Using default Adobe PDF settings files
3. To add security to the PDF file, choose one of the following options from the Adobe PDF
Security menu:
●
Reconfirm Security For Each Job opens the Adobe PDF - Security dialog box each time
you create a PDF file using Adobe PDF printer. Specify settings in the dialog box.
●
Use The Last Known Security Settings uses the same security settings as the last time a
PDF file was created using Adobe PDF printer on your machine.
To view or change the security settings, click Edit. For information on setting security
options, see
Adding passwords and setting security options
.
4. Choose an output folder for the converted PDF file using one of the following methods:
●
Select a folder from the Adobe PDF Output Folder menu.
●
Click Browse to add or change the output folder.
●
Choose Prompt For Adobe PDF Filename to specify a location and file name at
conversion time.
5. Choose a page size from the Adobe PDF Page Size menu. Any custom page sizes that you
have defined are listed on this menu. To define a custom page size, see
6. Select any of the following options:
●
View Adobe PDF Results automatically starts Acrobat and displays the converted
document immediately.
●
Add Document Information includes information such as the file name and date and time
of creation.
●
Do Not Send Fonts To "Adobe PDF." Check this option if you are creating a PostScript
file.
●
Delete Log Files For Successful Jobs automatically deletes the log files unless the job
failed.
●
Ask To Replace Existing PDF File displays a dialog box that warns you when you are
about to overwrite an existing PDF file with a file of the same name.
7. Set options on the Layout and Paper Quality tabs, as necessary.
