Press, Then press, The display changes as follows – Rockwell Automation 1747-PT1, D1747NP002 Hand-Held Terminal User Manual
Page 104
Chapter 6
Creating a Program
6–6
4. Press
[F3]
, OTHER. For the RIO Scanner Module, enter the module ID
code. Type
13608
, then press
[ENTER]
. (For some module ID codes, the
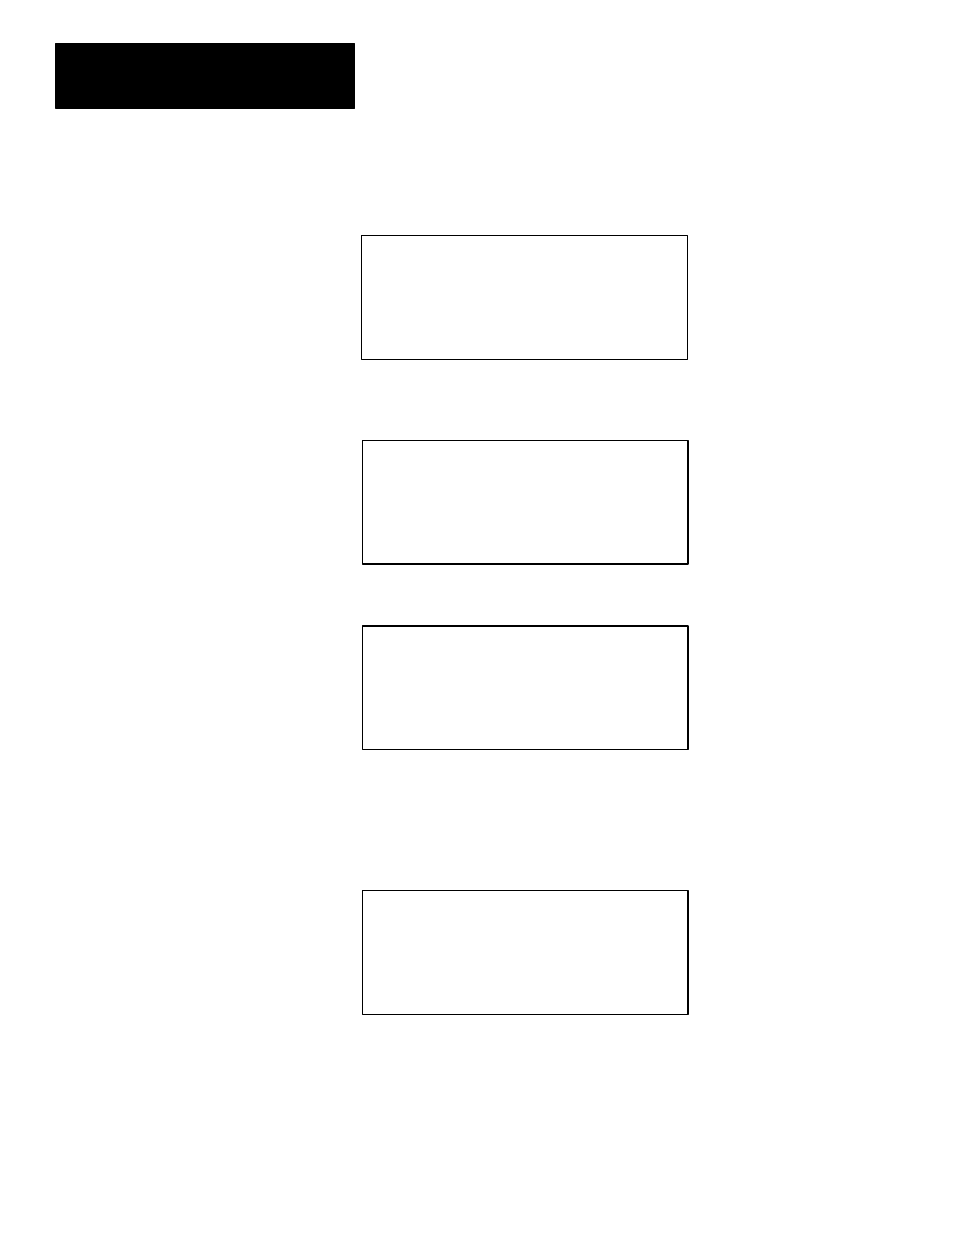
HHT may request additional information). The next display appears:
Rack 1 = 1746–A7
7–SLOT RACK
Rack 2 = NONE
Rack 3 = NONE
Slot 0 = 1747–L524
CPU–4K USER MEMORY
Slot 6 = OTHER 13608
F1
F2
F3
F4
F5
MOD_RCK MOD_SLT DEL_SLT UND_SLT
ADV_SET
5. Press
[F5]
, ADV_SET to view or modify the RIO scanner module’s
parameters:
–––––– Advanced I/O Configuration ––––––
Current Subroutine File:
0
Current Configuration File:
G6
F1
F2
F3
F4
F5
OFL
INT_SBR MOD_SET
CFG_SIZ ADV_SIZ
6. Press
[F4]
, ADV_SIZ to view or modify the I/O and M0/M1 file sizes:
–––––––– Advanced I/O Size Setup ––––––––
Note: All sizes are in words. Slot = 6
Output Size:
32
M0 File Size:
0
Input Size:
32
M1 File Size:
0
Scanned Output Size:
32
Scanned Input Size:
32
ENTER SCANNED OUTPUT:
32
F1
F2
F3
F4
F5
OFL
The default for the scanned output size is 32 words. In this example, to
reduce the processor scan time, enter 16 words.
7. Type
16
, then press
[ENTER]
.
The display changes as follows:
–––––––– Advanced I/O Size Setup ––––––––
Note: All sizes are in words. Slot = 6
Output Size:
32
M0 File Size:
0
Input Size:
32
M1 File Size:
0
Scanned Output Size:
16
Scanned Input Size:
32
ENTER SCANNED INPUT:
32
F1
F2
F3
F4
F5
OFL
8. View or modify the remaining parameters by pressing
[ENTER]
. See the
Remote I/O Scanner User Manual, catalog number 1747–NM005, for
specific values.