Konica Minolta bizhub PRESS C8000e User Manual
Page 384
9.9
[03 Finisher Adjustment] (Finisher FS-612)
9
bizhub PRESS C8000/e
9-66
9.9.3
[03 Punch Adjustment] - [01 Vertical Position Adj.]
Adjust the misalignment in center positions of paper and punch holes for each paper size if needed, when
using Finisher FS-612.
Objects of adjustment: Full Area, A3 w, B4 w, A4 w/v, B5 w/v, A5 w/v, 11 e 17 w, 8.5 e 14 w,
8.5 e 11 w/v, 5.5 e 8.5 w/v, 8.125 e 13.25 w, 8.5 e 13 w, 8.25 e 13 w, 8 e 13 w, 8K w, 16K w/v, 9 e 11 v
1
Press [Adjustment] on the Machine Screen to display the Adjustment Menu Screen.
2
Press [03 Finisher Adjustment], [03 Punch Adjustment], and [01 Vertical Position Adj.] in sequence.
The Vertical Position Adjustment Screen will be displayed.
3
Select the size to be adjusted using [+] and [,] to scroll.
4
Press [Print Mode].
5
Load the paper size to be adjusted into a tray, then select that tray key.
6
Press Start on the control panel. A sample pattern will be output.
7
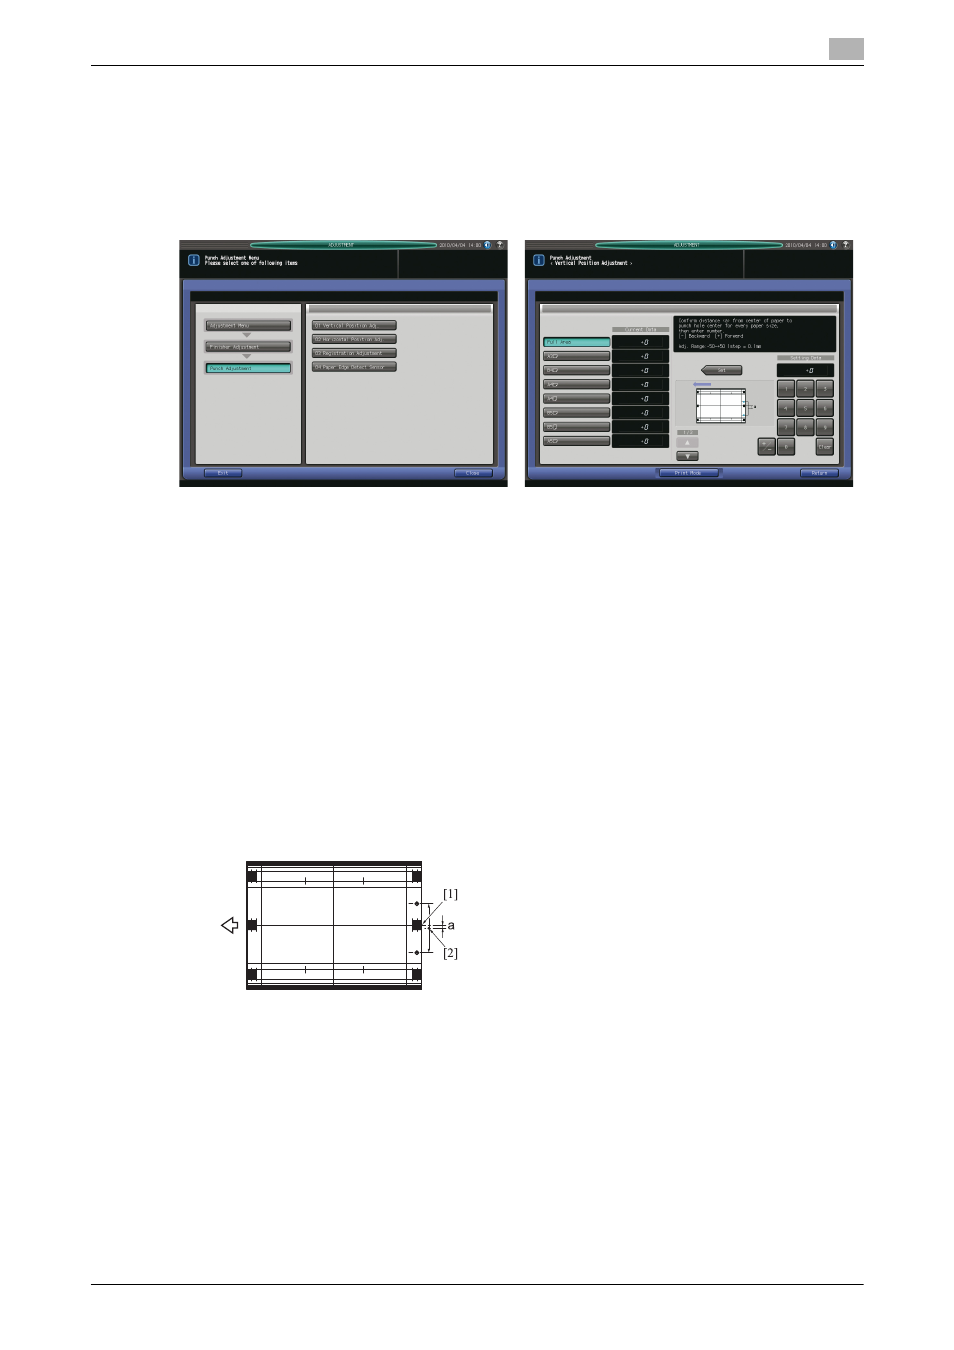
Measure the difference (a) between the center line of output sheet to the center position of punch holes.
Allowance: a = 0 +/- 2 mm
8
If any adjustment is required, press [Exit Print Mode] to return to the Vertical Position Adjustment
Screen.
9
Use the touch panel keypad or control panel keypad to enter the setting data.
% Use [+/-] to specify the value to be positive or negative.
% Press [Set] to change the current data.
% Adjustable range: -50 (Backward) to +50 (Forward) (1 step = 0.1 mm)
10
Repeat the steps from 4 to 9 until the desired result is obtained.
[1] Center of sheet [2] Center position of punch holes