Transferring the snapshot to the host system, Receiving the snapshot from disk or tape – HP Integrity NonStop H-Series User Manual
Page 205
Building and Applying a New Configuration
DSM/SCM User’s Guide — 529846-014
9 - 28
Transferring the Snapshot to the Host System
After the snapshot has been received into the host database, you can proceed to
Activating New Software on a Target System
Transferring the Snapshot to the Host System
To transfer the snapshot to the host system:
For networked systems not using an Expand connection, the snapshot is written to
a disk volume on the target system. To transfer it to the host system disk volume,
use a file-transfer program.
For non-networked systems, the snapshot is written to a magnetic tape. Manually
transport the tape to the host system. The operator transports the snapshot written
to tape to the planner.
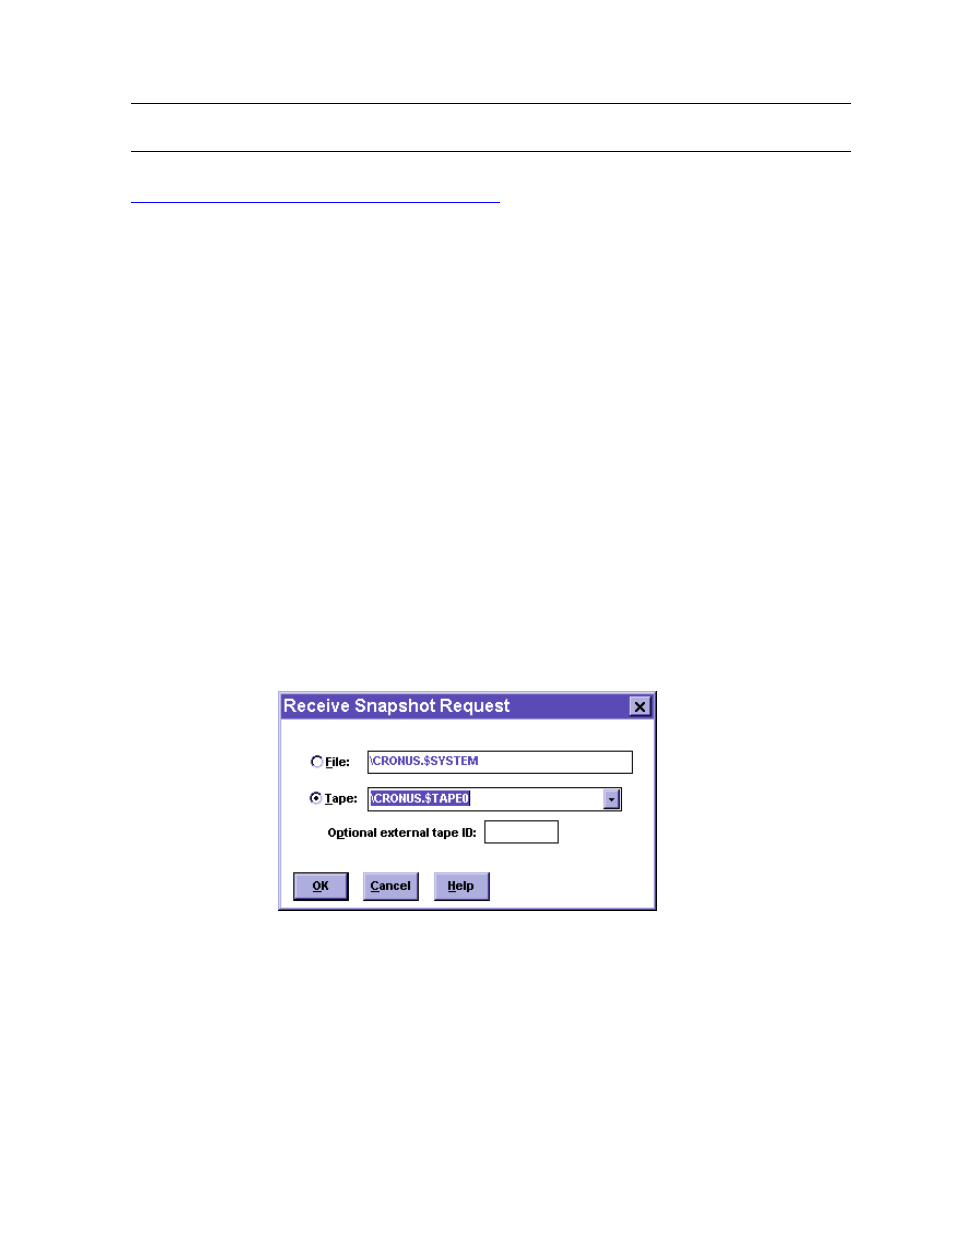
Receiving the Snapshot From Disk or Tape
On the host system, receive the snapshot into the host database and check the EMS
messages for the Apply request to confirm that the request completed successfully.
1. In the Configuration Revisions window, select the target for which you are receiving
the snapshot. (The configuration revision does not matter.)
2. Select Requests>Receive snapshot.
DSM/SCM displays the Receive Snapshot Request dialog box:
3. Select Requests>Receive snapshot.
DSM/SCM displays the Receive Snapshot Request dialog box.
4. Click OK to submit the Receive Snapshot request.
5. To check the EMS messages for the Apply request after receiving the snapshot
into the host database, select Requests>Requests list.
Note. For systems not connected using Expand, you can transfer the snapshot before or after
you activate the new software, but HP recommends that you do it before.
VST109.vsd