Logging in different hosts – CCTV Camera Pros Geovision 8.2 Multicam Digital Surveillance System User Manual
Page 332
318
The controls in the Remote E-Map window:
No. Name
Description
1
Login
Click to login up to 500 host servers.
2 Host
Information
Click to view the information of incoming events upon motion detected
and I/O devices triggered.
3
Previous
Click to go to the previous E-Map file.
4
Home
Click to back to the top of the tree view.
5
Next
Click to go to the next E-Map file.
6
ViewLog
Click to access the Remote ViewLog function.
7
Configure
Click to configure the Remote E-Map window.
8
Tree List
The list displays all created E-Map files and folders.
9
IP Address
Displays the IP Address of the connected host.
10
Flashing Icon
The flashing icon represents a triggered camera or I/O device.
11
Output Icon
Click to manually force the output device.
12
Camera/Dome Icon
Click to view the live video associated with that camera/dome.
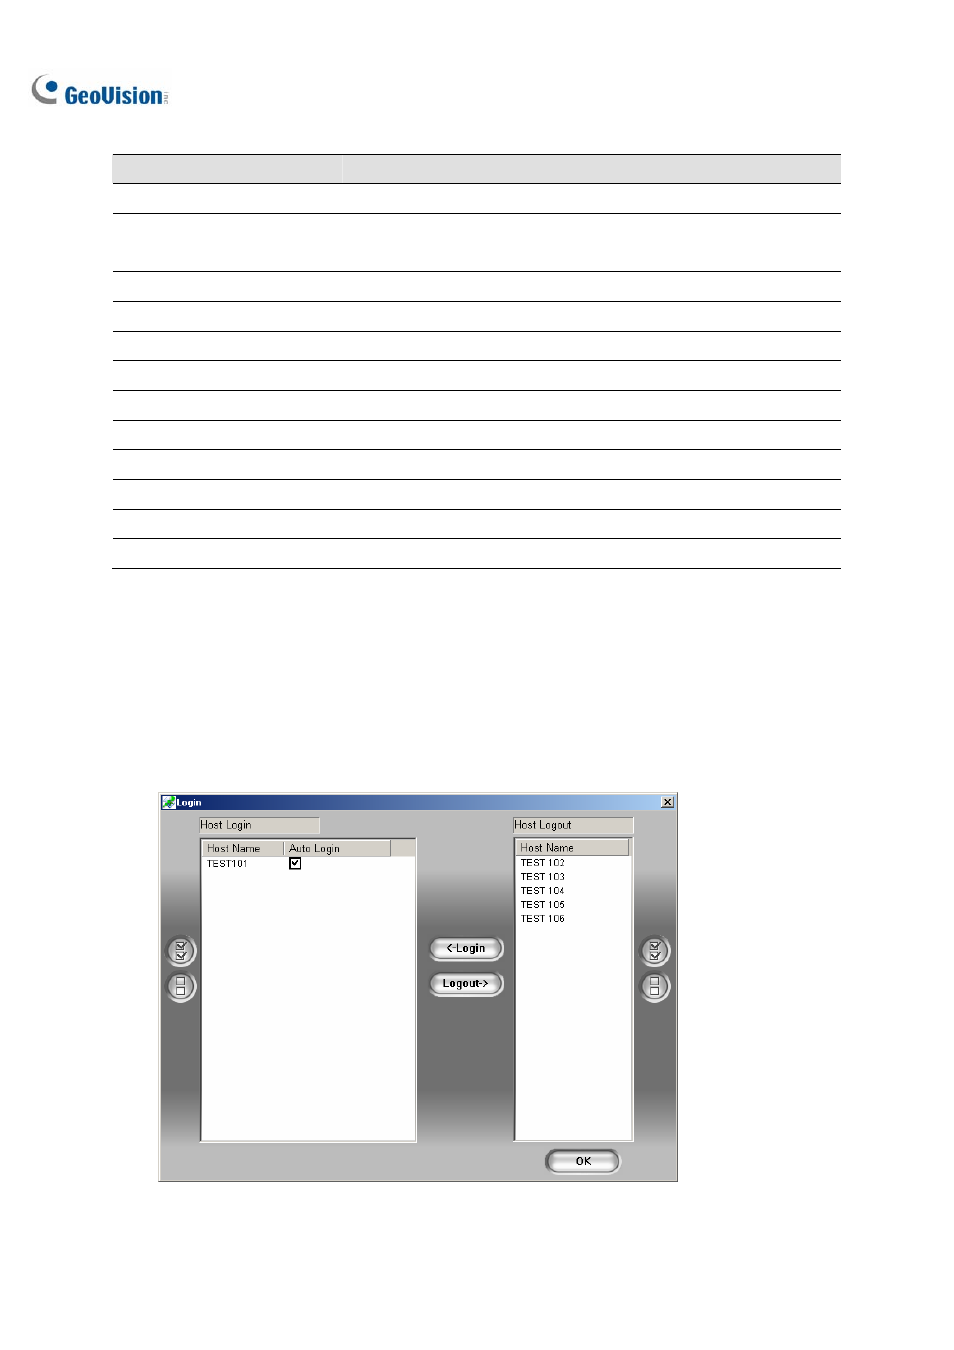
Logging in Different Hosts
When the client PC connects to the WebCam server, all the E-Maps saved in the local server will be
downloaded to the client PC, with the E-Map files of 500 hosts at most. The E-Maps created for remote
hosts can only function on WebCam after you log in these hosts. You can login 500 hosts at a time.
Click the Login button (No. 1, Figure 7-5) to display the following Login window.
Figure 7-6 Logging in different hosts