Grass Valley Maestro Master Control v.2.4.0 User Manual
Page 364
MAESTRO — User Manual
360
Visualization Tool
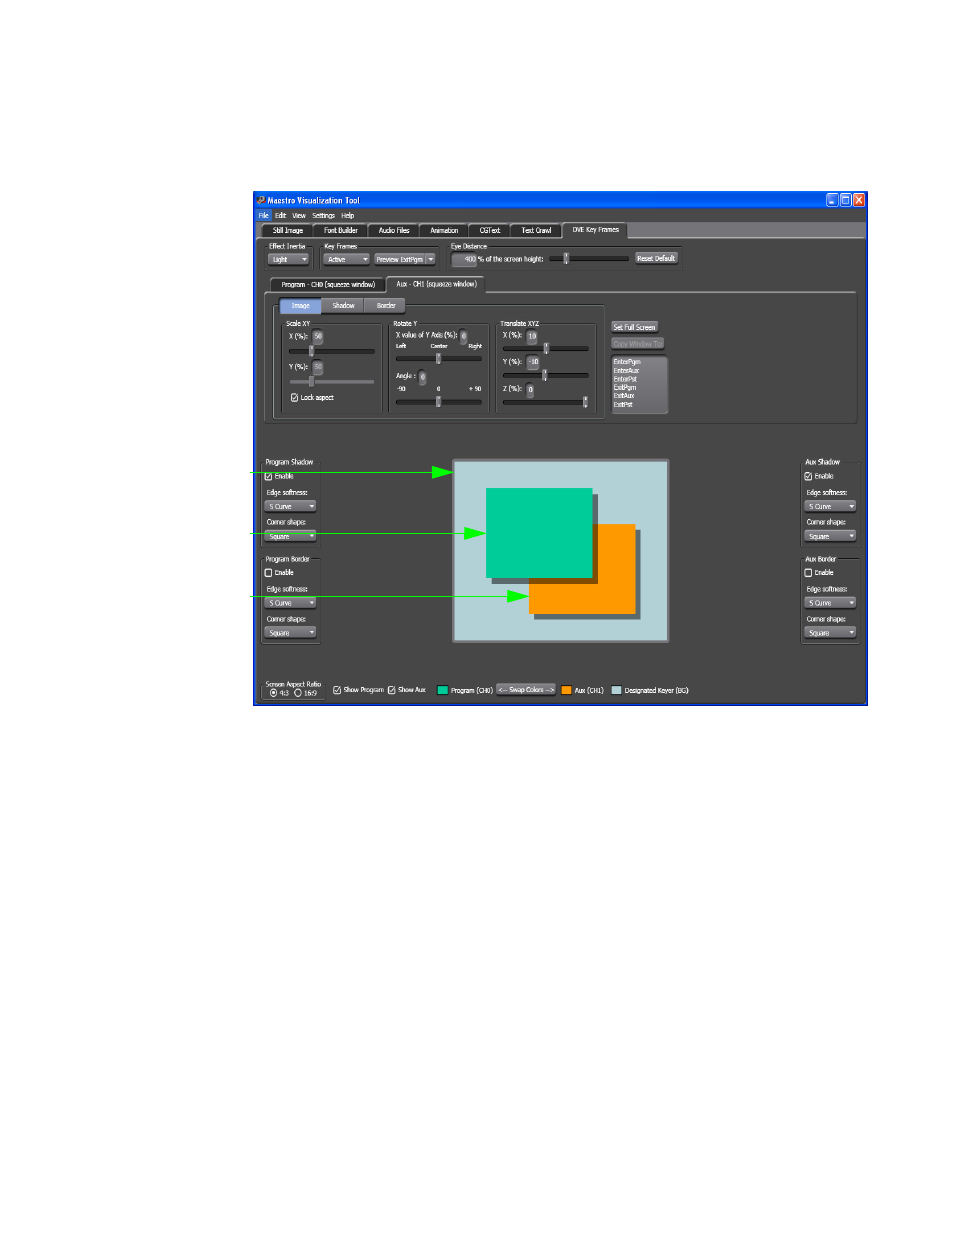
Note
The Keyframe EnterPGM preview was used to show the Shadow settings for
both the Program and AUX window.
Figure 261. AUX- CH1- Preview Settings- Shadow and Border Changes
The above steps are for the Program window; the AUX steps are the
same. The steps for the AUX window are not described here.
Selecting the Screen Aspect Ratio
Follow these steps to adjust the screen’s aspect ratio:
1.
Select the preferred ratio’s radio button.
2.
Select 4:3 for the standard aspect ratio.
3.
Select 16:9 for the wide-screen aspect ratio.
Changing the Program and AUX View
Follow these steps to change the Program and AUX views:
1.
Remove the check from the
Show Program
check box to hide the
Program’s window. Selecting, that is placing a check in the check box,
the
Show Program
check box will reveal the Program’s window.
Designated
Keyer
AUX Effect
Window
PGM Effect
Window
- Maestro Master Control v.2.2.0 Maestro Master Control v.2.3.0 7600REF v5.0 Installation 7600REF v3.0.0.8 Installation 7600REF v3.0.0.8 7600REF v5.0 7620PX-5 Installation 2012 7620PX Installation 2012 Kayenne Installation v.3.0 Kayenne K-Frame Installation v.6.0 Kayenne K-Frame Installation v.7.0 Kayenne K-Frame Installation v.8.0 Karrera K-Frame S-Series Installation v.8.0 Karrera Video Production Center Installation v.6.0 Karrera Video Production Center Installation v.7.0 Karrera Video Production Center Installation v.4.1 Karrera Video Production Center Installation v.4.0 Kayenne Installation v.4.0 7620PX 2012 7620PX-5 2012 7620PX 2008 MVMC 3G VMCR 3G 8900F GeckoFlex Frames Concerto Compact Routing System Concerto Routing Matrix v.1.8.1 Concerto Routing Matrix v.1.7.6.1 Concerto Routing Matrix v.1.7.5 GPIO-4848 Jupiter Maestro Master Control v.2.0.0 Maestro Master Control Installation v.2.0.0 Maestro Master Control Installation v.2.3.0 Maestro Master Control Installation v.2.4.0 KayenneKayenne v.2.0 v.2.0 Maestro Master Control Installation v.1.5.1