User-defined transition rates – Grass Valley Maestro Master Control v.2.4.0 User Manual
Page 186
MAESTRO User Manual
182
Transition Setup
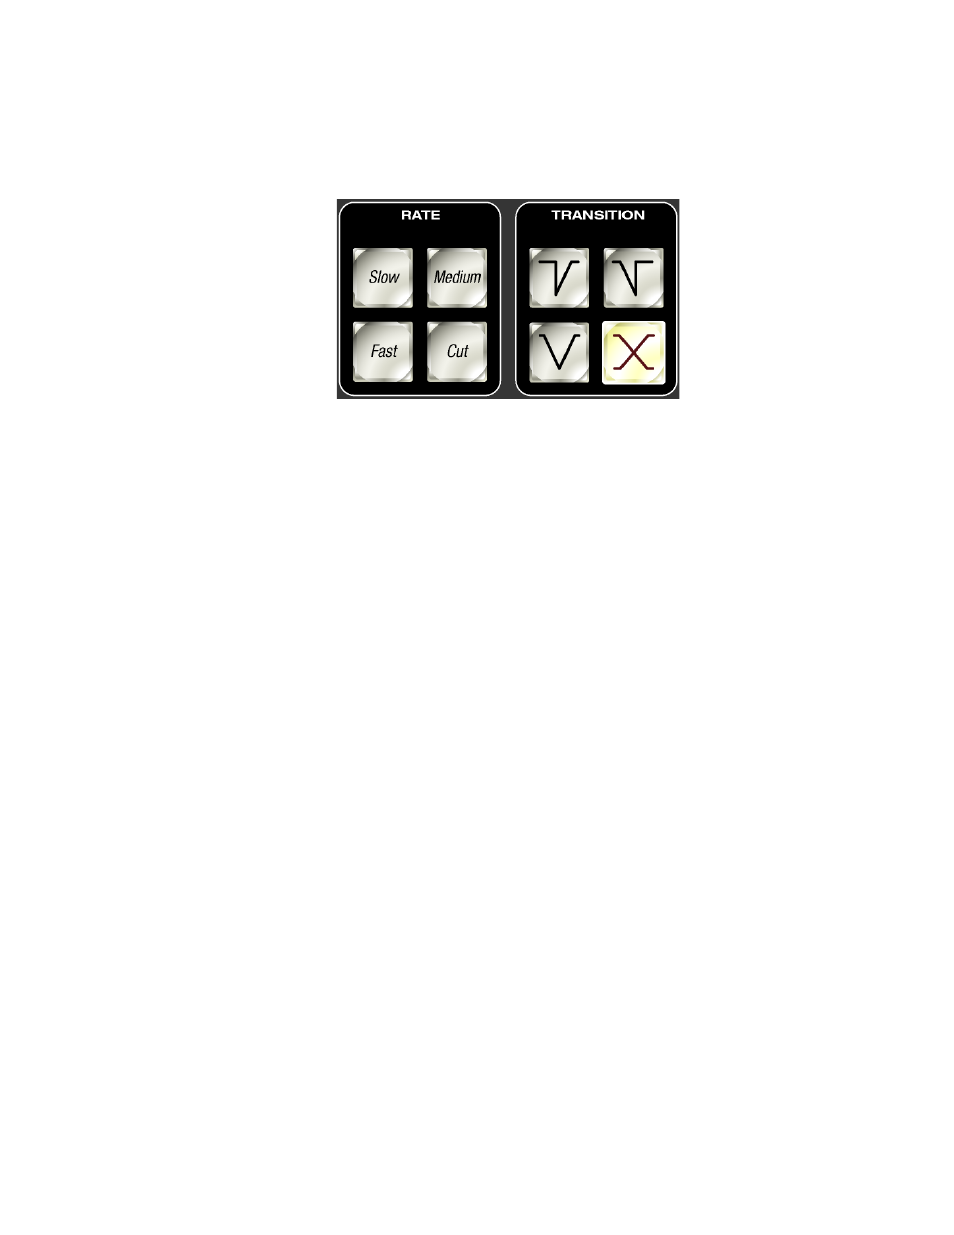
Press the preferred rate button. The time that is assigned to a rate button
appears in the Rate window, which is above the
Take
button.
Figure 110. Control Panel Rate and Transition Buttons
User-Defined Transition Rates
Although the control panel operator cannot modify the rates associated
with the
Slow
,
Medium,
and
Fast
transition rate buttons, a user-defined tran-
sition rate can be selected as follows:
1.
On the Source Assignment sub-panel enter the desired transition time
in the format seconds: frames by pressing the number pad buttons for
the desired time (See
).
Note
All of the significant digits must be entered. A transition time of 3 seconds
requires the entry of the digits 3, 0 and 0. Entering 3 only would result in a 3
frame transition.
2.
Press the
Send
button.
3.
Press the
Trans/D
button.
- Maestro Master Control v.2.2.0 Maestro Master Control v.2.3.0 7600REF v5.0 Installation 7600REF v3.0.0.8 Installation 7600REF v3.0.0.8 7600REF v5.0 7620PX-5 Installation 2012 7620PX Installation 2012 Kayenne Installation v.3.0 Kayenne K-Frame Installation v.6.0 Kayenne K-Frame Installation v.7.0 Kayenne K-Frame Installation v.8.0 Karrera K-Frame S-Series Installation v.8.0 Karrera Video Production Center Installation v.6.0 Karrera Video Production Center Installation v.7.0 Karrera Video Production Center Installation v.4.1 Karrera Video Production Center Installation v.4.0 Kayenne Installation v.4.0 7620PX 2012 7620PX-5 2012 7620PX 2008 MVMC 3G VMCR 3G 8900F GeckoFlex Frames Concerto Compact Routing System Concerto Routing Matrix v.1.8.1 Concerto Routing Matrix v.1.7.6.1 Concerto Routing Matrix v.1.7.5 GPIO-4848 Jupiter Maestro Master Control v.2.0.0 Maestro Master Control Installation v.2.0.0 Maestro Master Control Installation v.2.3.0 Maestro Master Control Installation v.2.4.0 KayenneKayenne v.2.0 v.2.0 Maestro Master Control Installation v.1.5.1