Grass Valley Maestro Master Control v.2.4.0 User Manual
Page 327
323
MAESTRO — User Manual
Section 6 — Visualization Tools
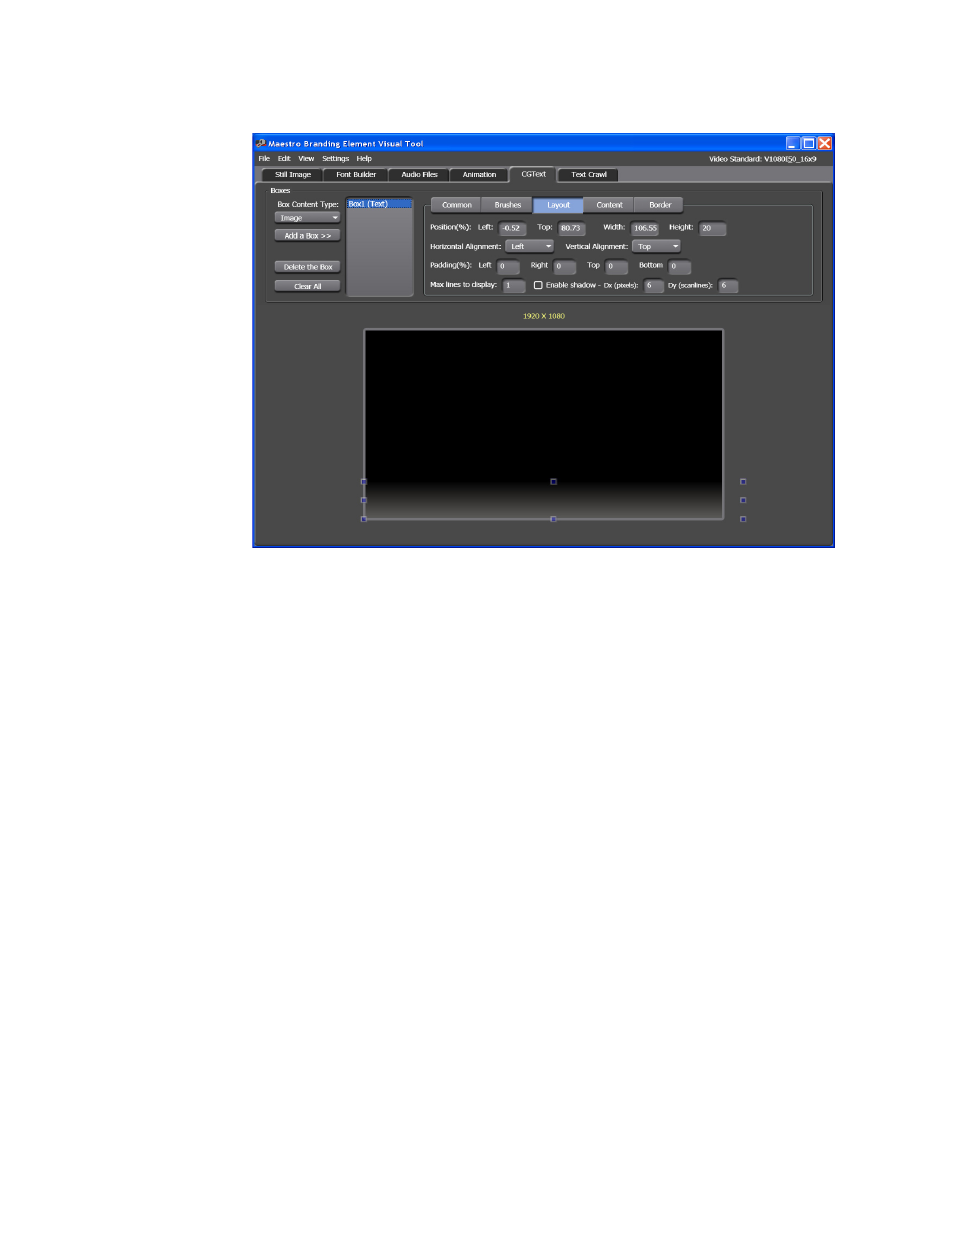
Figure 214. Visualization Tool - Text Box Layout Tab
2.
Drag the box to the location that you prefer. The information in the
Position% section will change to show the current position of the box.
You can also change the position by entering the information in the Left
and Top fields.
3.
Change the size of the box by clicking on a corner and dragging. The
information in the Position% section will change to show the current
size of the box. You can also change the size by entering the information
in the Width and Height fields.
4.
Select the text’s left and right alignment from the Horizontal Alignment
drop-down menu.
5.
Select the text’s top to bottom alignment from the Vertical Alignment
drop-down menu.
6.
Enter the preferred distance or spacing between the Text box
boundaries and the text inside the box by entering the preferred
number in the Left, Right, Top, and Bottom fields.
7.
Enter the number of lines you would like to be displayed in the Max
lines to display: field.
8.
Select the Enable shadow check box if you want the text to have a
shadow. Enter the distance that you want to move the shadow left or
right in the Dx (pixels) field. Enter the distance that you want to move
the shadow up or down in the Dy (scanlines) field.
- Maestro Master Control v.2.2.0 Maestro Master Control v.2.3.0 7600REF v5.0 Installation 7600REF v3.0.0.8 Installation 7600REF v3.0.0.8 7600REF v5.0 7620PX-5 Installation 2012 7620PX Installation 2012 Kayenne Installation v.3.0 Kayenne K-Frame Installation v.6.0 Kayenne K-Frame Installation v.7.0 Kayenne K-Frame Installation v.8.0 Karrera K-Frame S-Series Installation v.8.0 Karrera Video Production Center Installation v.6.0 Karrera Video Production Center Installation v.7.0 Karrera Video Production Center Installation v.4.1 Karrera Video Production Center Installation v.4.0 Kayenne Installation v.4.0 7620PX 2012 7620PX-5 2012 7620PX 2008 MVMC 3G VMCR 3G 8900F GeckoFlex Frames Concerto Compact Routing System Concerto Routing Matrix v.1.8.1 Concerto Routing Matrix v.1.7.6.1 Concerto Routing Matrix v.1.7.5 GPIO-4848 Jupiter Maestro Master Control v.2.0.0 Maestro Master Control Installation v.2.0.0 Maestro Master Control Installation v.2.3.0 Maestro Master Control Installation v.2.4.0 KayenneKayenne v.2.0 v.2.0 Maestro Master Control Installation v.1.5.1