Figure 167 – Grass Valley Maestro Master Control v.2.4.0 User Manual
Page 279
275
MAESTRO — User Manual
Section 4 — Installation Planning
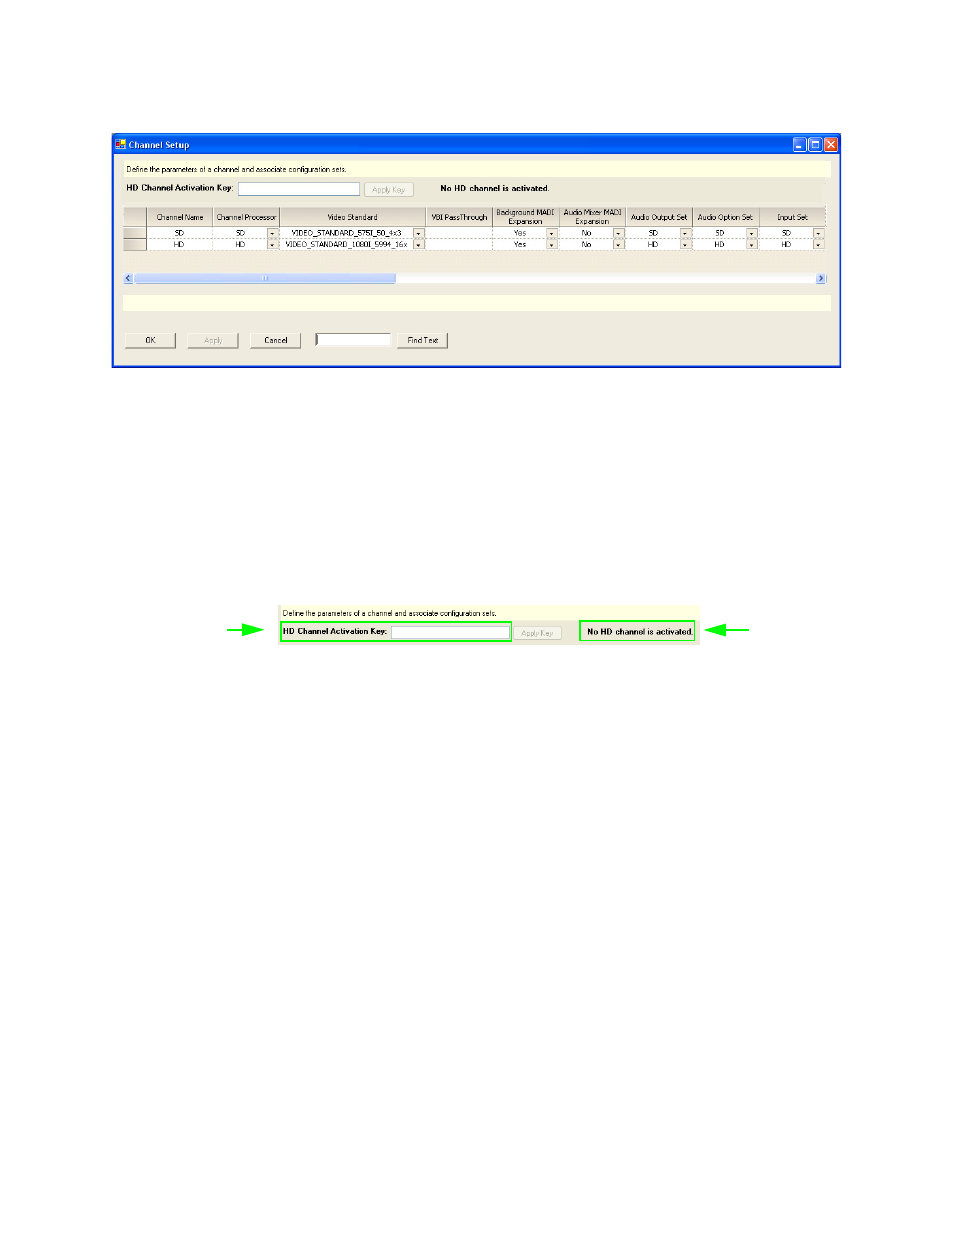
Figure 167. The Channel Setup Table
3.
Enter the Activation key in the HD Channel Activation Key field. This
field is located near the top of the dialog box (
The Activation Key can be found on the certificate that came with the
system.
4.
Click the
Apply Key
button. The HD channels will now be activated and
the number of activated HD channels will appear in the information
text (see
).
Figure 168. HD Channel Activation Key Field
The HD Channel
Activation Key Field
Information
Text. The
number of acti-
vated HD chan-
nels will appear
here.
This manual is related to the following products:
- Maestro Master Control v.2.2.0 Maestro Master Control v.2.3.0 7600REF v5.0 Installation 7600REF v3.0.0.8 Installation 7600REF v3.0.0.8 7600REF v5.0 7620PX-5 Installation 2012 7620PX Installation 2012 Kayenne Installation v.3.0 Kayenne K-Frame Installation v.6.0 Kayenne K-Frame Installation v.7.0 Kayenne K-Frame Installation v.8.0 Karrera K-Frame S-Series Installation v.8.0 Karrera Video Production Center Installation v.6.0 Karrera Video Production Center Installation v.7.0 Karrera Video Production Center Installation v.4.1 Karrera Video Production Center Installation v.4.0 Kayenne Installation v.4.0 7620PX 2012 7620PX-5 2012 7620PX 2008 MVMC 3G VMCR 3G 8900F GeckoFlex Frames Concerto Compact Routing System Concerto Routing Matrix v.1.8.1 Concerto Routing Matrix v.1.7.6.1 Concerto Routing Matrix v.1.7.5 GPIO-4848 Jupiter Maestro Master Control v.2.0.0 Maestro Master Control Installation v.2.0.0 Maestro Master Control Installation v.2.3.0 Maestro Master Control Installation v.2.4.0 KayenneKayenne v.2.0 v.2.0 Maestro Master Control Installation v.1.5.1