Learning about the audio controls in the viewer, P. 289) – Apple Final Cut Pro 6 User Manual
Page 622
Chapter 17
Audio Editing Basics
289
II
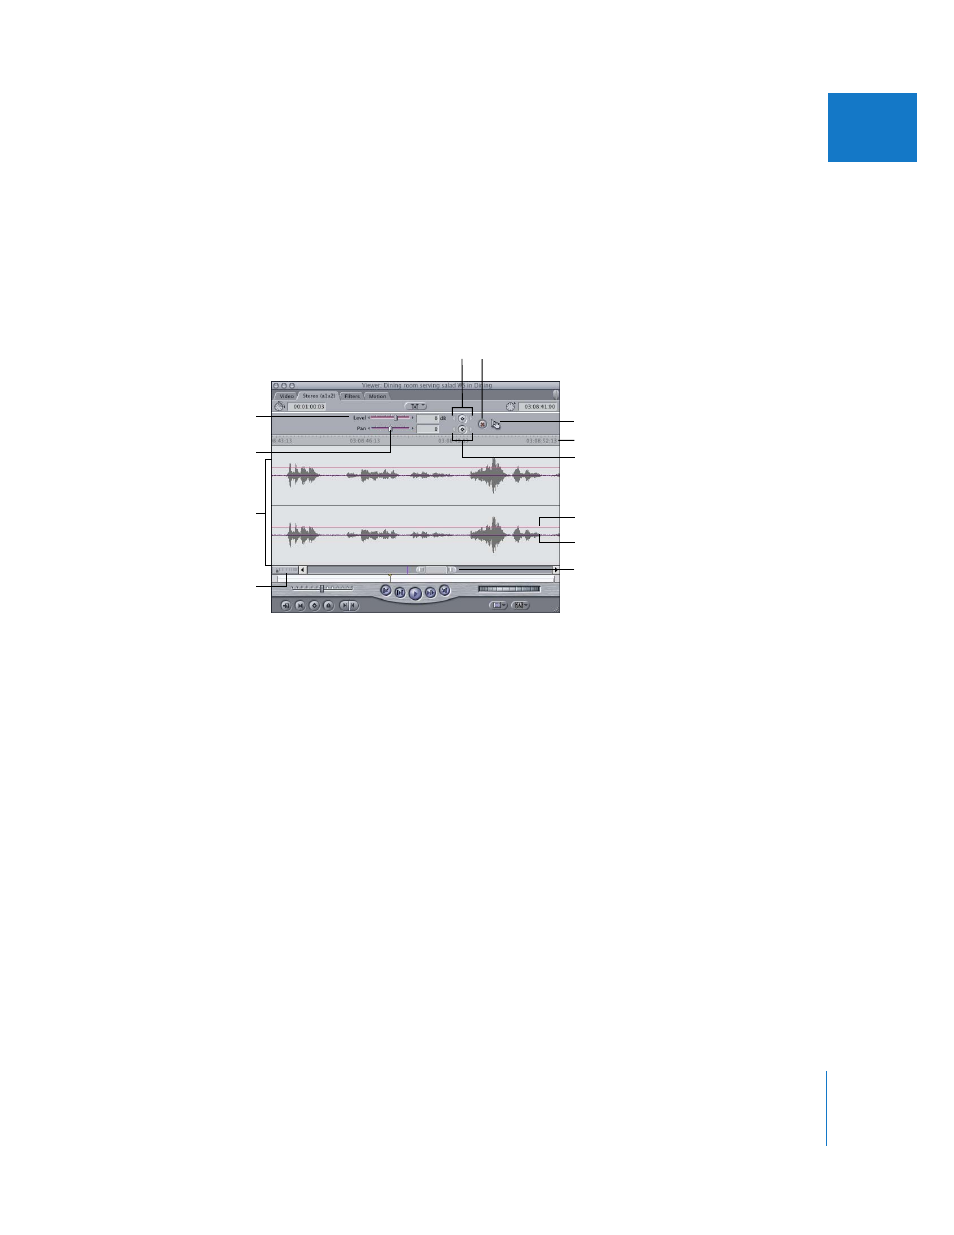
Learning About the Audio Controls in the Viewer
When you click an audio tab in the Viewer, the controls at the bottom of the window
are the same as those in the Video tab. These controls allow you to navigate through
your clip, set In and Out points and markers, create split edits, and so on. The In and
Out points that you see in an audio tab are the same as the In and Out points shown in
the Video tab. Similarly, the two timecode fields in the top area of the window are the
same as those in the Video tab. For more information on those controls and fields, see
Volume I, Chapter 6, “Viewer Basics.”
The following controls are found only in audio tabs:
 Waveform display area: Displays a graphical representation of the audio clip, showing
the sample values of your audio over time. If you zoom in on the waveform display,
you can see progressively more detail in your waveform. Clicking anywhere in the
waveform area moves the playhead to that frame, and dragging scrubs through
the clip.
 Pan overlay line: Drag this line up or down to change the pan for this clip. If you add
keyframes to the overlay, you can create changes in pan over time.
 Level overlay line: Drag this line up or down to change the sound level. If you add
keyframes to the overlay, you can create changes in level over time.
Zoom slider
Reset button
Level slider adjusts
volume.
Waveform display area
Pan slider adjusts stereo
sound placement.
Level Keyframe buttons
Ruler
Level overlay line
Pan overlay line
Drag hand
Pan Keyframe buttons
Zoom control