Using built-in video scopes during capture – Apple Final Cut Pro 6 User Manual
Page 1322
Chapter 26
Measuring and Setting Video Levels
537
III
Using Built-in Video Scopes During Capture
If you are capturing analog video footage using a third-party video interface, you can use
the Log and Capture video scopes to calibrate the video interface input settings to the
color bars at the beginning of each tape. Final Cut Pro saves individual image-control
settings with each clip you log. You can then have Final Cut Pro capture your offline clips
using these individually saved image-control settings.
Adjusting Capture Settings with the Log and Capture Video Scopes
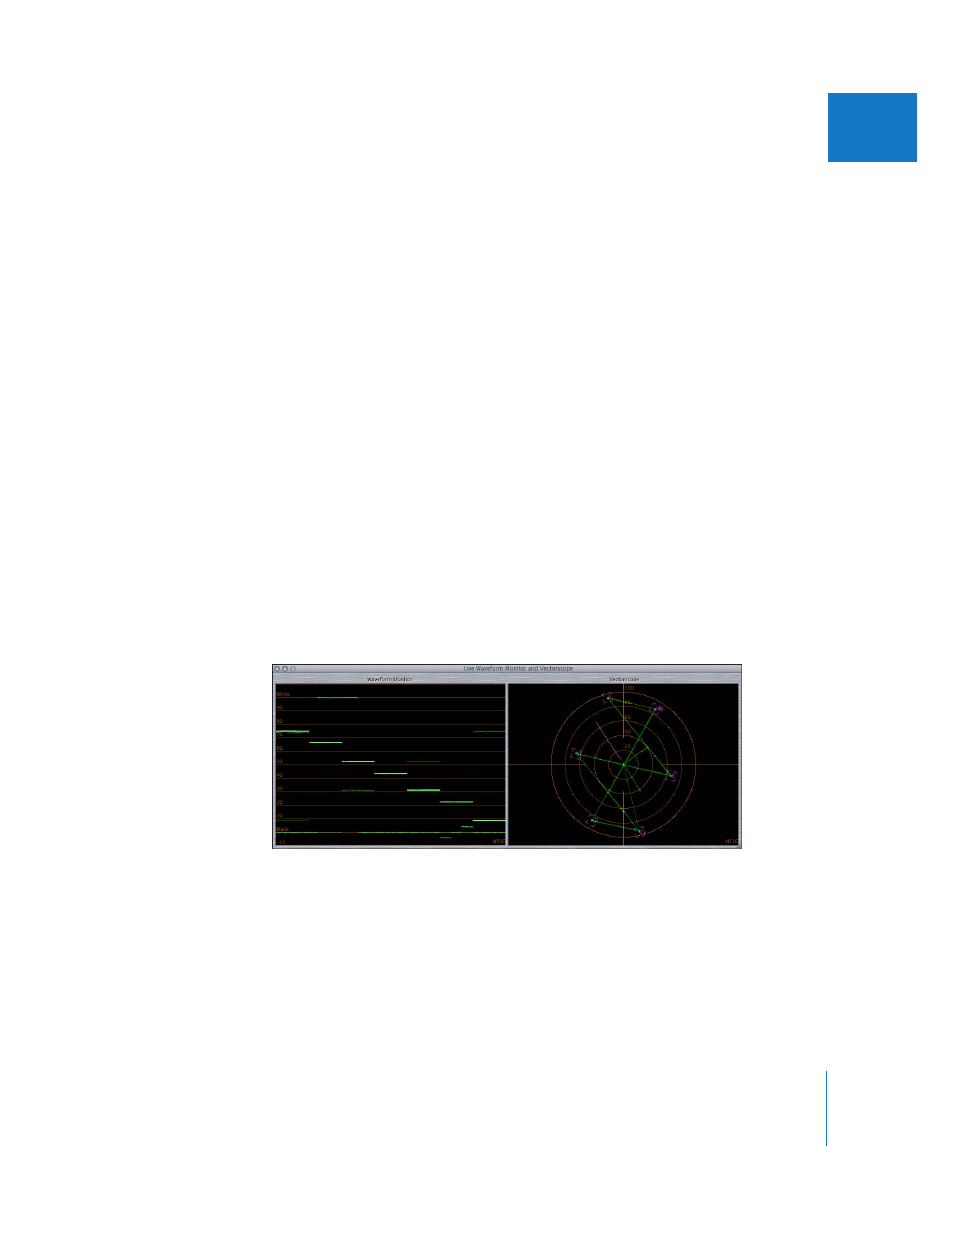
The video scopes in the Log and Capture window include the Waveform Monitor and
the Vectorscope. If you are capturing to a Y´C
B
C
R
video format, the entire range of the
scope is displayed (from –10 percent to 109 percent). However, if you are capturing to
an RGB codec, the range is limited to 0 percent to 100 percent.
To use the built-in Log and Capture video scopes to adjust your clip settings:
1
Make sure your video deck is connected to the video interface in your computer.
2
Cue the videotape to the color bars recorded at the beginning of the tape.
3
Choose File > Log and Capture, click the Clip Settings tab, then click the Video
Scopes button.
The Waveform Monitor and Vectorscope appear below the Log and Capture window.
On the left is the Waveform Monitor, which displays the brightness levels of the color
bars within the video frame as a graph. Each “step” of the graph corresponds to one of
the color bars. The goal is to adjust the brightness and contrast so that the levels of the
bars match their ideal targets, shown in purple.
Note: Don’t worry if the graph appears to be “noisy”; this is normal for analog video
played back from tape.
Waveform Monitor
Vectorscope