Making movies from still images – Apple Final Cut Pro 6 User Manual
Page 333
332
Part IV
Logging, Capturing, and Importing
7
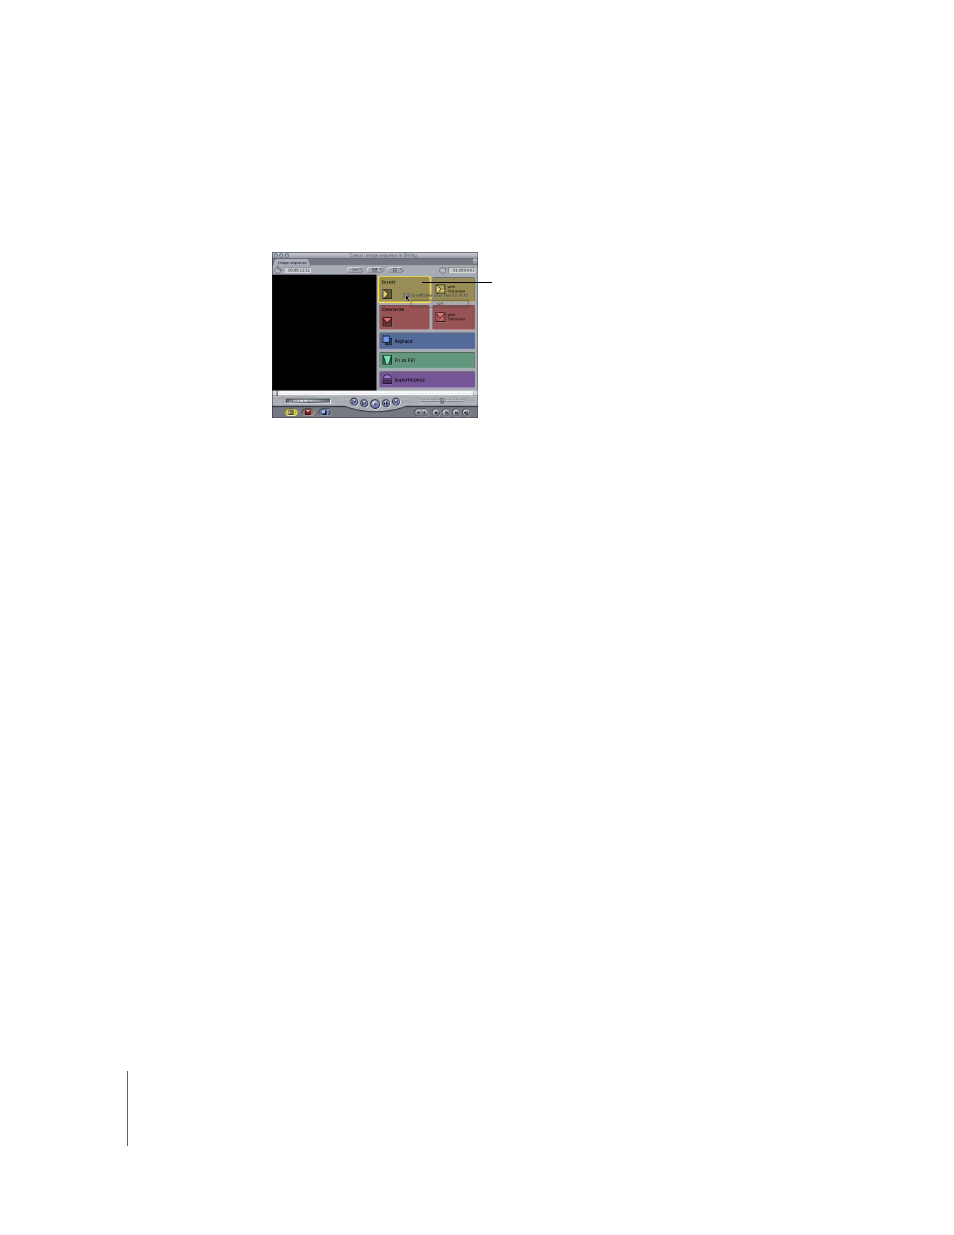
Select the newly imported bin with all the image clips in it, open it, and press
Command-A to select all these clips.
8
Drag the clips to the Insert section of the Edit Overlay in the Canvas.
You can now edit this sequence into other sequences.
Making Movies from Still Images
You can use one of the methods above to create your own animations as visual
elements in your movie. You can even make a whole movie this way, although it takes
patience to create 24 or more frames for every second of your finished movie.
Sources for still images include:
 Digital cameras (including your Aperture Libraries)
 Scanners
 Freeze frames exported from Final Cut Pro
 Hand-drawn computer graphics created with a graphics application
All of your images should be the same dimensions, and should ideally match the
dimensions of your output format (for example, NTSC DV is 720 x 480, HD is
1920 x 1080 or 1280 x 720, and so on).
After you collect a group of still image files together in one folder, name them
sequentially, such as AbstractBackground0001.jpg, AbstractBackground0002.jpg, and so
on. Then import the files into Final Cut Pro following the steps for importing a
numbered image sequence.
Drag the clips to
the Insert section
of the Edit Overlay.