Apple Final Cut Pro 6 User Manual
Page 1324
Chapter 26
Measuring and Setting Video Levels
539
III
6
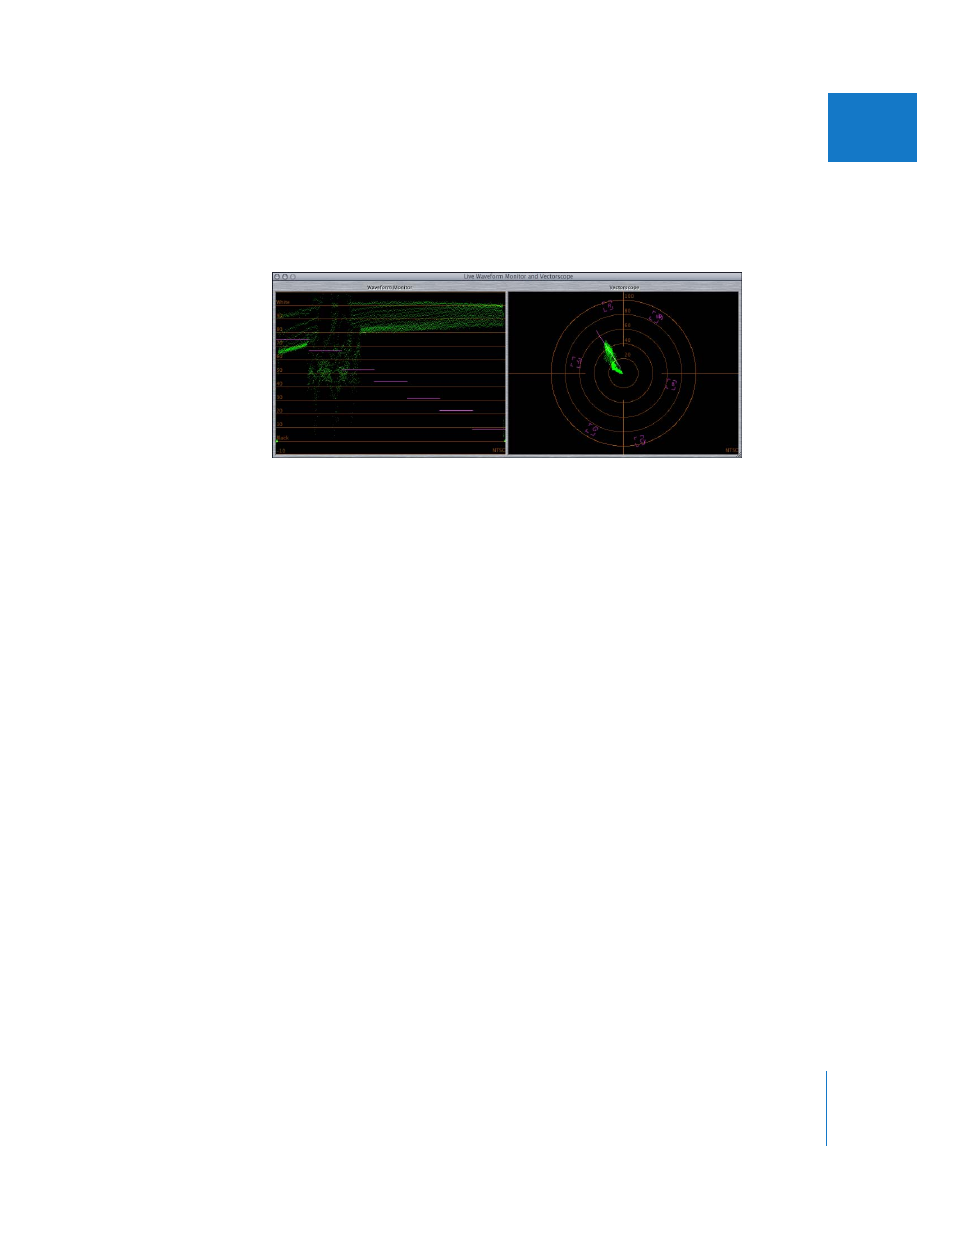
Adjust the clip’s hue and saturation using the Vectorscope for reference.
The Vectorscope is on the right and displays the color values of the different areas of
the video frame as a point graph. Each point on the circular graph represents one of
the color bars. The goal is to line up these points with their respective targets.
a
Adjust the Hue slider to rotate the points around the center of the graph.
b
Adjust the Saturation slider to move the points closer to or farther from the center of
the graph. If this slider is properly adjusted, each point falls within a purple target box.
Adjusting Capture Settings on Source Tapes Without Color Bars
If there are no color bars on your source tapes, you can adjust your tapes using the
flesh tones of people in the shot. As long as a person’s skin tones look accurate,
chances are the rest of the colors in that shot will look fine. To help you find the correct
flesh tone, a special marker appears in the Vectorscope to the left of the center of the
Vectorscope scale. This line indicates the hue of a person’s skin tones.
Regardless of race, the hues of human flesh tones, when recorded to videotape and
measured on a vectorscope, fall along a fairly narrow range (although the saturation
and brightness vary).
To adjust color on source tapes using flesh tones:
1
Cue your tape to a section that has a well-lit facial closeup.
2
Check to see if there’s a spike on the Vectorscope near the Flesh Tone line.
3
Adjust this spike so that it falls approximately along the Flesh Tone line. While doing so,
check the image quality of your clip on a broadcast monitor to make sure that your
adjustment is accurate.