Editing clips in finalcutpro, Editing clips in final cut pro – Apple Final Cut Pro 6 User Manual
Page 1657
174
5
Do one of the following:
 If the database shown in the Database field is the correct one, click OK. The Database
field updates if you use the New Database or Choose Database button.
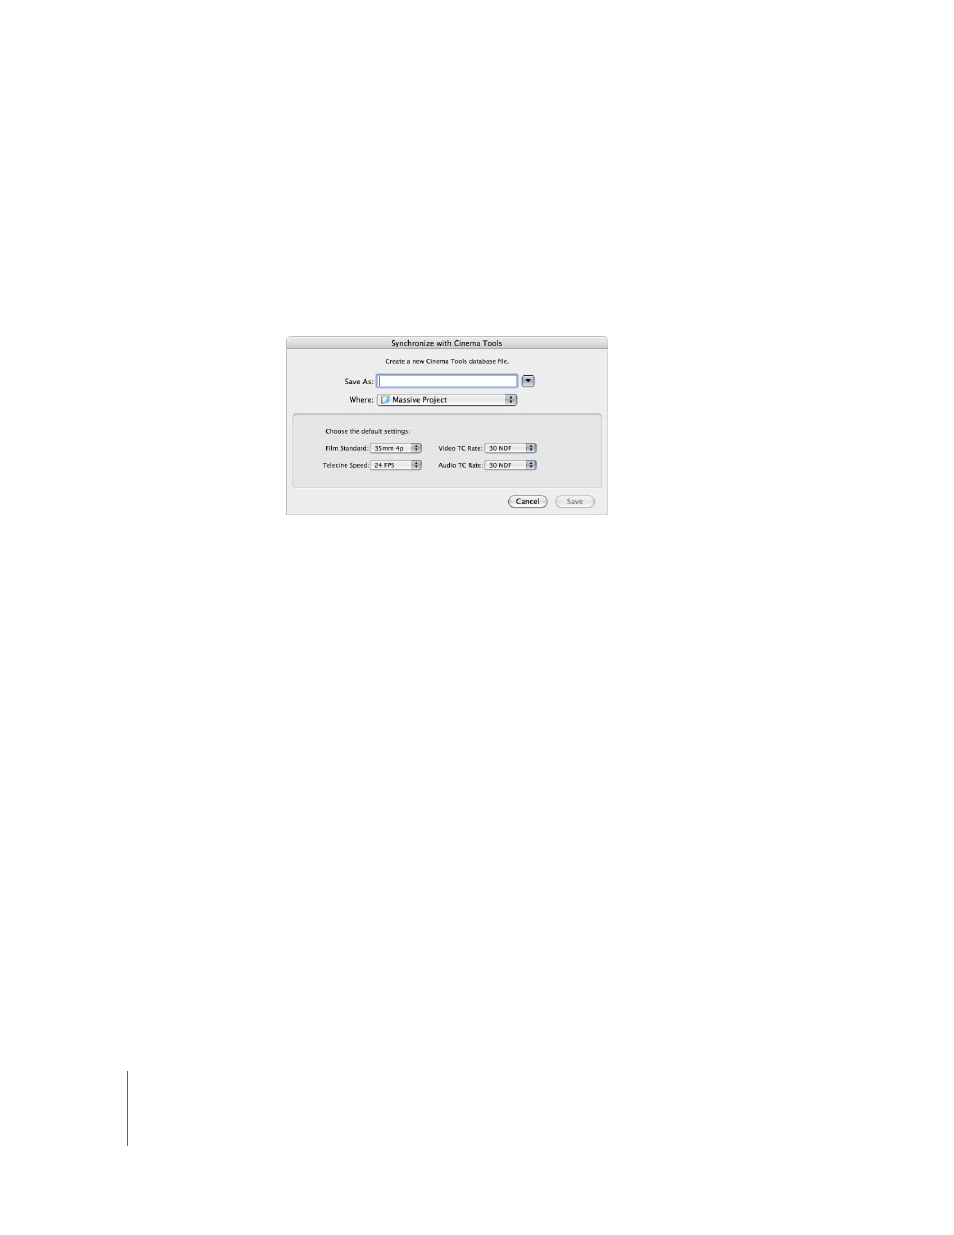
 Click New Database to create a new Cinema Tools database. This opens a new dialog
where you can enter a name and location for the database, as well as configure its
default settings. See the Cinema Tools User Manual for information on these settings.
Click Save when finished.
 Click Choose Database to choose an existing database. This opens a dialog where
you can select an existing database to synchronize with. Click Open when finished.
6
If you used either the New Database or Choose Database button, click OK.
Cinema Tools first checks the database for existing records without connected clips and
attempts to match the records with clip names (based on scene and take entries). If
matches are found, Cinema Tools connects the clips to the matching records. If no
matching records are found, new records are added to the database for each clip, with
any applicable information added to each record.
Editing Clips in Final Cut Pro
When you are editing a film-based project that you intend to conform the original
camera negative to, consider the following:
 When Cinema Tools is installed, Final Cut Pro includes a variety of Easy Setups
intended to be used when editing 24 fps–based media. Most of these Easy Setups
have “Cinema Tools” in their name. (An exception is the DV PAL 24 @ 25 Easy Setup.)
Note: Most Cinema Tools Easy Setups use a frame rate of 23.98 or 24 fps. To quickly
view available Cinema Tools Easy Setups in the Easy Setup dialog, choose 23.98 or
24 fps from the Rate pop-up menu.
 Each film list is based on one of the video tracks. You choose the video track to base
the film list on in the Export Film Lists or Export XML Film Lists dialog.