Apple Final Cut Pro 6 User Manual
Page 1375
590
Color Correction and Video Quality Control
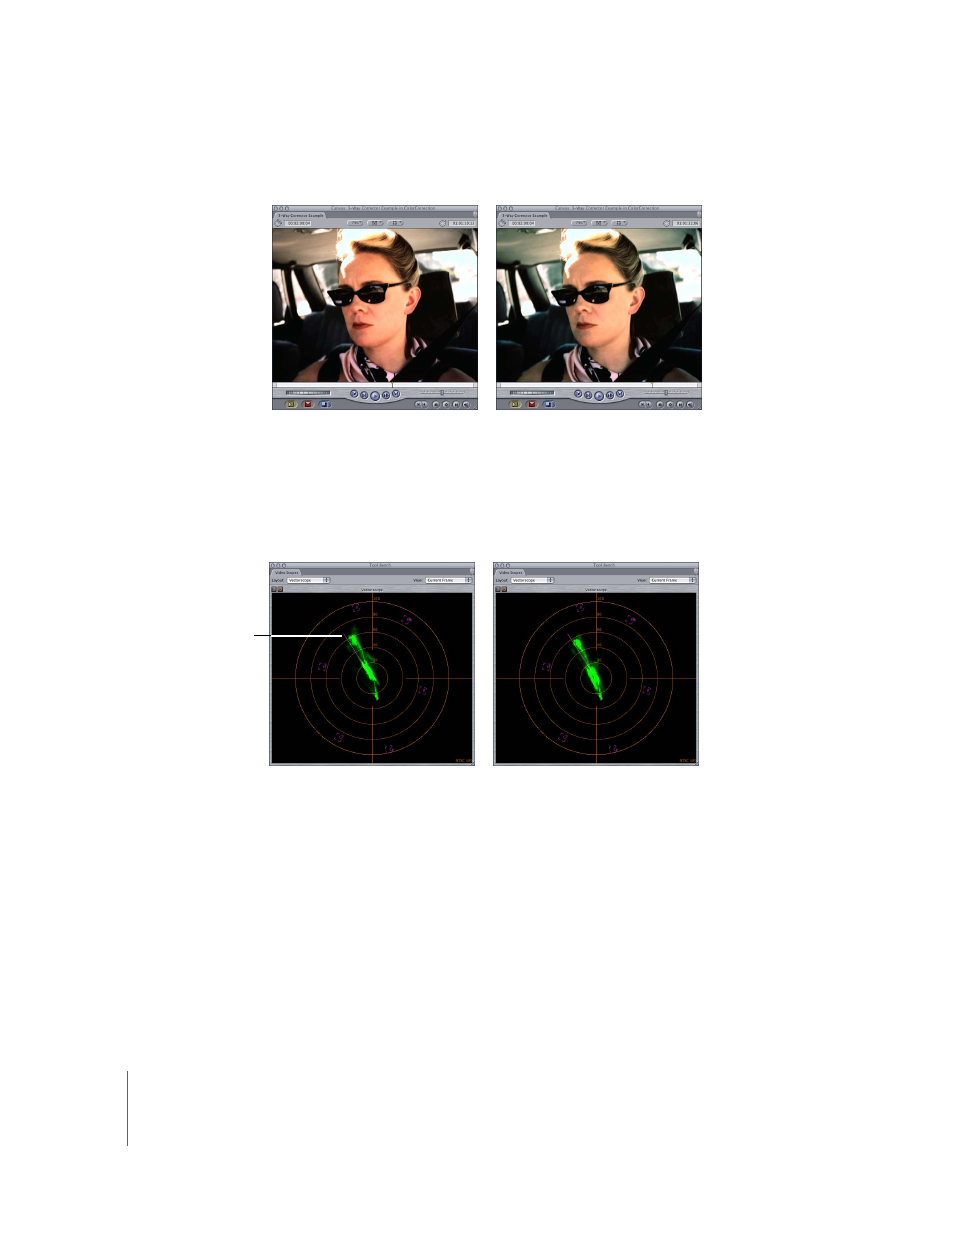
A before-and-after comparison of this change illustrates the effect.
While making these adjustments, it’s a good idea to use the Flesh Tone line in the
Vectorscope to show you how accurately the color of the actor’s face is represented. As
you can see in the Vectorscope’s analysis of the “before” image, the cluster of colors about
the Flesh Tone line was still a little off. Adjusting the Mids control corrected for this.
Because you’re not worrying about matching this image to any other shots right now,
you can select whatever look you want. Whether you go warmer, cooler, or even into
other more surreal balances of color is purely a creative choice at this point. If you’re
going for a realistic look, however, it’s important to be restrained and stick to making
subtle changes.
Once you’ve achieved the color balance you want, it’s time to adjust the saturation of
your clip to complete the look you want.
After
Before
After
Before
Flesh Tone line
- Numbers '09 (254 pages)
- Keynote '09 (247 pages)
- Pages '09 (279 pages)
- Boot Camp Mac OS X v10.6 Snow Leopard (18 pages)
- Boot Camp Mac OS X v10.6 Snow Leopard (19 pages)
- iWork '09 (372 pages)
- Mac OS X v10.6 Snow Leopard (7 pages)
- GarageBand '08 (102 pages)
- iDVD '08 (35 pages)
- GarageBand '09 (122 pages)
- iWeb (37 pages)
- iMovie '08 (50 pages)
- Boot Camp (Mac OS X v10.5 Leopard) (27 pages)
- Boot Camp (Mac OS X v10.5 Leopard) (25 pages)
- Mac OS X v10.5 Leopard (16 pages)
- Mac OS X (622 pages)
- Mac OS X Server (Version 10.6 Snow Leopard) (197 pages)
- Mac OS (42 pages)
- Mac OS X Server (Upgrading and Migrating For Version 10.4 or Later) (97 pages)
- iMovie HD (47 pages)
- iMovie HD (83 pages)
- MAC OS 7.6.1 (4 pages)
- Mac OS X Server (Extending Your Wiki Server For Version 10.5 Leopard) (45 pages)
- Mac OS X Server Ver 10.4 (35 pages)
- Mac OS X Server v10.6 (97 pages)
- Mac OS X Server v10.6 (76 pages)
- Macintosh Japanese Language Kit (30 pages)
- Xserve (Early 2008) DIY Procedure for Hard Drive (3 pages)
- Xserve (8 pages)
- Xserve (60 pages)
- GarageBand 3 (98 pages)
- Remote Desktop 3.1 (191 pages)
- Motion 5.1.1 (1090 pages)
- Workgroup Server 8150/110 (144 pages)
- Aperture (476 pages)
- Xserve Intel (Late 2006) DIY Procedure for Optical Drive Cable (7 pages)
- Xserve Intel (Late 2006) DIY Procedure for Optical Drive Cable (6 pages)
- Network Services Location Manager Network (8 pages)
- Macintosh System 7.5 (114 pages)
- Macintosh System 7.5 (65 pages)
- Macintosh System 7.5 (126 pages)
- DVD Studio Pro 4 (656 pages)
- Keynote '08 (204 pages)
- Xsan 2 (Second Edition) (11 pages)
- LiveType 2 (157 pages)