Connecting your camcorder, Choosing an easy setup, Opening final cut pro and choosing your initial – Apple Final Cut Pro 6 User Manual
Page 164: Settings, Opening final cut pro and, Choosing your initial settings, P. 163)
Chapter 11
Connecting DV Video Equipment
163
III
Connecting Your Camcorder
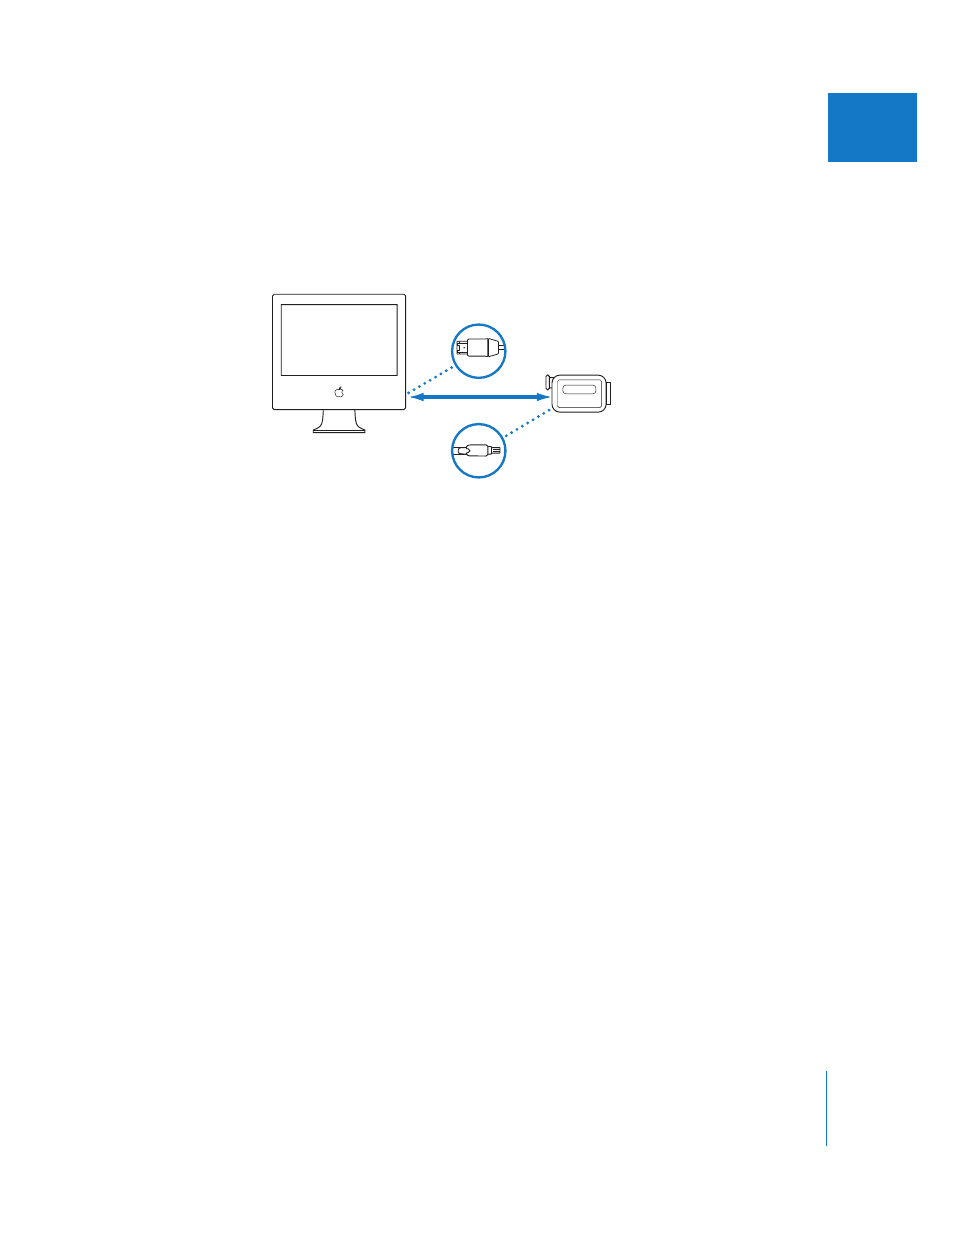
The following illustration demonstrates how to connect your DV camcorder to the
FireWire port on your computer, so that you can capture video (transfer the video from
your camcorder to your computer) and output your program back to DV tape. For more
information on FireWire, see “
To connect your DV camcorder or VTR to your computer:
1
Connect the 4-pin connector on one end of your FireWire cable to the 4-pin FireWire
port on your camcorder.
Important:
Some DV decks may use a 6-pin FireWire connector instead of a 4-pin
connector. Make sure you use a FireWire cable that matches the connector on your
video device.
2
Connect the 6-pin connector on the other end of your FireWire cable to a FireWire 400
port on your computer.
3
Turn on your VTR or camcorder, and switch it to VCR (or VTR) mode.
Opening Final Cut Pro and Choosing Your Initial Settings
The first time you open Final Cut Pro after installing the software, you’re prompted to
choose an Easy Setup (a collection of settings that determines what format you want to
capture and edit) and a scratch disk (the hard disk where you’ll store your captured
media files).
Choosing an Easy Setup
Final Cut Pro comes with predefined Easy Setups based on the most common video
formats and devices, such as DV NTSC and DV PAL. The Easy Setup you choose applies
to all new projects and sequences until you choose another Easy Setup.
FireWire
DV camcorder
in VTR mode
Computer
6-pin connector
to computer
4-pin connector
to camcorder
H